


Maintenance 5. Joint #1
C12 Rev.3
151
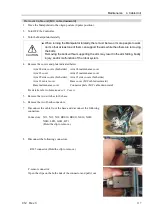
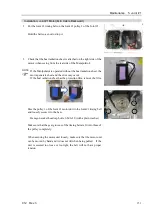
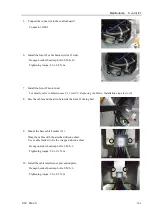
Installation: Joint #1 Motor (M/C Cable Backward)
1.
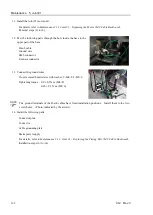
Put the Joint #1 timing belt on the Joint #1 pulley 2 of the Joint #1.
Hold the belt so as not to drop it.
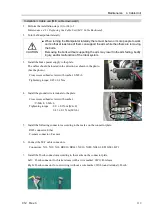
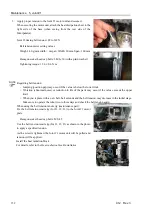
2.
Check that the heat radiation sheet is attached on the right side of the
motor (when seeing from the rear side of the Manipulator).
If the Manipulator is operated without the heat radiation sheet, the
motor generates heat and the error may occur.
If the heat radiation sheet has the protection film, remove the film.
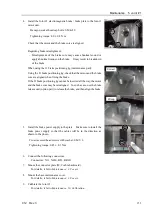
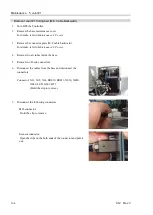
Pass the pulley 1 of the Joint #1 motor unit to the Joint #1 timing belt
and loosely secure it to the base.
Hexagon socket head cap bolts: 3-M6
×
30 (with a plain washer)
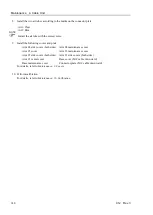
Make sure that the gear grooves of the timing belt are fit into those of
the pulley completely.
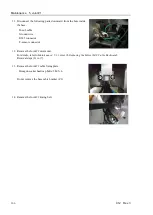
When securing the motor unit loosely, make sure that the motor unit
can be moved by hand and it does not tilt when being pulled. If the
unit is secured too loose or too tight, the belt will not have proper
tension.
NOTE
Summary of Contents for C12 Series
Page 1: ...Rev 3 EM204R4255F 6 Axis Robots C12 series MANIPULATOR MANUAL ...
Page 2: ...Manipulator manual C12 series Rev 3 ...
Page 8: ...vi C12 Rev 3 ...
Page 14: ...Table of Contents xii C12 Rev 3 ...
Page 16: ......
Page 30: ...Setup Operation 2 Specifications 16 C12 Rev 3 2 4 Outer Dimensions Unit mm ...
Page 84: ......
Page 155: ...Maintenance 4 Cable Unit C12 Rev 3 141 4 2 Connector Pin Assignment 4 2 1 Signal Cable ...
Page 156: ...Maintenance 4 Cable Unit 142 C12 Rev 3 ...
Page 157: ...Maintenance 4 Cable Unit C12 Rev 3 143 ...
Page 158: ...Maintenance 4 Cable Unit 144 C12 Rev 3 4 2 2 Power Cable ...