Maintenance 4. Cable Unit
C12 Rev.3
127
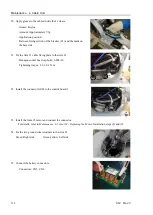
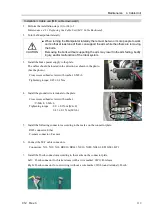
Adjust the connector protrusion so that the cover can be installed.
28.
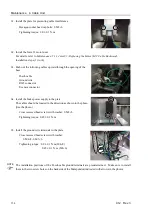
Use brackets (S3) to fix the cable protection spring to the Arm #2.
Hexagon socket head cap bolts: 2-M4
×
8
Tightening torque: 4.0
±
0.2 N·m
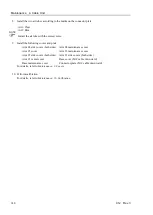
29.
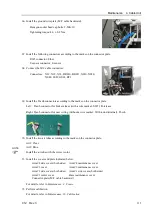
Use cable brackets (C3A) to fix the cables to the Arm #2
temporarily.
Place the silicone tube to the position where it is fixed with a cable
bracket.
Use a cable bracket to fix the silicone tube temporarily.
Hexagon socket head cap bolts: 2-M4
×
8
Rough guide of temporary fixing:
The cables can be pushed up even after fixing the cables.
30.
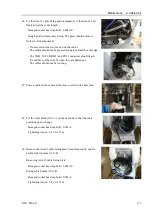
Push up the whole cables by 10 mm to the direction indicated with
the arrow in the photo to allow for some space.
31.
Fix the cables to the Arm #2 by fixing the cable brackets (C3A).
Check that the silicone tube is not shifted away from the fixed
position.
Hexagon socket head cap bolts: 2-M4
×
8
Tightening torque: 4.0
±
0.2 N·m
Summary of Contents for C12 Series
Page 1: ...Rev 3 EM204R4255F 6 Axis Robots C12 series MANIPULATOR MANUAL ...
Page 2: ...Manipulator manual C12 series Rev 3 ...
Page 8: ...vi C12 Rev 3 ...
Page 14: ...Table of Contents xii C12 Rev 3 ...
Page 16: ......
Page 30: ...Setup Operation 2 Specifications 16 C12 Rev 3 2 4 Outer Dimensions Unit mm ...
Page 84: ......
Page 155: ...Maintenance 4 Cable Unit C12 Rev 3 141 4 2 Connector Pin Assignment 4 2 1 Signal Cable ...
Page 156: ...Maintenance 4 Cable Unit 142 C12 Rev 3 ...
Page 157: ...Maintenance 4 Cable Unit C12 Rev 3 143 ...
Page 158: ...Maintenance 4 Cable Unit 144 C12 Rev 3 4 2 2 Power Cable ...


