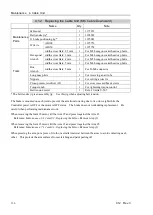
Maintenance 4. Cable Unit
C12 Rev.3
137
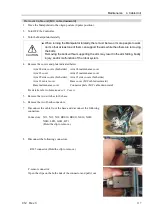
Removal: Cable unit (M/C cable downward)
1.
Move the Manipulator to the origin posture (0 pulse position).
2.
Turn OFF the Controller.
3.
Turn the Manipulator laterally.
CAUTION
■
When turning the Manipulator laterally, there must be two or more people to work
on it so that at least one of them can support the arm while the others are removing
the bolts.
Removing the bolts without supporting the arm may result in the arm falling, bodily
injury, and/or malfunction of the robot system.
4.
Remove the covers and plate indicated below.
Arm #4 side covers (both sides) Arm #4 maintenance cover
Arm #3 cover
Arm #3 maintenance cover
Arm #2 side covers (both sides) Arm #1 side covers (both sides)
Arm #1 center cover
Base cover (M/C cable downward)
Base maintenance cover
Connector plate (M/C cable downward)
For details, refer to
Maintenance: 3. Covers
.
5.
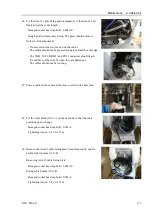
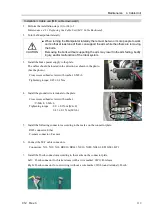
Remove the two air tubes in the base.
6.
Remove the two D-sub connectors.
7.
Disconnect the cable from the base and disconnect the following
connectors.
Connectors: X11, X12, X14, BR010, BR011, X010, X020,
X040, LED, GS01, BT1
(Hold the clip to remove.)
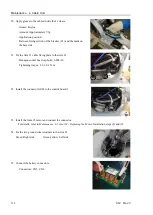
8.
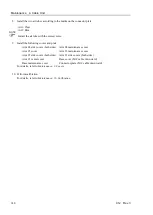
Disconnect the following connectors.
RJ45 connector (Hold the clip to remove.)
F-sensor connector:
Open the clips on the both ends of the connector and pull it out.
Summary of Contents for C12 Series
Page 1: ...Rev 3 EM204R4255F 6 Axis Robots C12 series MANIPULATOR MANUAL ...
Page 2: ...Manipulator manual C12 series Rev 3 ...
Page 8: ...vi C12 Rev 3 ...
Page 14: ...Table of Contents xii C12 Rev 3 ...
Page 16: ......
Page 30: ...Setup Operation 2 Specifications 16 C12 Rev 3 2 4 Outer Dimensions Unit mm ...
Page 84: ......
Page 155: ...Maintenance 4 Cable Unit C12 Rev 3 141 4 2 Connector Pin Assignment 4 2 1 Signal Cable ...
Page 156: ...Maintenance 4 Cable Unit 142 C12 Rev 3 ...
Page 157: ...Maintenance 4 Cable Unit C12 Rev 3 143 ...
Page 158: ...Maintenance 4 Cable Unit 144 C12 Rev 3 4 2 2 Power Cable ...


