Configuring Communication Settings
42
TPI-PRO/DVI (Total Presentation Interface)
Configuring the Master Connection Settings
It is necessary to point the TPI-PRO/DVI to the specific NetLinx Master with which it should be
communicating. "Pointing to a Master" is achieved via options in the
System Settings
page.
The options on the
System Settings
Page allow you to enter the IP Address, System Number, and Username/
Password information assigned to the target NetLinx Master.
1.
Launch the NetLinx Studio application, and establish communication with the target NetLinx Master.
NetLinx Studio is available to download from ww.amx.com.
This program assists in developing a System Number, Master IP/URL, and Master Port number.
Refer to the NetLinx Studio online help for details.
2.
Obtain the
System Number
,
Master IP/URL
, and
Master Port Number
for the Target NetLinx Master from
NetLinx Studio. This information must be specific for the system used with this TPI-PRO/DVI:
a.
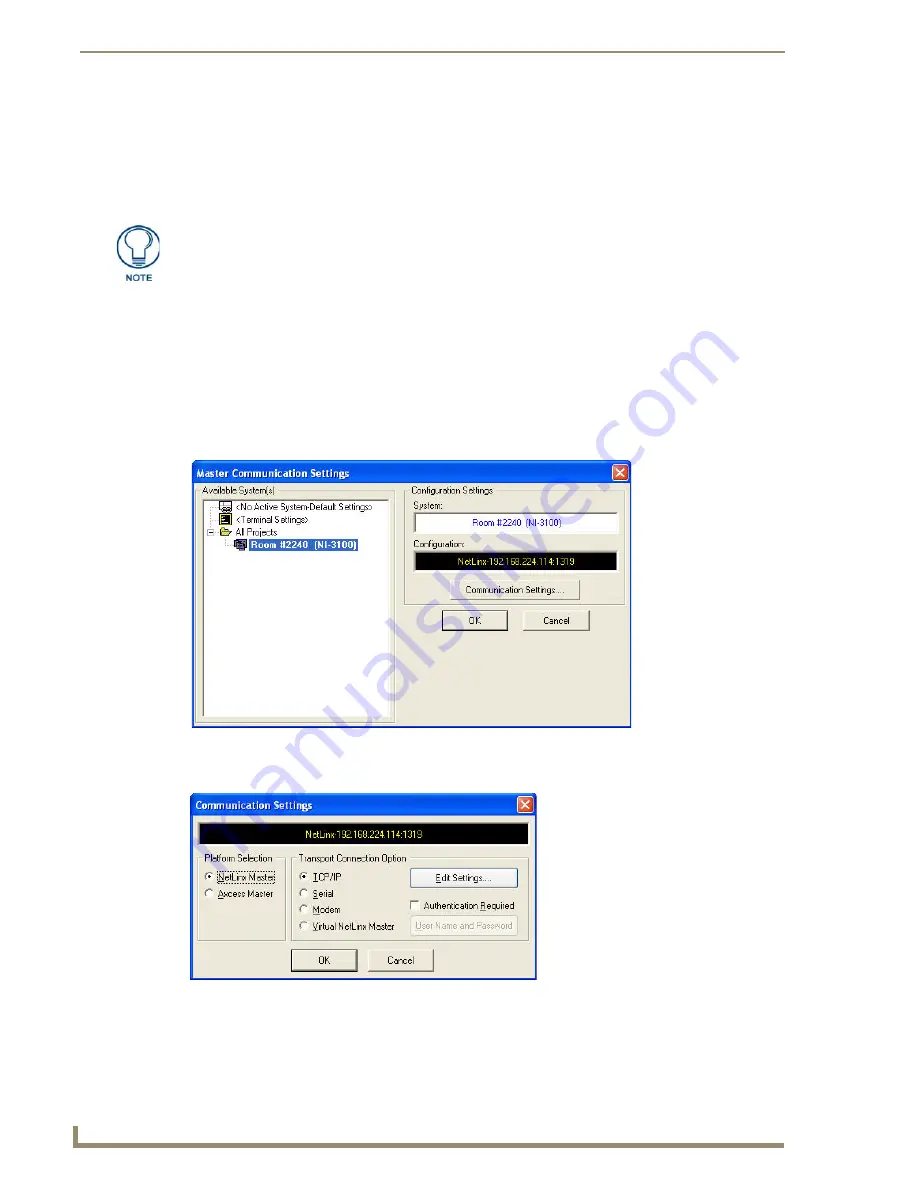
In NetLinx Studio, select
Settings > Master Communication Settings
to open the
Master
Communication Settings
b.
Select
Communication Settings
to open the
Communication
Settings
dialog (FIG. 39):
Until you configure the System Settings parameters, the Connection Status icon
remains red, indicating there is no current connection to a Master.
FIG. 38
NetLinx Studio - Master Communication Settings dialog
FIG. 39
NetLinx Studio - Communication Settings dialog
Summary of Contents for TPI-PRO-4
Page 14: ...xii TPI PRO Total Presentation Interface Table of Contents ...
Page 76: ...TPI PRO DVI Configuration Pages 70 TPI PRO DVI Total Presentation Interface ...
Page 172: ...Terminal Telnet Commands 166 TPI PRO DVI Total Presentation Interface ...
Page 180: ...Upgrading Firmware 174 TPI PRO DVI Total Presentation Interface ...
Page 208: ...Supported Input and Output Modes 202 TPI PRO DVI Total Presentation Interface ...
Page 214: ...Appendix 208 TPI PRO DVI Total Presentation Interface ...
Page 217: ...Troubleshooting 203 TPI PRO Total Presentation Interface ...


