Upgrading Firmware
171
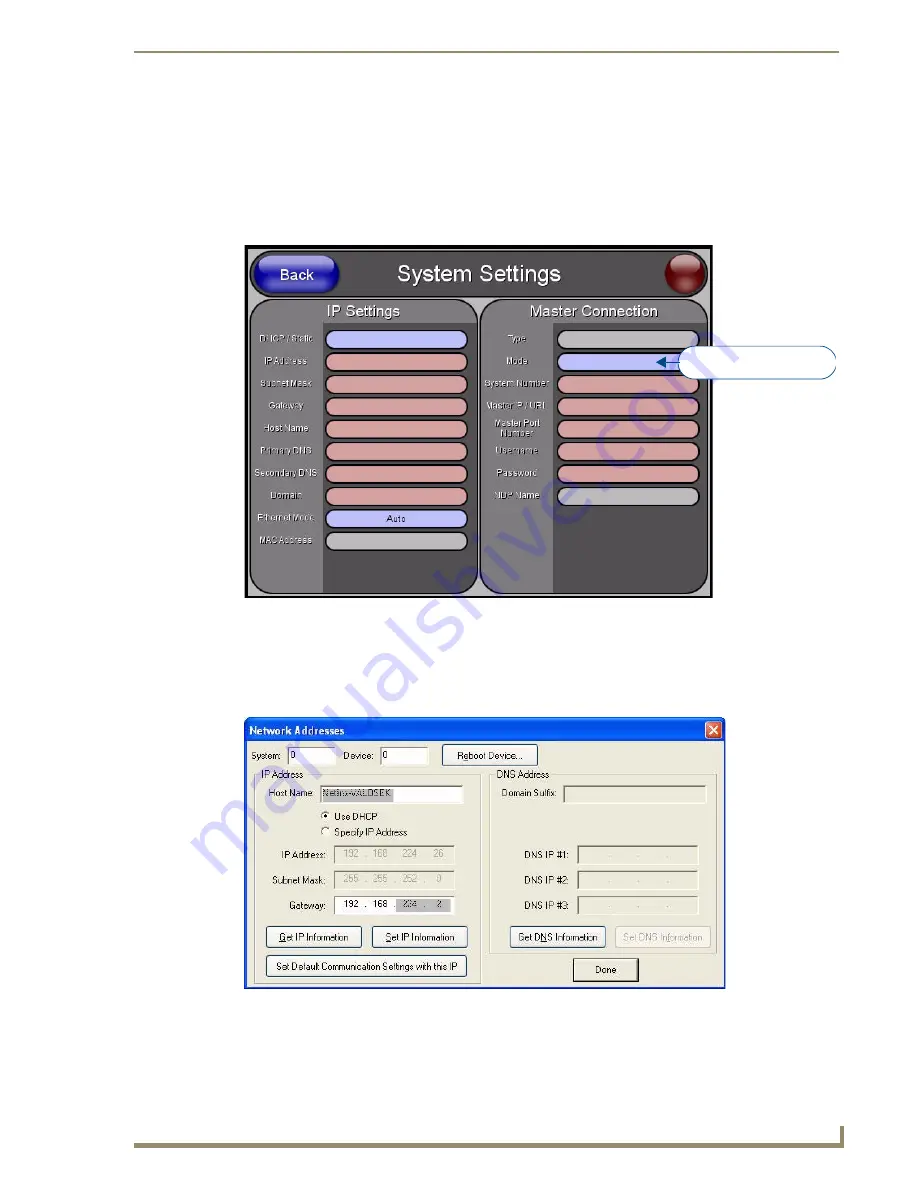
TPI-PRO/DVI (Total Presentation Interface)
Prepare the TPI-PRO/DVI for Ethernet Communication
1.
Open the
System Settings
page on the TPI-PRO/DVI:
a.
Press the SETUP pushbutton on the front panel to access the
Setup
page.
b.
Press the
Protected Setup
button to access the
Protected Setup
page, using the on-screen keypad to
enter the password (default =
1988
).
c.
Press the
System Settings
button to open the
System Settings
2.
Press the
Master IP/URL
button to open the on-screen keyboard, and enter the Master’s IP address or
URL. This information can be
obtained from the
Networking Addresses
dialog in NetLinx Studio:
a.
In NetLinx Studio, select
Diagnostics > Network Addresses
to open the
Network Addresses
dialog
b.
Click
Get IP Information
to retrieve IP information from the NetLinx Master.
FIG. 89
System Settings page
FIG. 90
NetLinx Studio - Network Addresses dialog
Press to toggle connection
Master Connection Modes
Summary of Contents for TPI-PRO-4
Page 14: ...xii TPI PRO Total Presentation Interface Table of Contents ...
Page 76: ...TPI PRO DVI Configuration Pages 70 TPI PRO DVI Total Presentation Interface ...
Page 172: ...Terminal Telnet Commands 166 TPI PRO DVI Total Presentation Interface ...
Page 180: ...Upgrading Firmware 174 TPI PRO DVI Total Presentation Interface ...
Page 208: ...Supported Input and Output Modes 202 TPI PRO DVI Total Presentation Interface ...
Page 214: ...Appendix 208 TPI PRO DVI Total Presentation Interface ...
Page 217: ...Troubleshooting 203 TPI PRO Total Presentation Interface ...


