Upgrading Firmware
173
TPI-PRO/DVI (Total Presentation Interface)
a.
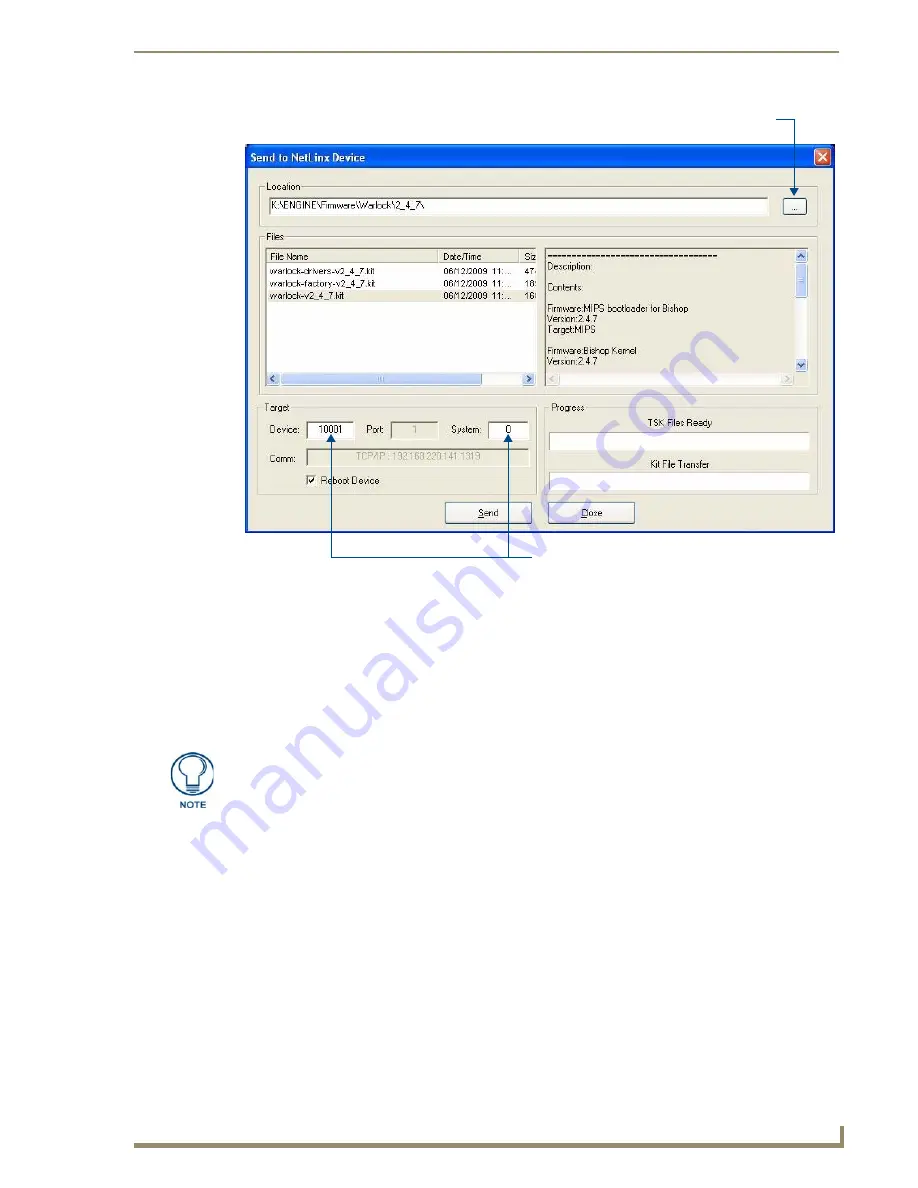
Click the Browse (...) button to locate and selected the directory to which the KIT file was
downloaded, via the
Browse For Folders
dialog.
b.
Select the TPI-PRO/DVI’s .KIT file from the
Files
list
c.
Enter the
Device
and
System
numbers for the target TPI-PRO/DVI. These values must match the
values listed in the Online Tree.
d.
Click
Reboot Device
to force the TPI-PRO/DVI to reboot after the firmware update process is
complete.
e.
Click
Send
. The file transfer progress is indicated in the Progress area of this dialog.
4.
Click
Close
after the TPI-PRO/DVI reboots.
FIG. 92
Send to NetLinx Device dialog box (showing TPI-PRO/DVI firmware update via IP)
Device number and System number
must match the values
listed in the Workspace window.
Click to locate the folder containing
the KIT file(s) that you want to transfer
A reboot can take up 30 seconds after the firmware process has finished.
Summary of Contents for TPI-PRO-4
Page 14: ...xii TPI PRO Total Presentation Interface Table of Contents ...
Page 76: ...TPI PRO DVI Configuration Pages 70 TPI PRO DVI Total Presentation Interface ...
Page 172: ...Terminal Telnet Commands 166 TPI PRO DVI Total Presentation Interface ...
Page 180: ...Upgrading Firmware 174 TPI PRO DVI Total Presentation Interface ...
Page 208: ...Supported Input and Output Modes 202 TPI PRO DVI Total Presentation Interface ...
Page 214: ...Appendix 208 TPI PRO DVI Total Presentation Interface ...
Page 217: ...Troubleshooting 203 TPI PRO Total Presentation Interface ...


