3860/80 User’s Manual
11-10
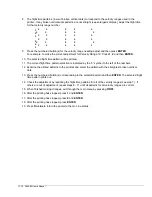
8. The flight time patterns (rows of broken vertical dots) correspond to the velocity ranges used in the
printer. If any broken vertical dots patterns are not straight (see enlarged samples), adjust the flight time
for that velocity range number.
9. Press the numbered button(s) for the velocity range needing adjust and then press
ENTER
.
For example, to make the correct adjustment for Velocity Range 12: Press
1
,
2
and then
ENTER
.
10. The selected flight time pattern will be printed.
11. The current flight time pattern selection is indicated by the “
>
” symbol to the left of the numbers.
12. Examine the printed patterns in the printout and select the pattern with the straightest broken vertical
dots.
13. Press the numbered button(s) corresponding to the selected pattern and then
ENTER
. The selected flight
time pattern prints out.
14. Check the adjustment by reprinting the flight time patterns for all of the velocity ranges (see step 7). If
others are out of adjustment, repeat steps 8 - 11 until all patterns for all velocity ranges are correct.
15. When finished making changes, exit through the main menu by pressing
FIRST.
16. After the printing has stopped, press
1
and
ENTER
.
17. After the printing has stopped, press
2
and
ENTER
.
18. After the printing has stopped, press
ENTER
.
19. Press
On Line
to return the printer to the On Line status.
•
•
•
•
•
•
•
•
•
•
•
•
•
•
•
•
•
•
•
•
•
•
•
•
•
•
•
•
•
•
•
•
•
•
•
•


