3860/80 User’s Manual
11-6
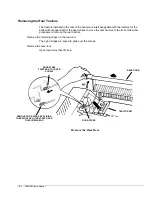
Removing the Print Head
1. Park the paper (press
PARK
button).
2. Remove the top door.
3. Turn power off, and unplug the printer from the wall outlet.
4. (For automatic print gap models go to step 5.) On manual print gap models, find the print gap adjust
lever on the inside right wall of the printer. Push it to release it from the notch and open it all the way to
the RIBBON CHANGE position.
5. Remove the ribbon cartridge.
6. Use a 5.5 mm hex driver or a Phillips screwdriver to loosen and remove the two print head screws.

