Control Panel
3-1
Chapter 3 Control Panel
The control panel keys provide different functions depending on whether the printer is online,
offline, or in a menu. Any button function associated with the menu is shown on the panel with
blue lettering. This section assumes that the printer is set up as shipped, because it is
possible to selectively lock out keys from the Printed Menu.
Control Panel Keys
If the LCD displays LOCKED
See “Control Panel Lockouts”, Chapter 5.
Park / Path
1
Press once to retract paper from the print path if paper is loaded. If two or
more pages are past the exit rollers, pressing park/path will cause the
paper to move in the reverse direction, but the LCD will display
Fault: Chk
Paper, and paper will forward feed back to the original position. To clear
this condition, press the CLEAR Key and tear off the last sheet printed by
using the Tear Off key. Be sure to remove extra pages/forms before
pressing park/path. When parked, paper remains in the tractors. If no form
is loaded, press this key repeatedly to step through the paper path
selections. Functions as the “1” key in menu entry mode.
Font
2
Press once to display the current font. Press repeatedly to step through
the available font selections in the current “print quality”. Wait three
seconds and the displayed selection becomes the current selection. See
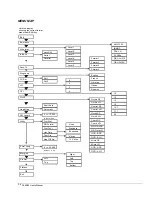
the LCD Menu Map for a list of fonts. Functions as the “2” key in menu
entry mode. DP and LQ quality fonts are available via the menu.
Print Quality
3
Press once to display the current print quality. Press again to change the
print quality. Wait three seconds and the displayed selection becomes the
current selection. Switches between letter quality and data processing
resolutions. LQ produces better quality characters; DP prints faster.
Functions as the “3” key in menu entry mode.
CPI
4
Press once to display the current characters per inch setting. Press
repeatedly to step through available CPI settings. Wait three seconds and
the displayed selection becomes the current selection. Some emulations
support continuously adjustable character spacing. If the host transmitted
a setting that is not on the list, for example: 11 CPI, then the LCD shows
LS after the number. LS stands for Line Select. Functions as the “4” key in
menu entry mode.
LPI
5
Press once to display the current lines per inch setting. Press repeatedly to
step through available LPI settings. Wait three seconds and the displayed
selection becomes the current selection. All emulations support
continuously adjustable line spacing. If the host transmitted a setting that is
not on the list, for example: 7 LPI, then the LCD shows LS after the
number. Functions as the “5” key in menu entry mode.


