Chapter 2
Using ROX II
RUGGEDCOM ROX II
User Guide
20
Icons
2
3
1
4
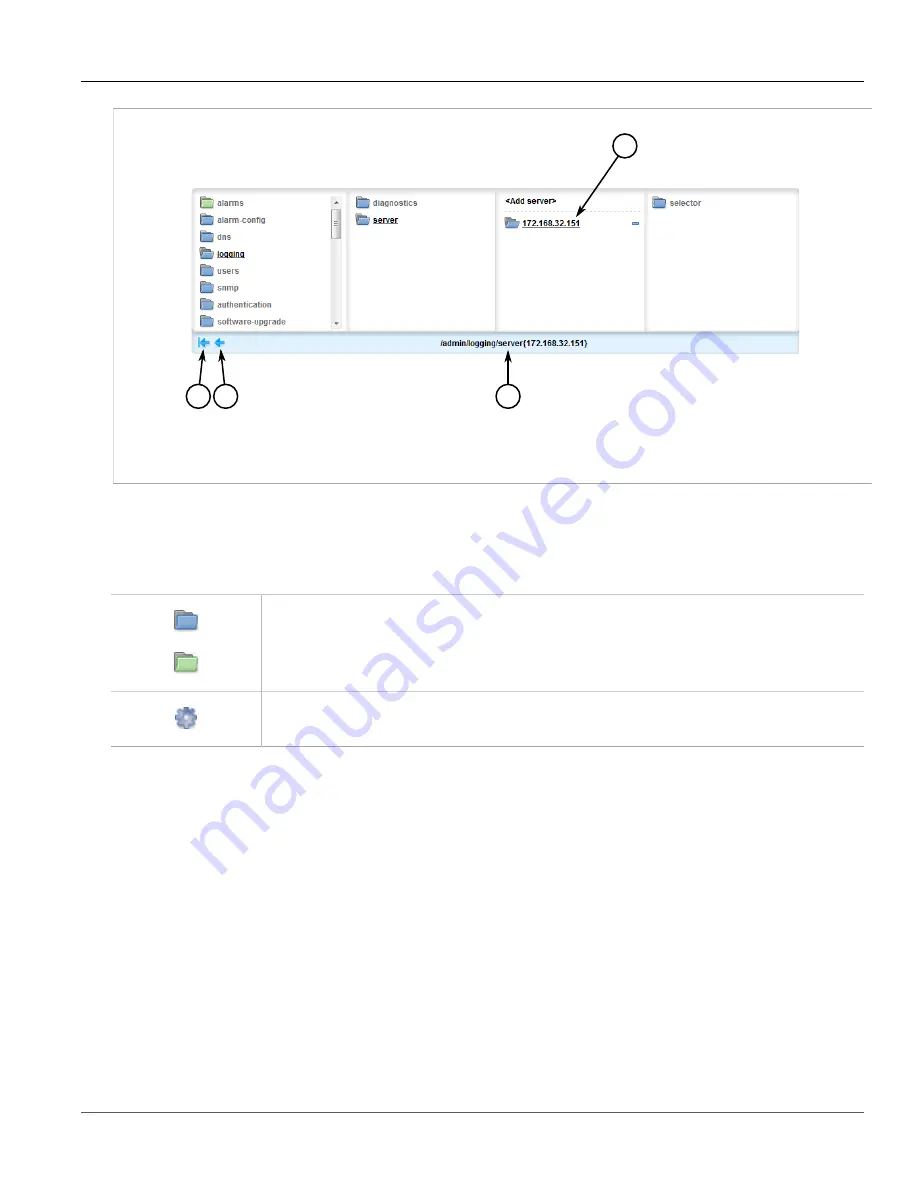
Figure 7: Navigation Menu
1.
Selected Node
2.
Home Button
3.
Previous Button
4.
Path to Current Node
Tables or configuration forms specific to the selected node appear below the navigation menu.
As the user navigates beyond four levels within the ROX II data structure, the columns shift left. To shift the
columns right, click the
Previous
arrow. To return to the top-level of the menu, click the
Home
arrow.
The following icons appear in the navigation menu:
Folder icons represent nodes under which forms or additional nodes are located. Click on a node to open the
next menu level and display any associated tables or forms.
A blue folder icon represents a configuration node, whereas a green folder icon represents a status node that
provides up-to-date information about the device and the network.
The gear icon represents an action node. Click on an action node to perform a specific task or function.
Parameters may need to be configured.
Section 2.5.5
Icons
Icons appear in the title bar of each table or form in ROX II to indicate the information type.
Summary of Contents for RUGGEDCOM RX1510
Page 32: ...RUGGEDCOM ROX II User Guide Preface Customer Support xxxii ...
Page 44: ...RUGGEDCOM ROX II User Guide Chapter 1 Introduction User Permissions 12 ...
Page 62: ...RUGGEDCOM ROX II User Guide Chapter 2 Using ROX II Using the Command Line Interface 30 ...
Page 268: ...RUGGEDCOM ROX II User Guide Chapter 4 System Administration Deleting a Scheduled Job 236 ...


