Notes
32
32
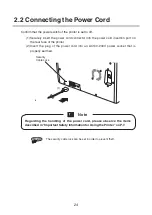
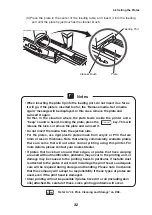
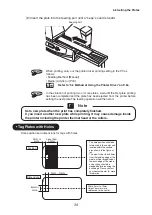
(3) Place the plate in the center of the feeding table, and insert it into the feeding
port until the plate tip just touches the cleaner brush.
Plate
Feeding Port
Cleaner Brush
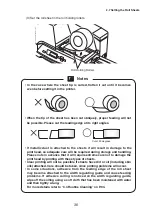
• When inserting the plate tip into the feeding port, do not insert it as far as
it will go. If the plate is inserted too far, the “Remove media. Set a media
again.” message will be displayed. In this case, remove the plate and
re-insert it again.
Further, in the situation where the plate feeds inside the printer and a
“beep” sound is heard, locking the plate, press the
Cancel
key. This will
release the lock, so remove the plate and re-insert it.
• Do not insert the media from the ejection side.
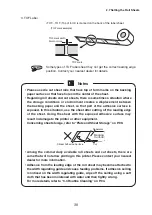
• For the plates, use rigid plastic plates made from acrylic or PVC that are
3mm or less in thickness. Note that among commercially available plates,
there are some that will not allow normal printing using this printer. For
more details, please contact your nearest dealer.
• If plates that have burr around their edges, or plates that have warping
are used without modification, problems may occur in the printing unit, or
damage may be caused to the printing head. In particular, if metallic dust
is attached to the plates it will result in damage the print head, so adequate
care will be required during storage and handling. Please note in advance
that this company will accept no responsibility if these types of plates are
used, even if the print head is damaged.
• Clear printing will not be possible if plates have dirt or oil (including skin
oils) attached. Be careful of these, since printing problems will occur.
Reference
Refer to “4.5 Plate Cleaning and Storage” on P.98.
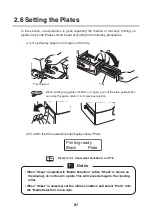
2.6 Setting the Plates

