Note:
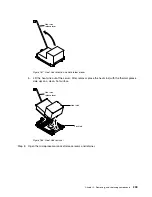
Do not touch the microprocessor contacts. Contaminants on the microprocessor
contacts, such as oil from your skin, can cause connection failures between the contacts
and the socket.
b.
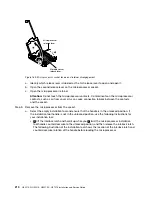
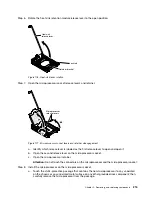
Align the installation tool with the microprocessor socket and lower down the installation tool.
The installation tool rests flush on the socket only if properly aligned.
Installation tool
Microprocessor
Alignment pins
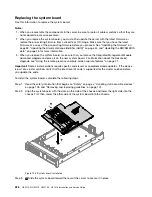
Figure 178. Installation tool alignment
c.
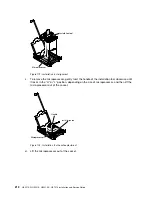
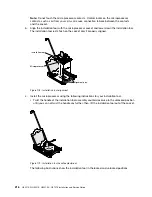
Install the microprocessor using the following instructions for your installation tool.
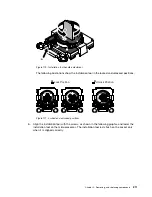
• Twist the handle of the installation tool assembly counterclockwise to the unlocked position
until you can not twist the handle any further; then, lift the installation tool out of the socket.
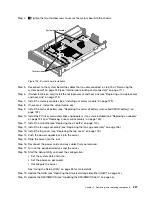
Figure 179. Installation tool handle adjustment
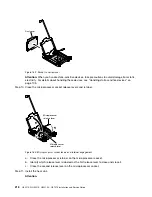
The following illustrations show the installation tool in the locked and unlocked positions.
216
HX3510-G, HX5510, HX5510-C, HX7510 Installation and Service Guide
Summary of Contents for HX3510-G
Page 1: ...HX3510 G HX5510 HX5510 C HX7510 Installation and Service Guide Machine Type 8695 ...
Page 6: ...iv HX3510 G HX5510 HX5510 C HX7510 Installation and Service Guide ...
Page 62: ...50 HX3510 G HX5510 HX5510 C HX7510 Installation and Service Guide ...
Page 102: ...90 HX3510 G HX5510 HX5510 C HX7510 Installation and Service Guide ...
Page 112: ...100 HX3510 G HX5510 HX5510 C HX7510 Installation and Service Guide ...
Page 1222: ...1210 HX3510 G HX5510 HX5510 C HX7510 Installation and Service Guide ...
Page 1238: ...1226 HX3510 G HX5510 HX5510 C HX7510 Installation and Service Guide ...
Page 1239: ......
Page 1240: ......


