


Appendices
152
MIDI driver installation and settings
Windows XP users
Installing the KORG USB-MIDI Driver for Win-
dows XP
In order to install or uninstall drivers in Windows
XP, you must have Administrator privileges. For
details, contact your system administrator.
Make settings so that driver installation does not
require a digital signature. (
digital signature authentication during driver in-
stallation”)
This driver is only for Windows XP. It cannot be
used with Windows 95/98/Me.
The driver must be installed for each USB port. If
you connect the RADIAS to a USB port other than
the one you used when installing KORG USB-
MIDI Driver for Windows, you will need to re-in-
stall the KORG USB-MIDI Driver for Windows us-
ing the same procedure.
1
You must install KORG USB-MIDI Driver Tools
before you connect the RADIAS to your com-
puter. Make sure that the RADIAS is discon-
nected, and insert the included CD-ROM into
your CD-ROM drive. Normally the “RADIAS
Application Installer” will start up automati-
cally.
If settings have been made on your computer so
that this does not start up automatically, double-
click “KorgSetup.exe” in the CD-ROM.
2
In the list, select “KORG USB-MIDI Drive
Tools” and click [Install] to start up the KORG
USB-MIDI Driver Tools installer.
3
The KORG USB-MIDI Drive Tools Installer
screen will appear. Click [Next>].
4
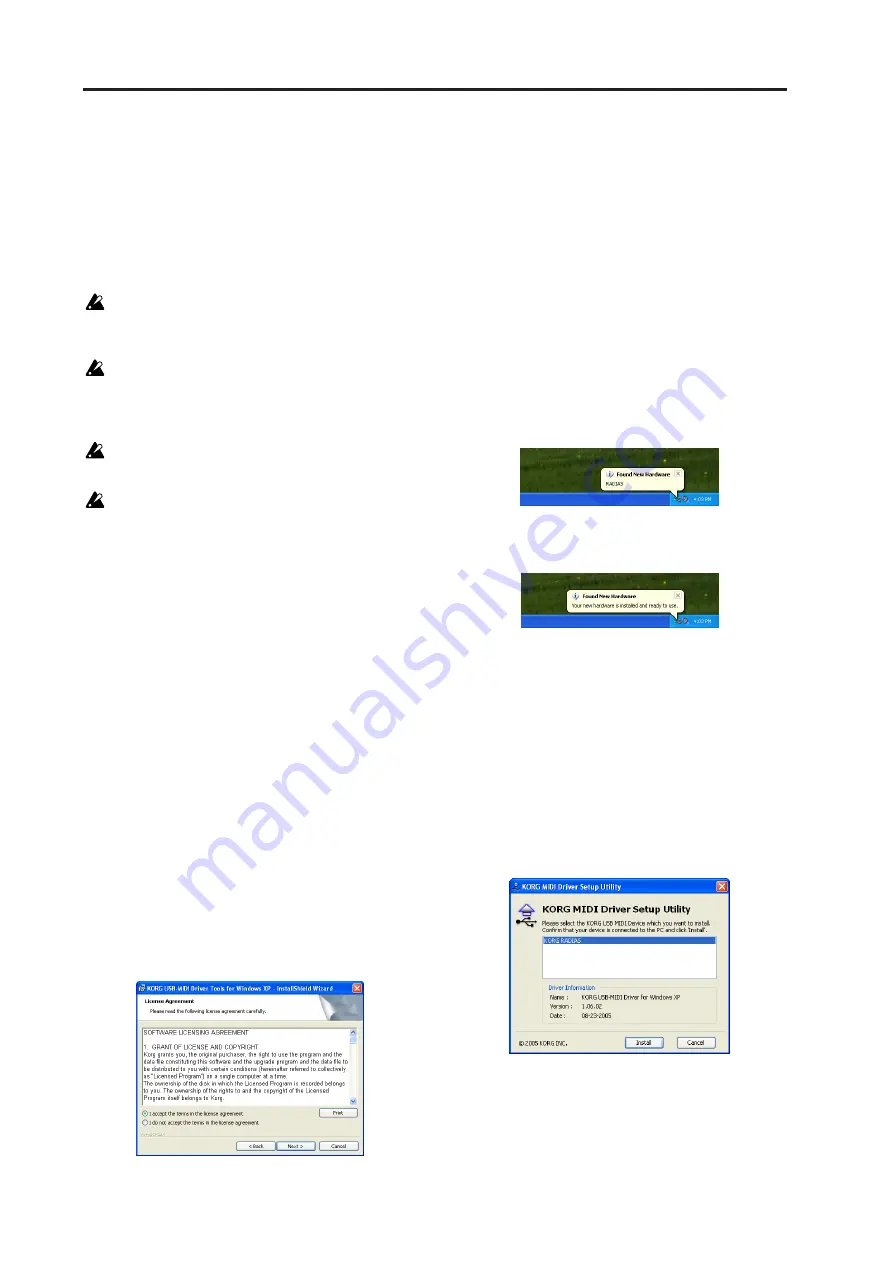
The “License agreement” will appear. Carefully
read the contents, and if you consent to the
terms, select “I accept the license agreement”
and click [Next>].
5
Enter your user information and click [Next>].
6
Specify the location where the software will be
installed. The screen will show the installation
location. If you want to change this, click
[Change] and select the desired installation loca-
tion. Click [Next>] to begin the installation.
7
When the installation is completed, click [Fin-
ish] to exit the installer.
8
Use a USB cable to connect the RADIAS to your
computer, and turn on the power of the
RADIAS. Windows will detect that the RADIAS
is connected.
The standard driver will then be installed auto-
matically.
9
From the taskbar, choose [Start]
➞
[All Pro-
grams]
➞
[KORG]
➞
[KORG USB-MIDI Driver
Tools]
➞
[Install KORG USB-MIDI Device] to
start up the setup utility.
In the upper part of the window, a list will show
the KORG USB-MIDI devices currently connected
to your computer. The lower part of the window
shows information about the version of the
KORG USB-MIDI Driver you are about to install.
In the list, select the KORG USB-MIDI device that
is currently connected to your computer, and click
[Install]. Driver installation will begin.
10
During the installation, a warning dialog box
regarding digital signature authentication may
appear. If so, click [Continue Anyway] to pro-
ceed.
Summary of Contents for MMT RADIAS
Page 1: ...2 E Owner s Manual...
Page 6: ...Table of Contents vi...
Page 7: ...Operation Introduction Front and rear panels Setup Quick Start Editing...
Page 78: ...Editing 72...
Page 79: ...Parameter Program parameters Drum parameters Global parameters Effect guide...
Page 150: ...Effect guide 144...
Page 151: ...Appendices...