Maintaining Your Printer
457
2
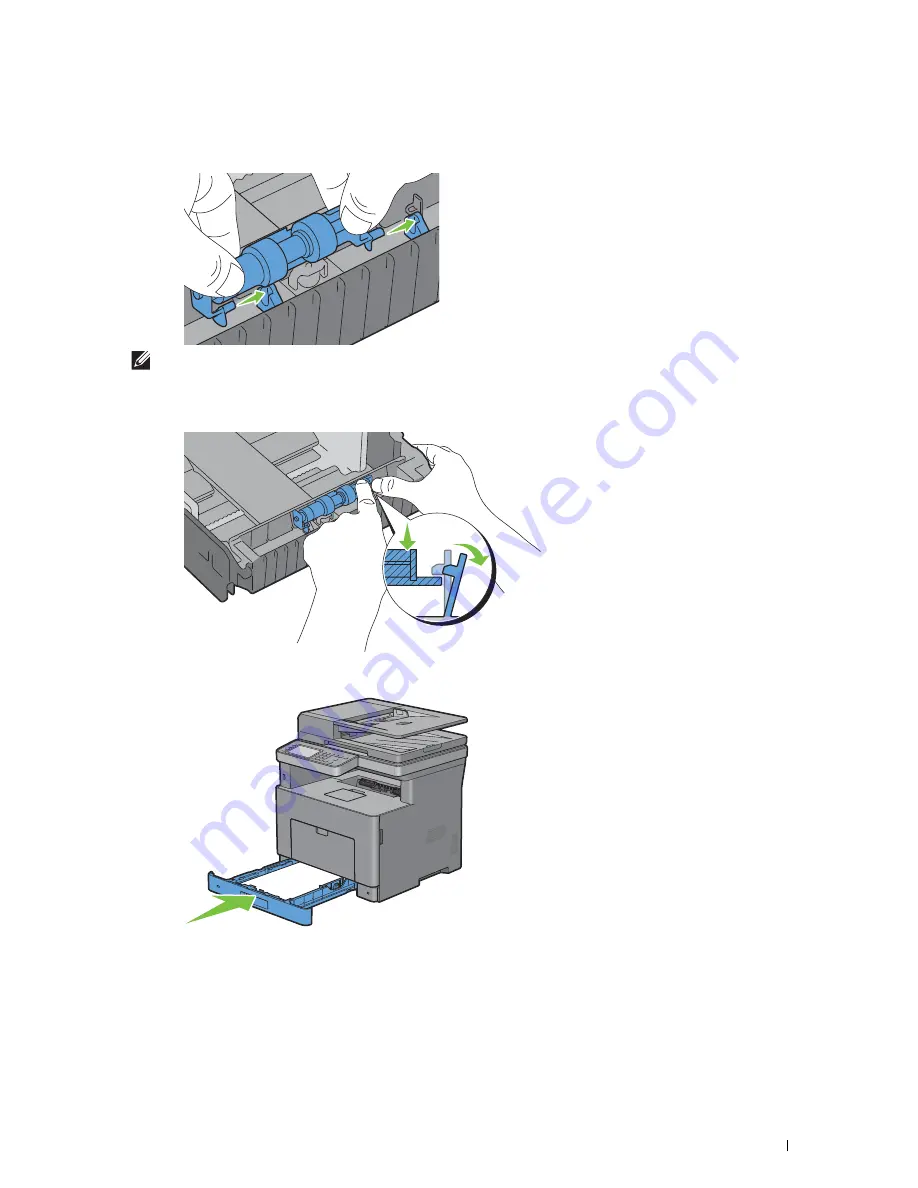
Hold the both ends of the new retard roller, and attach it by sliding the two axles of the retard roller into the holes
on tray1.
NOTE:
Be careful not to touch the rubber rollers.
3
While pressing the lock lever on tray1 slightly to the right, press down the retard roller until it clicks, and then
release the lock lever.
4
Load paper in tray1, and then insert the tray into the printer and push until it stops.
Summary of Contents for H815dw
Page 2: ......
Page 24: ...24 Contents Template Last Updated 2 7 2007 ...
Page 26: ...26 ...
Page 30: ...30 Notes Cautions and Warnings ...
Page 38: ...38 Product Features ...
Page 44: ...44 About the Printer ...
Page 46: ...46 ...
Page 48: ...48 Overview of the Printer Setup ...
Page 86: ...86 Loading Paper ...
Page 100: ...100 Installing Printer Drivers on Windows Computers ...
Page 104: ...104 Installing Printer Drivers on Macintosh Computers ...
Page 114: ...114 ...
Page 180: ...180 Dell Printer Configuration Web Tool ...
Page 282: ...282 ...
Page 316: ...316 Copying ...
Page 344: ...344 Scanning For Apple Macintosh Password for Scanner Enter the password ...
Page 380: ...380 Dell Document Hub ...
Page 386: ...386 ...
Page 404: ...404 Understanding Your Printer Software ...
Page 424: ...424 Using Digital Certificates ...
Page 434: ...434 Understanding Printer Messages ...
Page 440: ...440 Specifications ...
Page 441: ...441 Maintaining Your Printer 31 Maintaining Your Printer 443 32 Clearing Jams 469 ...
Page 442: ...442 ...
Page 468: ...468 Maintaining Your Printer ...
Page 476: ...476 Clearing Jams 8 Insert the MPF into the printer 9 Close the rear cover ...
Page 499: ...499 Troubleshooting 33 Troubleshooting Guide 501 ...
Page 500: ...500 ...
Page 530: ...530 Troubleshooting Guide ...
Page 531: ...531 Appendix Appendix 533 ...
Page 532: ...532 ...


