2-30
Installing the Dektak 150 System
To change the voltage setting:
1
Verify the main power switch located on the back of the computer console is turned off.
2
Verify the main power cable is disconnected from its primary power source and the computer console.
3
Verify the voltage setting displays the correct voltage once the main power cable is disconnected from the
computer. If it does not, change the voltage setting.
NOTE –
The voltage setting is located below the power inlet on the back of the computer
(see
).
4
To change the voltage supply setting, use a small flat head screw driver to slide the voltage switch (see
) until the appropriate voltage setting appears.
5
Connect the power bar into an outlet that provides the appropriate voltage as shown on the voltage select
card.
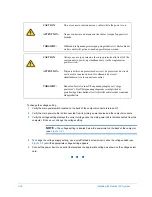
CAUTION:
Do not connect or disconnect any cables while the power is on.
ATTENTION:
Ne pas connecter ou déconnecter de cables lorsque l’appareil est
branché.
VORSICHT:
Während die Spannungsversorgung eingeschaltet ist, dürfen Kabel
weder vom Gerät getrennt, noch angeschlossen werden.
CAUTION:
Always use a surge protector; the surge protector allows all of the
components to power-up simultaneously via the single master
power switch.
ATTENTION:
Toujours utiliser un protecteur de circuit. Le protecteur de circuit
sert à mettre sous tension tous les éléments du circuit
simultanément via le connecteur central.
VORSICHT:
Benutzen Sie stets einen Überspannungsbegrenzer (“surge
protector”). Der Überspannungsbegrenzer ermöglicht das
gleichzeitige Einschalten aller Geräteteile mittels eines einzelnen
Hauptschalters.
Содержание Dektak 150
Страница 1: ......
Страница 2: ...P N 980 294 Standard P N 980 298 Cleanroom Revision A DEKTAK 150 SURFACE PROFILER USER S MANUAL ...
Страница 7: ......
Страница 17: ......
Страница 81: ......
Страница 105: ......
Страница 149: ......
Страница 191: ......
Страница 251: ......
Страница 257: ...A 6 Facilities Specifications Figure A 6 Dektak 150 without Enclosure Side View ...
Страница 258: ...Facilities Specifications A 7 Figure A 7 Dektak 150 Dimensions without Enclosure Top View ...
Страница 259: ...A 8 Facilities Specifications Figure A 8 Dektak 150 without Enclosure Center of Mass ...
Страница 273: ......
Страница 283: ......
Страница 320: ...3D Mapping Function E 37 Figure E 26 Database Options Button Figure E 27 Database Options Dialog Box ...
Страница 321: ......
Страница 331: ......
Страница 333: ......
Страница 336: ......
Страница 337: ......
Страница 349: ......


