D-8
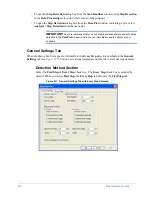
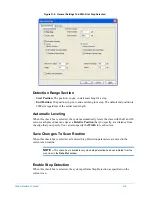
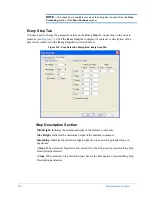
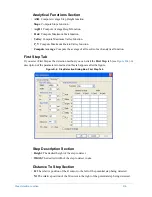
Step Detection Function
Performing Step Detection on a Single Scan
1
With the
Step Parameters
dialog box displayed, select the
Step Detection
method (
First Step
or
Every
Step
).
2
Select the desired parameters for the scan to measure the scanned step or steps.
3
Click
OK
.
The resulting scan after you enable Step Detection redisplays the plotted profile and detects and
measures the steps applicable to selected Step Detection parameters.
Selected analytical functions (such as ASH measurement) perform on the detected steps. The steps
are detected, causing the ASH measurement to compute with R and M cursors positioned on either
side of the step and displayed to the left of the plotted profile.
You can now automatically locate the cursors to their corresponding position by highlighting the
desired analytic result.
Programming Step Detection in a Scan Routine
The same criteria for locating feature edges on a single data file can be used for performing step
detection on similar features during subsequent scans.
1
Select
Window
>
Scan Routines
to display the
Scan Routines
window to enable Step Detection during a
scan.
2
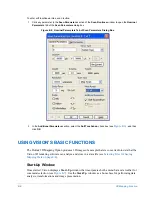
Under
Data Processing
, click
Step Detection
to display the default values in the
Step Detection
dialog
box.
3
Select the
Step Detection Enabled
check box to enable step detection while scanning.
Programming Step Detection on Multiple Scans
You can use the Automation Program Summary (APS) Report with step detection to automatically
compute standard deviation and mean values of chosen analytic functions at each detected step for a
series of scans.
1
Select
Window
>
Automation Programs
to program a series of scans with Step Detection.
2
Under
Automation Program Options
, click
APS File
to open the
Automation Program Options
dialog
box
.
3
On the
General
tab, in the
Auto Program Summary (APS)
section, click the
Compute & Display
check
box.
4
Accept the default file, or specify the desired file for the APS summary, and click
OK
.
5
Select
Edit
>
Copy To...
to create a copy of the previously developed scan routine.
6
In the dialog box that pops up, enter a numerical value for the new
Scan Routine #
into the field and click
OK
.
7
Double-click the left mouse button on the newly created scan routine to allow modification of the new scan
routine location.
8
Modify any parameters of the scan routine you want to alter.
Содержание Dektak 150
Страница 1: ......
Страница 2: ...P N 980 294 Standard P N 980 298 Cleanroom Revision A DEKTAK 150 SURFACE PROFILER USER S MANUAL ...
Страница 7: ......
Страница 17: ......
Страница 81: ......
Страница 105: ......
Страница 149: ......
Страница 191: ......
Страница 251: ......
Страница 257: ...A 6 Facilities Specifications Figure A 6 Dektak 150 without Enclosure Side View ...
Страница 258: ...Facilities Specifications A 7 Figure A 7 Dektak 150 Dimensions without Enclosure Top View ...
Страница 259: ...A 8 Facilities Specifications Figure A 8 Dektak 150 without Enclosure Center of Mass ...
Страница 273: ......
Страница 283: ......
Страница 320: ...3D Mapping Function E 37 Figure E 26 Database Options Button Figure E 27 Database Options Dialog Box ...
Страница 321: ......
Страница 331: ......
Страница 333: ......
Страница 336: ......
Страница 337: ......
Страница 349: ......

