right-click menu are for screen 1 only.
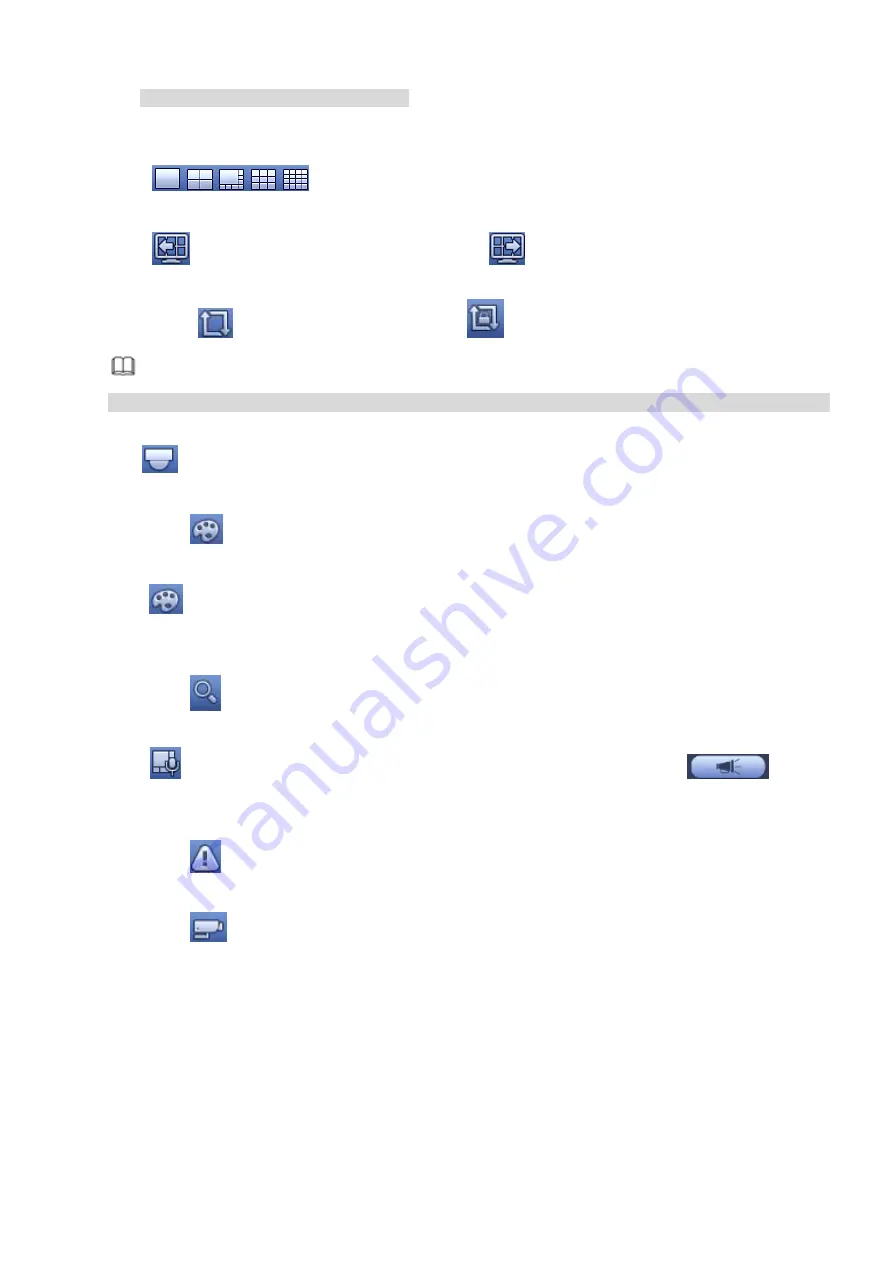
3.6.2.3 Output Screen
Click
to select corresponding window-split mode and output channels.
3.6.2.4 Previous screen/next screen
Click
to go back to the previous screen, click
to go to the next screen.
3.6.2.5 Tour
Click button
to enable tour, the icon becomes
, you can see the tour is in process.
Note
Close the tour or the triggered tour operation has cancelled, device restore the previous preview video.
3.6.2.6 PTZ
Click
, system goes to the PTZ control interface.
3.6.2.7 Color
Click button
, system goes to the color interface. Please make sure system is in one-channel mode.
3.6.2.8 Image
Click
to go to the image interface. Please make sure system is in one-channel mode.
3.6.2.9 Search
Click button
, system goes to search interface.
3.6.2.10 Broadcast
Click
to go to broadcast interface. Select a group name and then click
to begin
broadcast.
3.6.2.11 Alarm Status
Click button
, system goes to alarm status interface. It is to view device status and channel status.
3.6.2.12 Channel Info
Click button
, system goes to the channel information setup interface. It is to view information of the
corresponding channel. See Figure 3-58.
Содержание ELITE Network IP Series
Страница 1: ...64 Channel 4K Hot Swap NVR NVR ELHS 64 4K DH...
Страница 43: ...Figure 3 14 Step 2 Click Add new holiday button and device displays the following interface See Figure 3 15...
Страница 108: ...Figure 3 92 Figure 3 93...
Страница 131: ...Figure 3 111 Figure 3 112 Figure 3 113...
Страница 144: ...Figure 3 126 Figure 3 127...
Страница 146: ...Figure 3 129 Click draw button to draw the zone See Figure 3 130 Figure 3 130...
Страница 149: ...Figure 3 133 Click Draw button to draw a zone See Figure 3 134 Figure 3 134...
Страница 154: ...Figure 3 139 Click draw button to draw the zone See Figure 3 140...
Страница 165: ...Figure 3 151 Step 2 Add surveillance scene 1 Click Add The Add interface is displayed See Figure 3 152...
Страница 172: ...Figure 3 157 Figure 3 158...
Страница 173: ...Figure 3 159 Figure 3 160...
Страница 176: ...Figure 3 164 Figure 3 165...
Страница 211: ...Figure 3 199...
Страница 218: ...Figure 3 206 Step 2 Click Add user button in Figure 3 206 The interface is shown as in Figure 3 207 Figure 3 207...
Страница 234: ...Figure 3 227 Step 2 Click Add group Enter add group interface See Figure 3 228 Figure 3 228...
Страница 298: ...Figure 4 56 Figure 4 57...
Страница 304: ...Figure 4 62 Figure 4 63...
Страница 305: ...Figure 4 64 Figure 4 65...
Страница 330: ...Figure 4 101 Figure 4 102...
Страница 339: ...Figure 4 115 Figure 4 116...
Страница 359: ...Figure 4 144 Note For admin you can change the email information See Figure 4 145...


