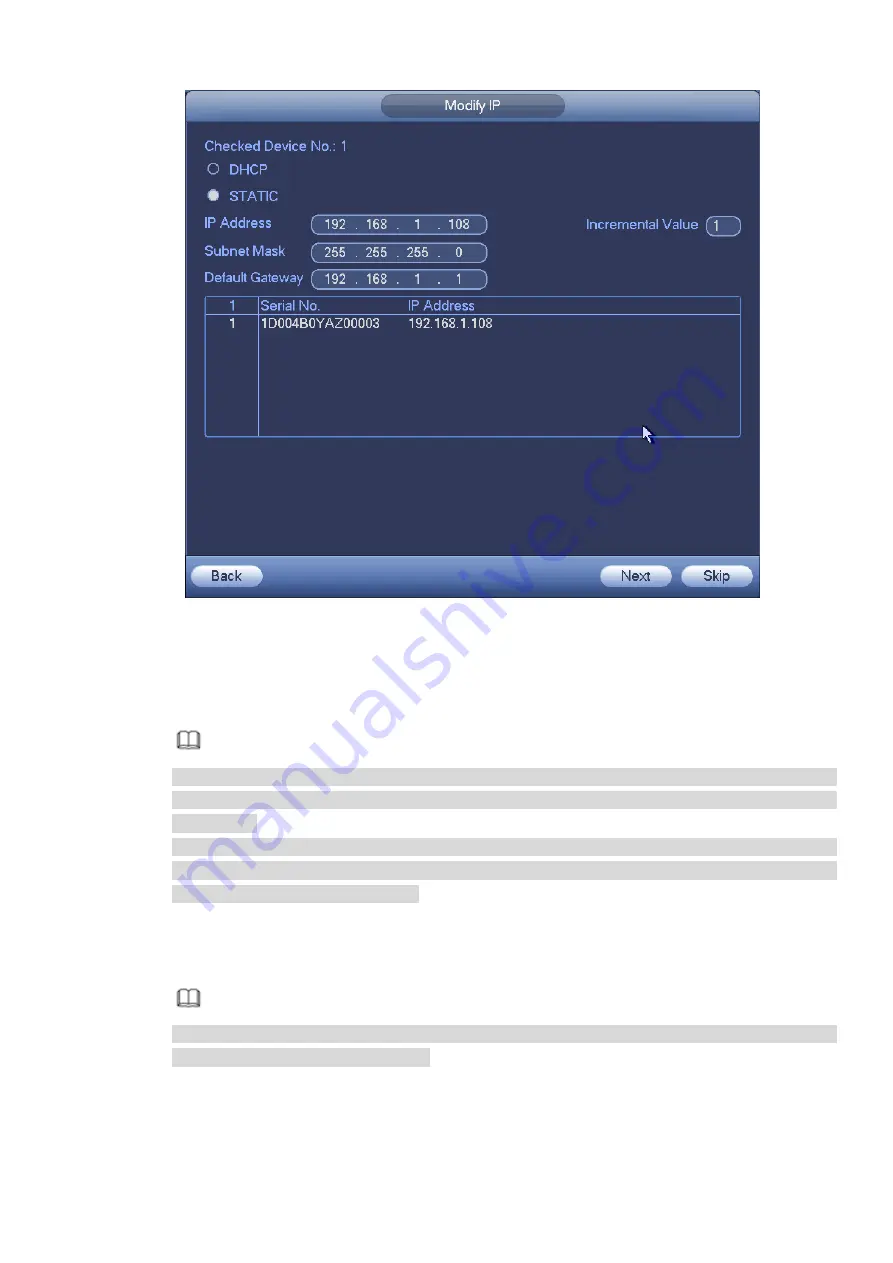
Figure 3-37
Step 2 Select IP mode.
Check DHCP, there is no need to input IP address, subnet mask, and default gateway. Device
automatically allocates the IP address to the camera.
Check Static, and then input IP address, subnet mask, default gateway and incremental value.
Note
If it is to change several devices IP addresses at the same time, please input incremental value.
Device can add the fourth address of the IP address one by one to automatically allocate the IP
addresses.
If there is IP conflict when changing static IP address, device pops up IP conflict dialogue box. If
batch change IP address, device automatically skips the conflicted IP and begin the allocation
according to the incremental value
Step 3 Input remote device user name and password.
Step 4 Click OK button to save settings.
After the changing operation, search again, device displays new IP address.
Note
When change IP addresses of several devices at the same time, make sure the cameras user
name and passwords are the same.
3.5.1.2 IP Export
Device can export the Added device list to your local USB device.
Step 1 Insert the USB device and then click the Export button.
Содержание ELITE Network IP Series
Страница 1: ...64 Channel 4K Hot Swap NVR NVR ELHS 64 4K DH...
Страница 43: ...Figure 3 14 Step 2 Click Add new holiday button and device displays the following interface See Figure 3 15...
Страница 108: ...Figure 3 92 Figure 3 93...
Страница 131: ...Figure 3 111 Figure 3 112 Figure 3 113...
Страница 144: ...Figure 3 126 Figure 3 127...
Страница 146: ...Figure 3 129 Click draw button to draw the zone See Figure 3 130 Figure 3 130...
Страница 149: ...Figure 3 133 Click Draw button to draw a zone See Figure 3 134 Figure 3 134...
Страница 154: ...Figure 3 139 Click draw button to draw the zone See Figure 3 140...
Страница 165: ...Figure 3 151 Step 2 Add surveillance scene 1 Click Add The Add interface is displayed See Figure 3 152...
Страница 172: ...Figure 3 157 Figure 3 158...
Страница 173: ...Figure 3 159 Figure 3 160...
Страница 176: ...Figure 3 164 Figure 3 165...
Страница 211: ...Figure 3 199...
Страница 218: ...Figure 3 206 Step 2 Click Add user button in Figure 3 206 The interface is shown as in Figure 3 207 Figure 3 207...
Страница 234: ...Figure 3 227 Step 2 Click Add group Enter add group interface See Figure 3 228 Figure 3 228...
Страница 298: ...Figure 4 56 Figure 4 57...
Страница 304: ...Figure 4 62 Figure 4 63...
Страница 305: ...Figure 4 64 Figure 4 65...
Страница 330: ...Figure 4 101 Figure 4 102...
Страница 339: ...Figure 4 115 Figure 4 116...
Страница 359: ...Figure 4 144 Note For admin you can change the email information See Figure 4 145...


