No.
Function
Description
9
Split track
Click it to split the channel window.
10
Close
Close the monitor window.
4.5.1.1 Smart Track
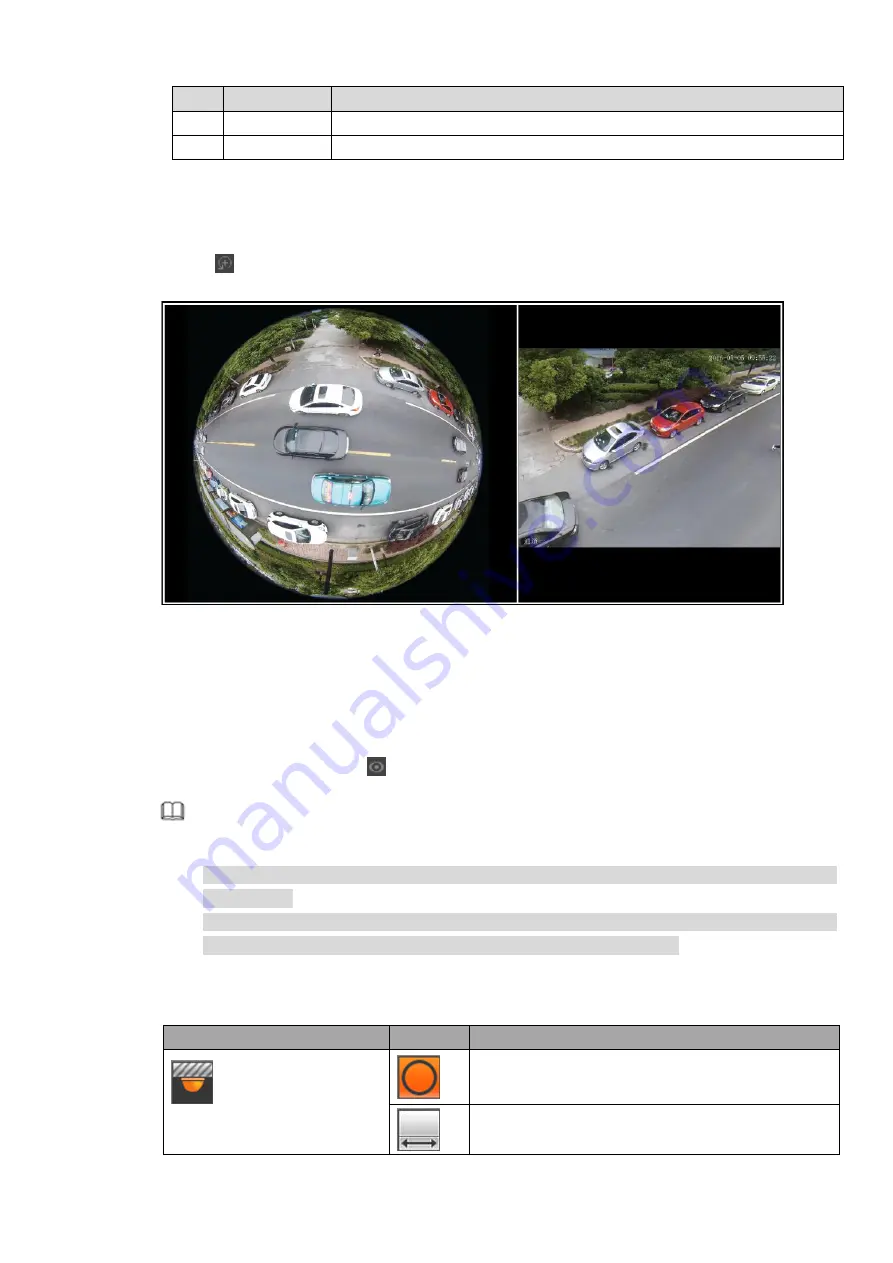
This function allows you to view the trigger video of the fish eye & PTZ camera. The fish eye is the
main camera to view the whole surveillance condition and the PTZ camera works as the slave
camera to view the details.
Step 1 Click
on top right corner of the play window.
The Smart Track interface is displayed. See Figure 4-16
Figure 4-16
Step 2 Click the corresponding position in the fisheye channel.
The PTZ camera rotates to the specified position and zooms in or zooms out to display the
image.
4.5.1.2 Fisheye De-Warp
On the preview window, click
and the fisheye correction interface is displayed.
Note
If the current channel is not the fisheye channel, the system prompts that Doesn’t support
de-warping!
If the performance of the current channel is insufficient, the system prompts that Channel
performance is insufficient and does not support fisheye de-warping.
Fisheye mouting mode includes: Ceiling mount, wall mount and ground mount. Different
mounting mode supports different de-warping modes.
Installation modes
Icon
Note
(
Ceiling mount
)
360°panorama original view
1 de-warp 1 panorama stretching
Содержание ELITE Network IP Series
Страница 1: ...64 Channel 4K Hot Swap NVR NVR ELHS 64 4K DH...
Страница 43: ...Figure 3 14 Step 2 Click Add new holiday button and device displays the following interface See Figure 3 15...
Страница 108: ...Figure 3 92 Figure 3 93...
Страница 131: ...Figure 3 111 Figure 3 112 Figure 3 113...
Страница 144: ...Figure 3 126 Figure 3 127...
Страница 146: ...Figure 3 129 Click draw button to draw the zone See Figure 3 130 Figure 3 130...
Страница 149: ...Figure 3 133 Click Draw button to draw a zone See Figure 3 134 Figure 3 134...
Страница 154: ...Figure 3 139 Click draw button to draw the zone See Figure 3 140...
Страница 165: ...Figure 3 151 Step 2 Add surveillance scene 1 Click Add The Add interface is displayed See Figure 3 152...
Страница 172: ...Figure 3 157 Figure 3 158...
Страница 173: ...Figure 3 159 Figure 3 160...
Страница 176: ...Figure 3 164 Figure 3 165...
Страница 211: ...Figure 3 199...
Страница 218: ...Figure 3 206 Step 2 Click Add user button in Figure 3 206 The interface is shown as in Figure 3 207 Figure 3 207...
Страница 234: ...Figure 3 227 Step 2 Click Add group Enter add group interface See Figure 3 228 Figure 3 228...
Страница 298: ...Figure 4 56 Figure 4 57...
Страница 304: ...Figure 4 62 Figure 4 63...
Страница 305: ...Figure 4 64 Figure 4 65...
Страница 330: ...Figure 4 101 Figure 4 102...
Страница 339: ...Figure 4 115 Figure 4 116...
Страница 359: ...Figure 4 144 Note For admin you can change the email information See Figure 4 145...


