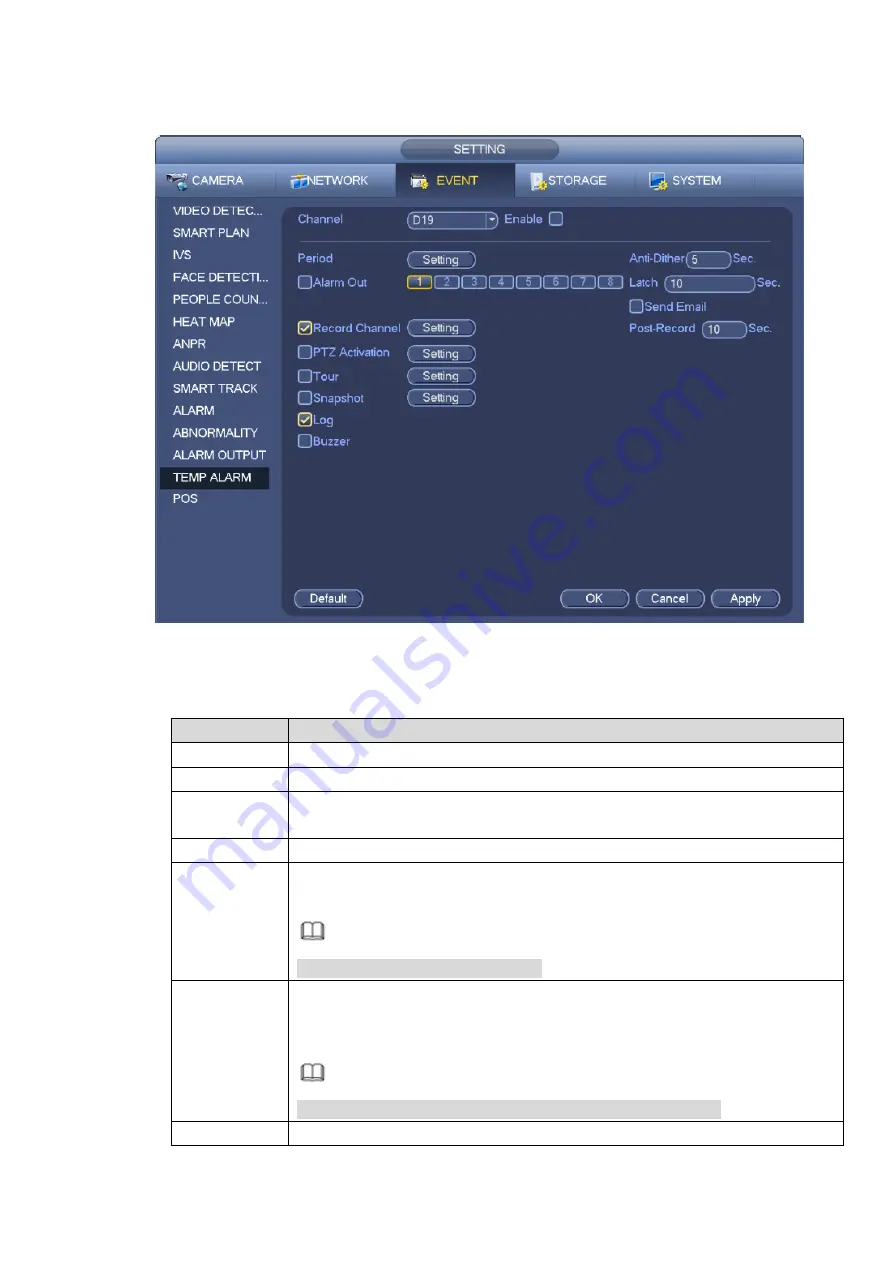
Step 1 Enter from main menu > Settings > Event > Temp Alarm.
The Temp Alarm interface is displayed. See Figure 3-167.
Figure 3-167
Step 2 Select the channel number and select the Enable check box.
Step 3 Configure the alarm activation parameters. For details, see the following table.
Parameter
Description
Period
Enter the period only in which the system triggers the linked alarms.
Anti-Dither
During the anti-dither period, the system only records one temp alarm event.
Alarm Out
Connect alarm device (such as light, siren) in the alarm out port. When an
alarm occurs, NVR transmits the alarm information to the alarm device.
Latch
The alarm lasts for 0-300 seconds after the alarm event ends.
Send Email
Select the check box. When an alarm occurs, NVR semds email to the set
mail box.
Note
You shall configure the Email first.
Record
Channel
Select the check box, click Setting and then select the channel (support
multi-choice). When an alarm occurs, NVR triggers the channel to take
records.
Note
You shall enable alarm record and auto record functions first.
Post-record
Recording lasts for 10-300 seconds after the alarm ends.
Содержание ELITE Network IP Series
Страница 1: ...64 Channel 4K Hot Swap NVR NVR ELHS 64 4K DH...
Страница 43: ...Figure 3 14 Step 2 Click Add new holiday button and device displays the following interface See Figure 3 15...
Страница 108: ...Figure 3 92 Figure 3 93...
Страница 131: ...Figure 3 111 Figure 3 112 Figure 3 113...
Страница 144: ...Figure 3 126 Figure 3 127...
Страница 146: ...Figure 3 129 Click draw button to draw the zone See Figure 3 130 Figure 3 130...
Страница 149: ...Figure 3 133 Click Draw button to draw a zone See Figure 3 134 Figure 3 134...
Страница 154: ...Figure 3 139 Click draw button to draw the zone See Figure 3 140...
Страница 165: ...Figure 3 151 Step 2 Add surveillance scene 1 Click Add The Add interface is displayed See Figure 3 152...
Страница 172: ...Figure 3 157 Figure 3 158...
Страница 173: ...Figure 3 159 Figure 3 160...
Страница 176: ...Figure 3 164 Figure 3 165...
Страница 211: ...Figure 3 199...
Страница 218: ...Figure 3 206 Step 2 Click Add user button in Figure 3 206 The interface is shown as in Figure 3 207 Figure 3 207...
Страница 234: ...Figure 3 227 Step 2 Click Add group Enter add group interface See Figure 3 228 Figure 3 228...
Страница 298: ...Figure 4 56 Figure 4 57...
Страница 304: ...Figure 4 62 Figure 4 63...
Страница 305: ...Figure 4 64 Figure 4 65...
Страница 330: ...Figure 4 101 Figure 4 102...
Страница 339: ...Figure 4 115 Figure 4 116...
Страница 359: ...Figure 4 144 Note For admin you can change the email information See Figure 4 145...


