Parameter
Description
successfully.
If succeeded, go to step4.
If failed, check if the domain information is correct and clear
the browser buffer.
System supports this function when DDNS type is NO-IP DDNS.
Update period
The time interval to send update request. Unit: Minute.
Step 4 Click Save to complete the setting.
Step 5 Input the domain name in the Web browser and click Enter key. The setting is right if you can
view the Web interface of the device. Otherwise, check the parameters.
4.6.2.5 Sync Time Right
By setting the trusted sites, you can specify the IP host to synchronize or modify device time, and prevent
several IP hosts from synchronizing time with the same device.
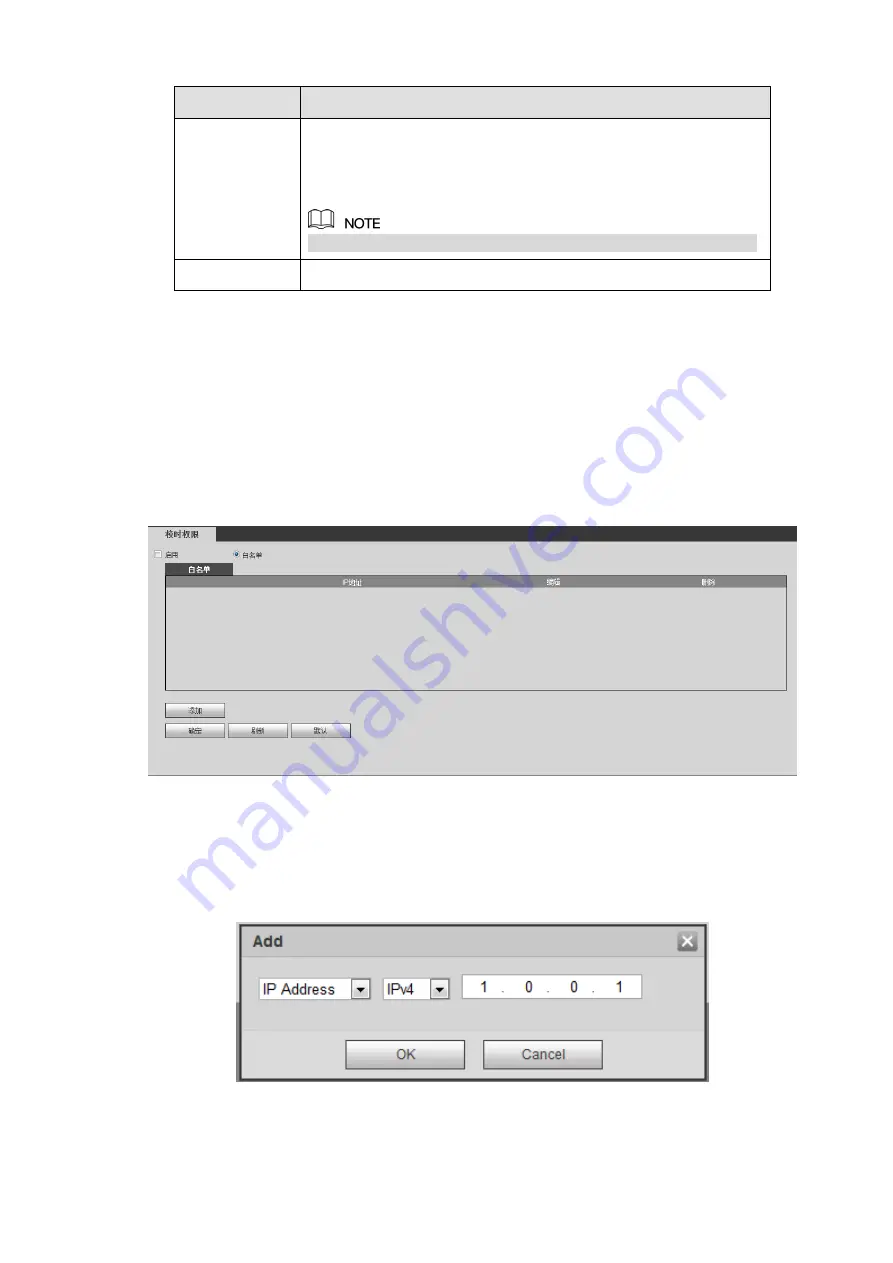
Step 5 Enter from Setup > Network > Sync Time Right.
The Sync Time Right interface is displayed. See Figure 4-43.
Figure 4-43
Step 6 Select the Enable check box.
Step 7 Add IP host.
4.
Click Add.
The Add interface is displayed. See Figure 4-44
Figure 4-44
5.
Configure the IP address. For details, see the following table.
Содержание ELITE Network IP Series
Страница 1: ...64 Channel 4K Hot Swap NVR NVR ELHS 64 4K DH...
Страница 43: ...Figure 3 14 Step 2 Click Add new holiday button and device displays the following interface See Figure 3 15...
Страница 108: ...Figure 3 92 Figure 3 93...
Страница 131: ...Figure 3 111 Figure 3 112 Figure 3 113...
Страница 144: ...Figure 3 126 Figure 3 127...
Страница 146: ...Figure 3 129 Click draw button to draw the zone See Figure 3 130 Figure 3 130...
Страница 149: ...Figure 3 133 Click Draw button to draw a zone See Figure 3 134 Figure 3 134...
Страница 154: ...Figure 3 139 Click draw button to draw the zone See Figure 3 140...
Страница 165: ...Figure 3 151 Step 2 Add surveillance scene 1 Click Add The Add interface is displayed See Figure 3 152...
Страница 172: ...Figure 3 157 Figure 3 158...
Страница 173: ...Figure 3 159 Figure 3 160...
Страница 176: ...Figure 3 164 Figure 3 165...
Страница 211: ...Figure 3 199...
Страница 218: ...Figure 3 206 Step 2 Click Add user button in Figure 3 206 The interface is shown as in Figure 3 207 Figure 3 207...
Страница 234: ...Figure 3 227 Step 2 Click Add group Enter add group interface See Figure 3 228 Figure 3 228...
Страница 298: ...Figure 4 56 Figure 4 57...
Страница 304: ...Figure 4 62 Figure 4 63...
Страница 305: ...Figure 4 64 Figure 4 65...
Страница 330: ...Figure 4 101 Figure 4 102...
Страница 339: ...Figure 4 115 Figure 4 116...
Страница 359: ...Figure 4 144 Note For admin you can change the email information See Figure 4 145...


