


DDE
Appendix F Obsolete Features
312
2. Enter "DDE1" in the Point Name: field.
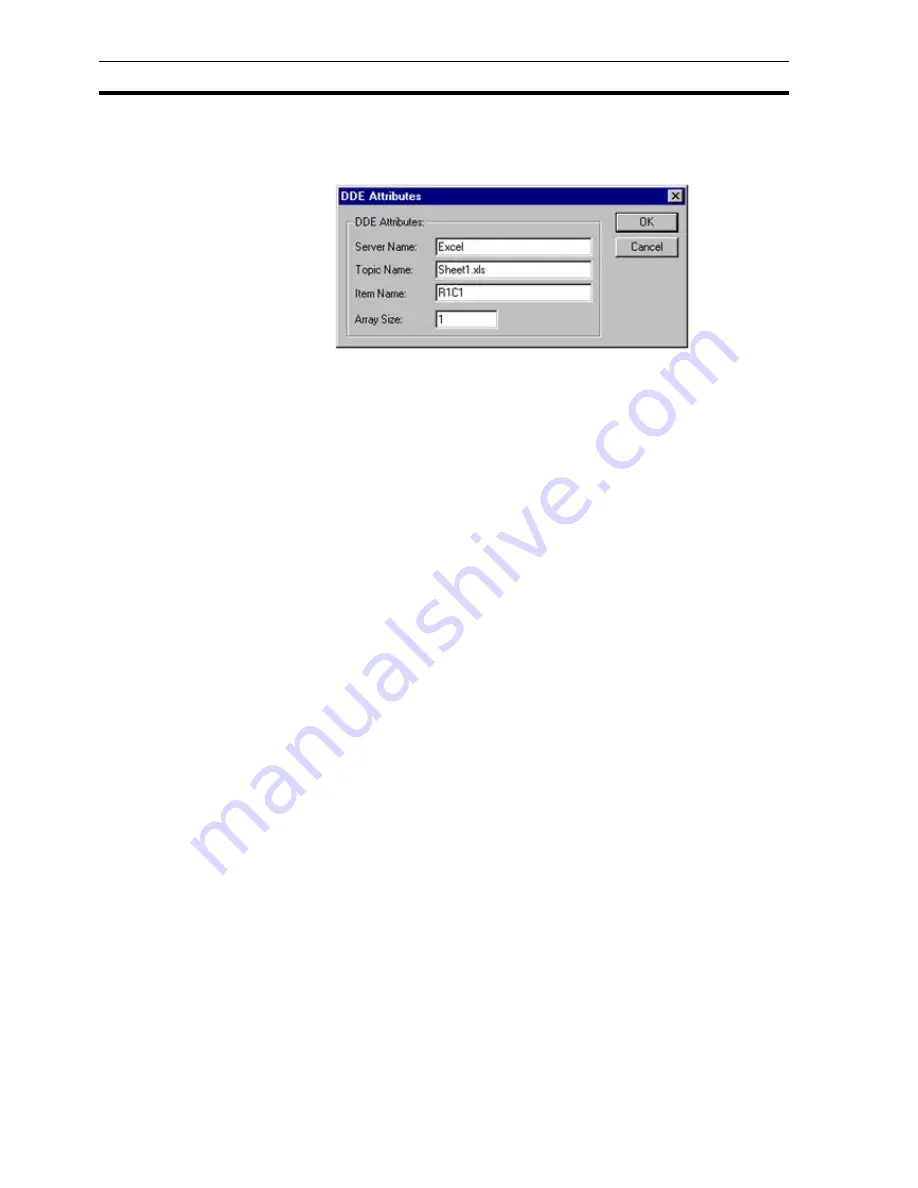
3. Set the I/O Attributes setting to DDE and click the Setup button. The DDE
attributes dialog box opens.
4. Enter "Excel" in the Server Name: field. This is the name of the external
DDE server application.
5. Enter "Sheet1.xls" in the Topic Name: field. This is the required topic, in
this case it is a Microsoft Excel worksheet named 'Sheet1.xls'. It is
possible to specify a specific topic: for instance, in Microsoft Excel, to
specify a sheet within a book a colon is used to delimit the information, e.g.
'Book1:sheet3.xls'.
6. Enter "R1C1" in the Item Name: field. This refers to the item name.
7. Enter "1" in the Array Size: field.
8. Click the OK button to accept the settings in both the DDE Attributes
dialog box and the Add Point dialog box.
This process is repeated for any further DDE data transfers that are required.
F.4.2 DDE Server Points
A DDE server point receives data from or receives a request for data from an
external Client application. This chapter explains how to create "DDE Server
Points", these points are exposed to DDE Client applications either for "Read/
Only" or "Read/Write" access. In order for a point to take part in a conversation
with a DDE Client, it must be given 'DDE Access'. The following dialog box
demonstrates how to give a Real memory point, DDE Read/Write access:
A DDE Server point is created as follows:
1, 2, 3…
1. Select the Add Point button from the Point Editor toolbar. The Add Point
dialog box opens.
2. Enter a meaningful name for the DDE Server point in the Point Name:
field.
3. Click the Advanced button. The Advanced Point Settings dialog box
opens.
Note:
It is not necessary to give 'DDE Client Points' DDE access via the Advanced
dialog box - this field is only used in the creation of 'DDE Server Points'. If the
DDE Access Read/Write setting is set 'ON', this point's value would then be
'exposed' to change by external DDE server application(s) which may not
always be desirable.
Содержание CX-Supervisor
Страница 1: ...CX Supervisor Software Cat No W10E EN 01 User Manual Software Release 3 1...
Страница 3: ...Copyright Notice 2...
Страница 16: ...15...
Страница 17: ...16...
Страница 27: ...Tip of the Day SECTION 1 Graphics Editor 26...
Страница 35: ...CX Supervisor Preferences SECTION 2 Pages 34...
Страница 79: ...Responding to Events SECTION 5 ActiveX Objects 78...
Страница 115: ...Printing the Graphics Library SECTION 7 Graphics Library 114...
Страница 181: ...Data Logging SECTION 11 Data Logging 180...
Страница 201: ...Examples SECTION 12 Databases 200...
Страница 243: ...Performance Monitor SECTION 16 Application Analysis Performance Monitor 242...
Страница 253: ...Using with Omron s CX Server OPC SECTION 17 Using CX Supervisor as an OPC Cli 252...
Страница 259: ...Creating a CX Supervisor Client application SECTION 18 Connecting to a remote CX 258...
Страница 263: ...Adding a Point Linked to a Parameter SECTION 19 Connecting to Omron Industrial 262...
Страница 271: ...Data Logging SECTION 20 Best Practices 270...
Страница 275: ...Configuring a Server PC running Windows NT or 2000 Appendix A Configuring a PC 274...
Страница 277: ...Appendix B Frequently Asked Questions 276...
Страница 296: ...Appendix B Frequently Asked Questions 295...
Страница 297: ...Appendix B Frequently Asked Questions 296...
Страница 298: ...Appendix B Frequently Asked Questions 297...
Страница 299: ...Appendix B Frequently Asked Questions 298...
Страница 333: ...Revision history 332...


