Configuring Field Associations
SECTION 12 Databases
189
12-4
Configuring Field Associations
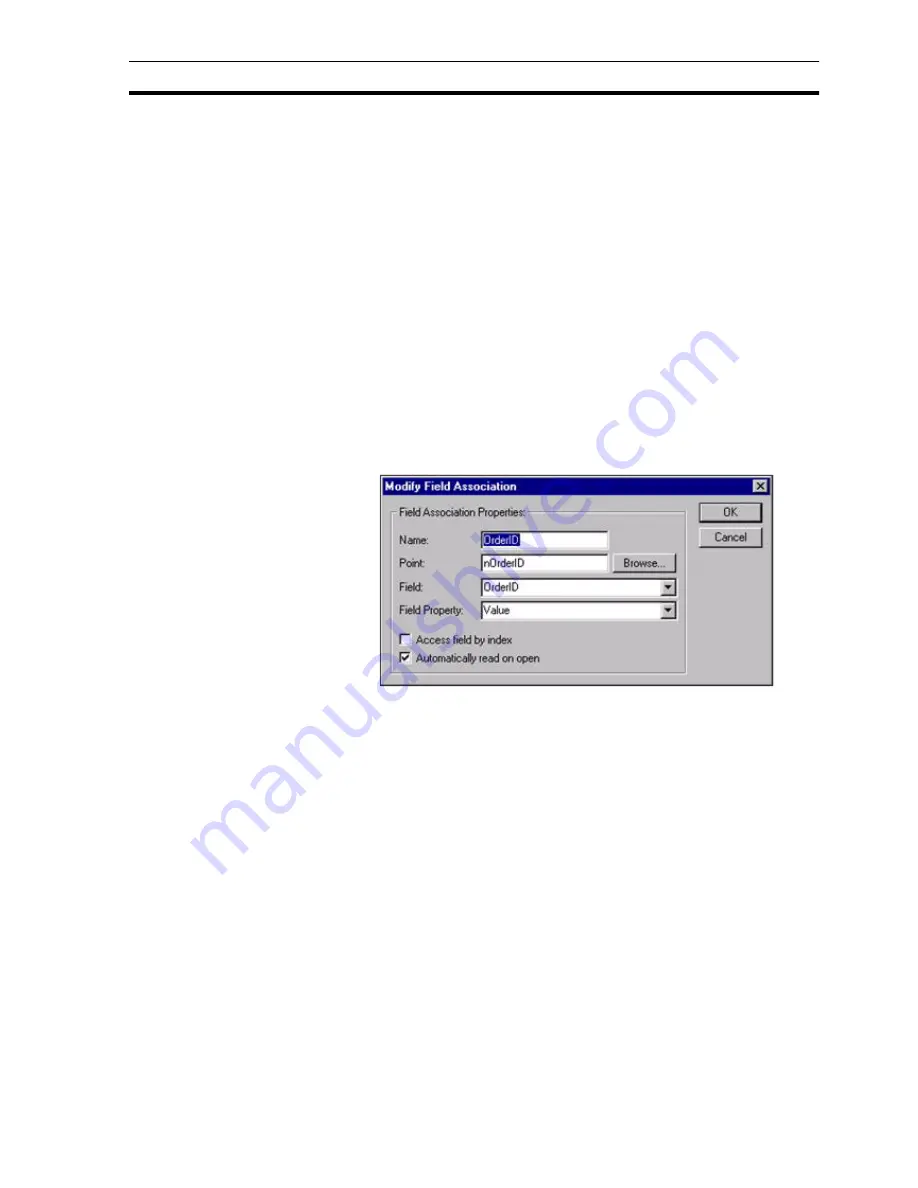
Field associations provide a means of connecting CX-Supervisor Points with
fields (i.e. columns of data) in a Recordset, thus enabling data transfers to be
made between Points and Records. By creating a Field Association for each
field in a record, data can easily be read from a record in the database to its
associated points, and written from the points to the current record in the
database. When a Recordset has been added to a Connection in the
Workspace, the right menu option 'Add Field…' will be enabled. Selecting this
option will invoke the following dialog box:
12-4-1 Name
A unique Field name will be automatically provided. This can be modified to
provide a more meaningful name if required.
12-4-2 Point
The name of the point that will be used in data transfers. The Browse button
may be used to select a current point, or add a new one.
12-4-3 Field
The name of the Recordset field to be associated with the above point. If the
Recordset is open, this list will automatically show all available fields.
12-4-4 Field Property
The type of information from the field to be transferred, the following options
are available:
Optimistic
Locked only when the Update() method is called, therefore
changes can be made to records without creating a lock,
conflicts have to be catered for because someone else might
have changed the record between the time you started editing
and the time you called Update().
Note:
If the Connection is open when a Recordset is added the Combo boxes for
'Table Name' and 'Server Query' will be automatically populated with valid
entries for the selected Database. When the 'Add Recordset…' dialog box is
closed an attempt will be made to open the newly configured Recordset.
Value
default - the assigned value of the field
Name
the name of the field / column title
Type
the fields Data Type
Содержание CX-Supervisor
Страница 1: ...CX Supervisor Software Cat No W10E EN 01 User Manual Software Release 3 1...
Страница 3: ...Copyright Notice 2...
Страница 16: ...15...
Страница 17: ...16...
Страница 27: ...Tip of the Day SECTION 1 Graphics Editor 26...
Страница 35: ...CX Supervisor Preferences SECTION 2 Pages 34...
Страница 79: ...Responding to Events SECTION 5 ActiveX Objects 78...
Страница 115: ...Printing the Graphics Library SECTION 7 Graphics Library 114...
Страница 181: ...Data Logging SECTION 11 Data Logging 180...
Страница 201: ...Examples SECTION 12 Databases 200...
Страница 243: ...Performance Monitor SECTION 16 Application Analysis Performance Monitor 242...
Страница 253: ...Using with Omron s CX Server OPC SECTION 17 Using CX Supervisor as an OPC Cli 252...
Страница 259: ...Creating a CX Supervisor Client application SECTION 18 Connecting to a remote CX 258...
Страница 263: ...Adding a Point Linked to a Parameter SECTION 19 Connecting to Omron Industrial 262...
Страница 271: ...Data Logging SECTION 20 Best Practices 270...
Страница 275: ...Configuring a Server PC running Windows NT or 2000 Appendix A Configuring a PC 274...
Страница 277: ...Appendix B Frequently Asked Questions 276...
Страница 296: ...Appendix B Frequently Asked Questions 295...
Страница 297: ...Appendix B Frequently Asked Questions 296...
Страница 298: ...Appendix B Frequently Asked Questions 297...
Страница 299: ...Appendix B Frequently Asked Questions 298...
Страница 333: ...Revision history 332...


