CHAPTER 23
• CLICK 301
189
Configuration Features
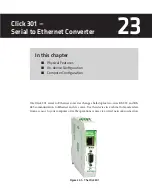
The faceplate of the Click 301 has three activity indicator LEDs:
˽
PWR (red) lights up when the device has power.
˽
TD (yellow) lights up when the device is transmitting data.
˽
RD (green) lights up when the device is receiving data.
The LEDs are also used to indicate operation modes, which will be discussed in the On-
device Configuration section of this chapter.
The faceplate also has a push-button labeled
Mode Switch
, which is used to cycle the Click
301 through operation modes. This will be discussed in the On-device Configuration sec-
tion of this chapter.
On-device Configuration
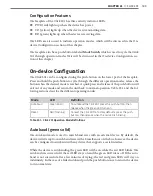
The Click 301 can be configured using the push-button on the lower part of the faceplate.
Press and hold the push-button to cycle through the different operation modes; release the
button when the desired mode is reached. A quick press and release of the push-button will
exit out of any mode and return the unit back to normal operation. Table 23.1 and the fol-
lowing sections describe the different operating modes.
Mode
LED
Definition
Autobaud
Green (solid)
To autobaud the Click 301, press the push-button, then
release when the green LED turns on.
Reset
Red (flashing)
To reset the Click 301 to factory defaults, press the push-
button, then release when the red LED is blinking.
Table 23.1 – Click 301 Operation Mode Definitions
Autobaud (green solid)
The Autobaud mode is used to match baud rates with an external device. By default, the
device will attempt to match baud rates with a SmartSensor on the bus; however, the device
can be configured to autobaud with any device that supports a serial interface.
While the device is autobauding, the green LED will be on while the red LED blinks. The
autobaud was successful if the red LED stays on and the green LED turns off. If the auto-
baud is not successful after a few minutes of trying, the red and green LEDs will stay on
indefinitely. In the case of a failed autobaud, push the push-button once to return the device
to its normal state.
Summary of Contents for Click 100
Page 1: ...Click 100 400 Series USER GUIDE...
Page 11: ......
Page 17: ......
Page 27: ......
Page 41: ......
Page 43: ......
Page 79: ......
Page 129: ......
Page 145: ......
Page 161: ......
Page 175: ......
Page 183: ......
Page 187: ......
Page 207: ......
Page 219: ......
Page 225: ......
Page 245: ......
Page 259: ......
Page 260: ...www wavetronix com...


