CHAPTER 4
• CLICK 104
69
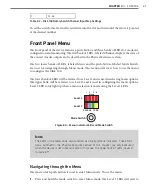
Press and release
Configuration parameter selected;
autobaud commences (will show
intermediate LED states); auto-
baud finishes and normal operation
resumes
Table 8.3 – Menu Operation Example
Inactivity of one minute on the mode switch will exit menu mode.
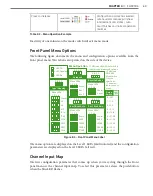
Front Panel Menu Options
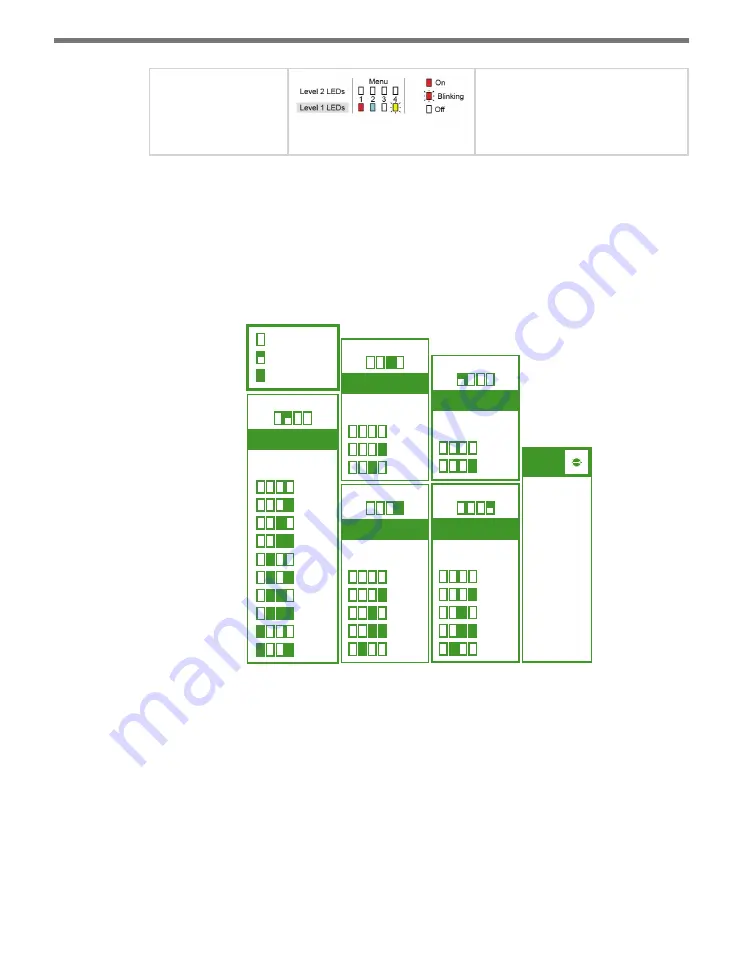
The following figure documents the menu and configuration options available from the
front panel menu. This label is also printed on the side of the device.
Input Mapping
Menu LEDs
Cancel
1-4
5-8
9-12
13-16
17-20
21-24
25-28
29-32
33-36
1 2 3 4
R B G Y
Rotary
Switch
= SW
0
= 1-4
= 5-8
= 9-12
= 13-16
= 17-20
= 21-24
= 25-28
= 29-32
= 33-36
1
2
3
4
5
6
7
8
9
Bus 1 Baud Rate
R B G Y
Menu LEDs
Cancel
9600
19200
38400
57600
1 2 3 4
Bus 2 Baud Rate
R B G Y
Menu LEDs
Cancel
9600
19200
38400
57600
1 2 3 4
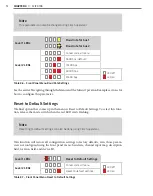
Autobaud
R B G Y
Menu LEDs
Cancel
Bus 1
Bus 2
1 2 3 4
Reset to Default
= LED Off
= LED Flashing
= LED On
R B G Y
Menu LEDs
Cancel
Reset
1 2 3 4
Menu Operation
•
PUSH and HOLD Mode Switch to
cycle through menus and options.
•
PUSH and
RELEASE
Mode Switch
to make
selections.
•
1 minute of
inactivity exits
menu.
5 4 3 2 1
09
8
7
6
Figure 8.5 – Front Panel Menu Label
The menu options are displayed on the Level 1 LEDs (multicolored) and the configuration
parameters are displayed on the Level 2 LEDs (all red).
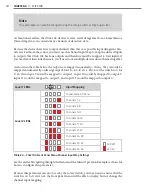
Channel Input Map
The first configuration parameter that comes up when you’re cycling through the front
panel menu is the channel input map. To select this parameter, release the push-button
when the blue LED flashes.
Summary of Contents for Click 100
Page 1: ...Click 100 400 Series USER GUIDE...
Page 11: ......
Page 17: ......
Page 27: ......
Page 41: ......
Page 43: ......
Page 79: ......
Page 129: ......
Page 145: ......
Page 161: ......
Page 175: ......
Page 183: ......
Page 187: ......
Page 207: ......
Page 219: ......
Page 225: ......
Page 245: ......
Page 259: ......
Page 260: ...www wavetronix com...

