5 Printing from Windows
254 Printing with Extended Print Functionality
y
When “Auto” is selected in the “Source” drop down menu, the paper is automatically
selected according to the printed document size.
y
“Print both sides of page” is available only when 2-Sided printing is enabled at the
Finishing tab.
3
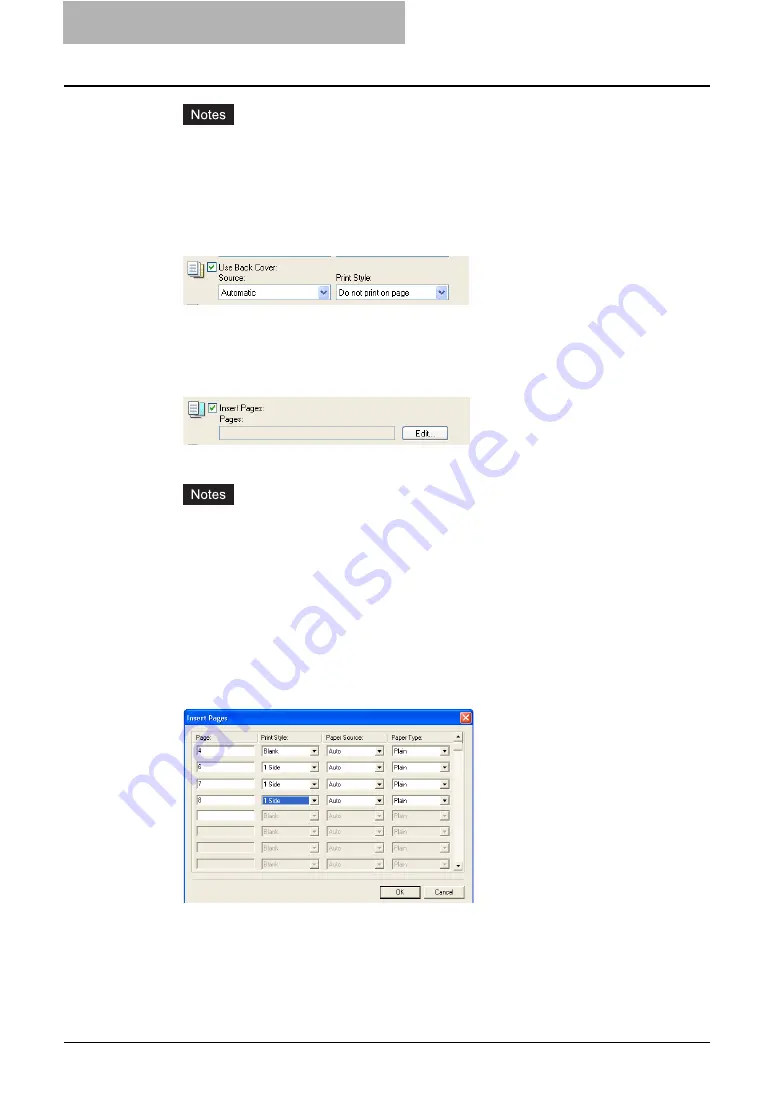
To print or insert a back cover, check the “Use Back Cover” box
and set the “Source” and “Print Style” options that you require.
y
How to set the Source and Print Style options are the same as “Use Front Cover”
option.
4
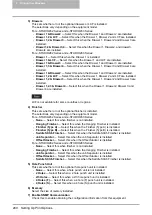
To print or insert sheets between the pages, check the “Insert
Pages” box and click [Edit...].
y
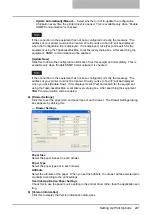
The Insert Pages dialog box appears.
y
Up to 50 pages can be inserted.
y
When Insert Pages printing is performed using the PSL3 printer driver from an appli-
cation that can create the PS command directly, the interleaving sheets may not be
inserted between the designated pages. In that case, disable the “Use PostScript
Passthrough” option in the PostScript Settings dialog box.
5
Enter the page numbers the sheet will be inserted in each “Page”
field and select the “Print Style”, “Paper Source”, and “Paper Type”
options as you require. Then click [OK].Select the Use Tab Paper
check box and make settings when you want to insert the tab paper.
6
Set any other print options you require and click [OK].
7
Click [OK] or [Print] to send the print job.
y
A front cover and back cover are printed or inserted for output.
Summary of Contents for e-studio202L
Page 1: ...MULTIFUNCTIONAL DIGITAL SYSTEMS Printing Guide ...
Page 2: ......
Page 10: ......
Page 14: ...12 INDEX 349 ...
Page 20: ......
Page 200: ......
Page 332: ......
Page 354: ......


