Various menu settings
Icon name
Function
Factory setting
Remark
Reference
page
Safety
Connection
Sets the admin setting of
response behaviours when
the Pressure Alarm, the Air
Bubble Detected Alarm and
the Back Flow Alarm are
issued during circulation.
Over Pressure P1: Message Only
Over Pressure P2: Message Only
Low Pressure P1: Message Only
Low Pressure P2: Message Only
Air Bubble: Message Only
Back Flow: Message Only
The setting will take
effect after restarting.*
page 105
Alarm Setup
List
Displays the admin setting of
each menu in a list.
The value set at each menu of the
admin setup is displayed in a list.
The setting will take
effect after restarting.*
page 105
Auto-Priming
Sets the on time/off time and
on time motor speed during
auto-priming.
On time: 5.0 s
Off time: 1.0 s
Motor Speed: 3000 RPM
The setting will take
effect instantly.
page 106
Coast
Speed
Sets the coast speed.
Coast speed: 1250 RPM
The setting will take
effect instantly.
page 108
Date & Time
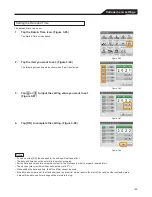
Sets the date and time.
The date and time were set at the
time of manufacture. (Japan time)
The setting will take
effect instantly.
page 109
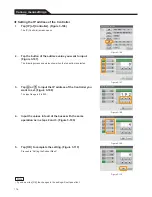
LAN
Sets the connection
environment of the LAN.
PC/Server
IP: 0.0.0.0
MAC: 0-0-0-0-0-0
Port: 0
DHCP: On
Controller
IP: 0.0.0.0
Subnet Mask: 0.0.0.0
On/Off: Off
The setting will take
effect instantly.
page 110
CDI
Sets the on/off status of the
communication with CDI.
On/Off: Off
The setting will take
effect instantly.
page 116
Language
Changes the displayed
language.
Language (English/
): English
The setting will take
effect after restarting.
page 118
Volume
Brightness
Adjusts the alarm volume
and brightness on the LCD
touch panel display.
Volume (Large/Middle/Small):
Large
Brightness (Light/Moderate/Dark):
Light
The setting will take
effect instantly.
page 118
* The setting can also take effect through the method described in “Alarm Setup List” (page 92).
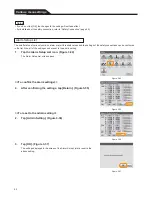
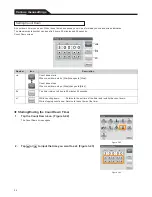
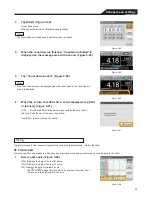
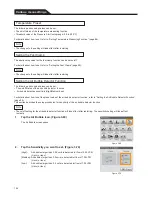
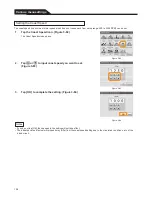
The admin setting of the threshold value (setup range: 0.0 to 9.9 LPM (L/min)) when the Flow Alarm is issued can be set.
For details about how to set, refer to “Setting Flow Alarms” (page 84).
• The changes to the setting will take effect after restarting.
102
Note
Flow Preset
Summary of Contents for CAPIOX EBS Circuit with X coating
Page 1: ...CAPIOX Emergency Bypass System Instructions for use...
Page 4: ...CAPIOX EBS Circuit with X coating Instructions for use...
Page 8: ...Structure Structure...
Page 25: ...EBS and X coating are trademarks of TERUMO CORPORATION 2019 XX...
Page 26: ...CAPIOX EBS Cannula Kit with X coating Instructions for use...
Page 29: ...CAPIOX Centrifugal Pump Controller SP 200 Instructions for use...
Page 175: ...Memo 146...
Page 176: ...147 Memo...


