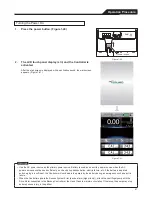
Operation Procedure
Using the Fast Clamp Arm
1.
Confirm that the knobs (two places) of the Fast Clamp Arm
are secured. (Figure 1-25)
If the knobs are not secured, the Fast clamp holder may move and it may
cause the Fast Clamp fall when you attach the Fast Clamp.
Figure 1-25
2.
Attach the Fast Clamp Arm to the IV pole of the
Cart (Figure 1-26
a
), and secure it with the knob.
(Figure 1-26
b
)
• The Fast Clamp Arm is secured.
Figure 1-26
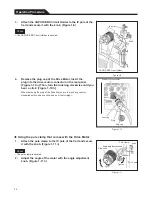
3.
Attach the Fast Clamp to the Fast Clamp Arm
(Figure 1-27
a
), and secure it with the knob.
(Figure 1-27
b
)
• The Fast Clamp is secured.
Figure 1-27
4.
Insert the plug of the Fast Clamp into the fast clamp
connector on the rear panel. (Figure 1-28)
Align the plug of the Fast Clamp with the slot of the fast clamp connector, and
insert the plug until you hear a click.
Do not forcefully insert the plug.
Figure 1-28
40
Check
Check
Knob
Fast clamp holder
Fast Clamp Arm
Knob
IV pole
Knob
Fast
Clamp
Knob
Fast clamp connector
Plug
Summary of Contents for CAPIOX EBS Circuit with X coating
Page 1: ...CAPIOX Emergency Bypass System Instructions for use...
Page 4: ...CAPIOX EBS Circuit with X coating Instructions for use...
Page 8: ...Structure Structure...
Page 25: ...EBS and X coating are trademarks of TERUMO CORPORATION 2019 XX...
Page 26: ...CAPIOX EBS Cannula Kit with X coating Instructions for use...
Page 29: ...CAPIOX Centrifugal Pump Controller SP 200 Instructions for use...
Page 175: ...Memo 146...
Page 176: ...147 Memo...

