326
Chapter 10
Testing Lipsync
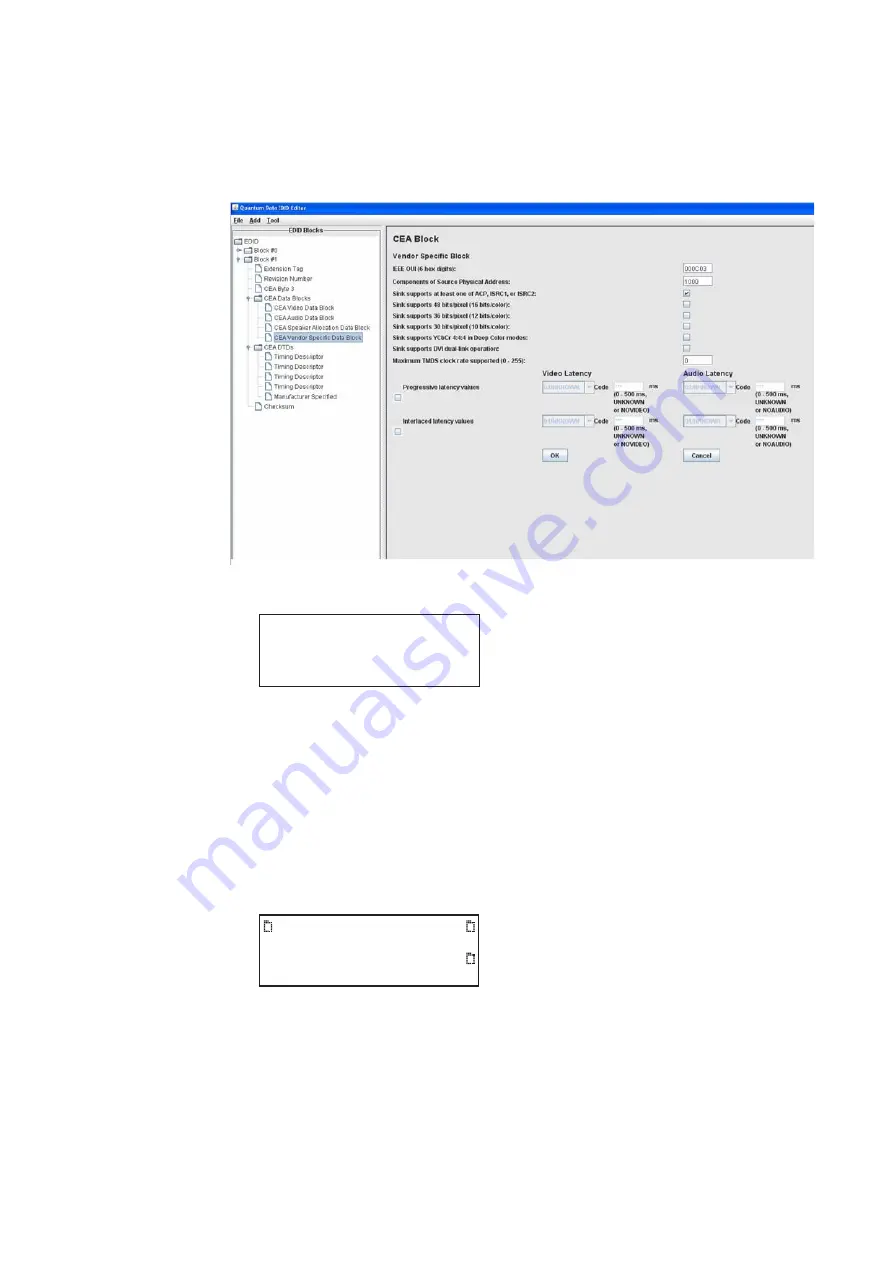
emulating an EDID on the analyzer. In the EDID Editor, the Vendor Specific Block
screen with the
Video Latency
and
Audio Latency
fields is shown below:
3. Press the
Interface
key repeatedly until the following menu appears:
4. Choose the connector to which the source device is connected by pressing the
adjacent soft key.
5. Connect an HDMI-to-HDMI cable between the HDMI IN connector on the analyzer and
HDMI Port on the source device. The EDID is read from emulated display on the
analyzer, and lipsync latency values are processed by the source device.
6. From source device, generate supplied lipsync test image.
7. On the 882, press the
Tools
key. The
Tools
menu appears on the 882’s display as
shown below.
HDMI IN 1
HDMI IN 2
*
System
Sequence
Probe
AFC
Analyzer
Reports
ImgShift
Summary of Contents for 881
Page 1: ...881 882 Video Test Instrument User Guide 882E for HDMI ...
Page 12: ...10 Contents ...
Page 50: ...38 Chapter 1 Getting Started ...
Page 84: ...72 Chapter 2 Testing Video Displays ...
Page 99: ...882 Video Test Instrument User Guide Rev A 35 87 ...
Page 102: ...90 Chapter 3 Administrative Tasks ...
Page 107: ...882 Video Test Instrument User Guide Rev A 35 95 ...
Page 216: ...204 Chapter 5 Working with Formats ...
Page 248: ...236 Chapter 7 Working with Images ...
Page 264: ...252 Chapter 8 Working with Test Sequences ...
Page 382: ...40 Chapter 11 Testing EDID for HDMI 2 Expand the EDID Block in the navigation view ...
Page 446: ...104 Chapter 12 CEC Interactive Troubleshooting Environment ITE ...
Page 493: ...882 Video Test Instrument User Guide Rev A 35 151 ...
Page 591: ...882 Video Test Instrument User Guide Rev A 35 213 Commands by name ...
Page 687: ...882 Video Test Instrument User Guide Rev A 35 309 Example DVIC 23 FMTU ...
Page 1018: ...580 Appendix B Image Reference The EMITest5 image is shown below ...
Page 1094: ...656 Appendix B Image Reference ...
Page 1124: ...686 Appendix C Error Messages ...
Page 1140: ...702 Appendix D Format Reference ...


