


Creating and Editing Control Objects
SECTION 4 Objects
59
1, 2, 3…
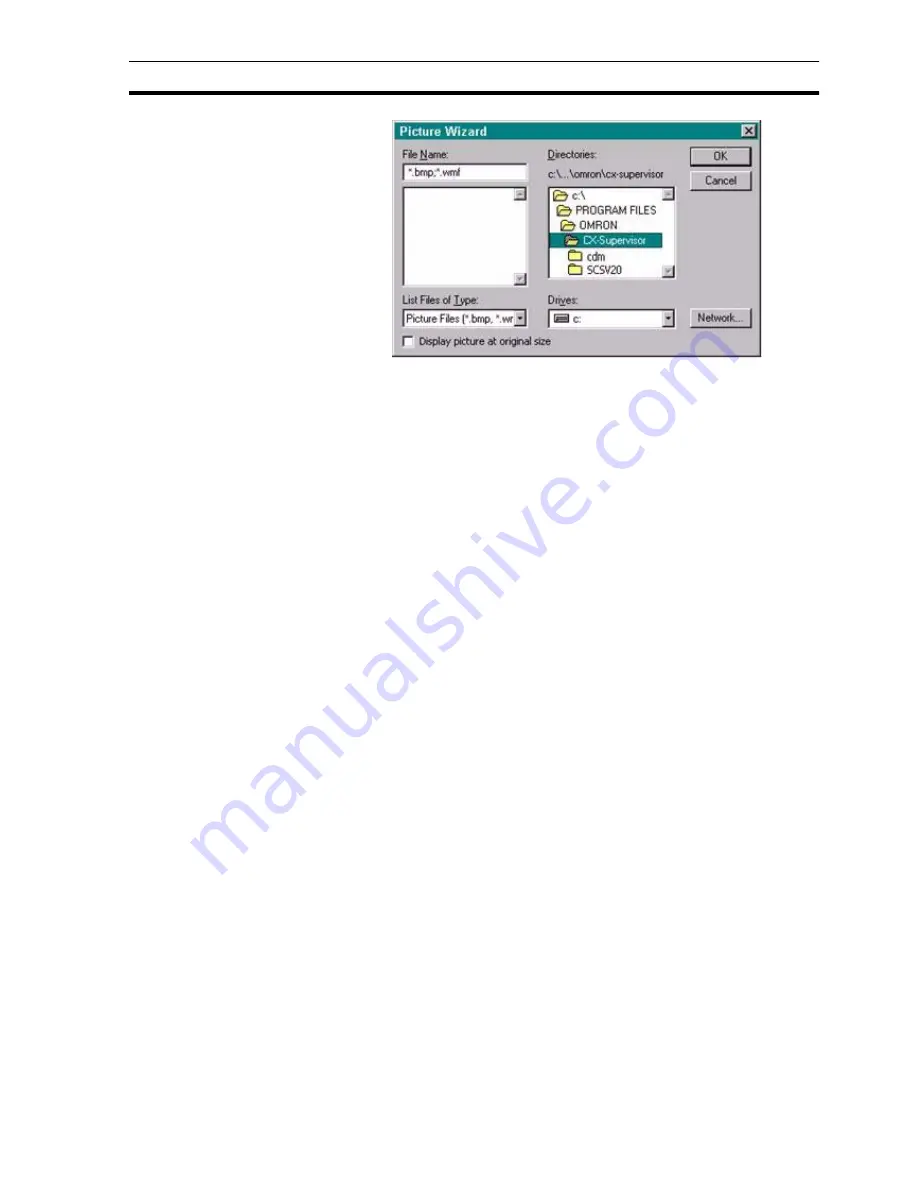
1. Locate the drive and directory where the desired picture is stored using
the Directories: and Drives: controls.
2. Select the file type and then the picture from the list presented.
3. Use the Display picture at original size setting to specify whether the
picture is to be displayed at original size or scaled.
4. Click the OK button to load the page.
Note:If the PC installation of CX-Supervisor is on a networked machine, a
Network button is added to the dialog box. For further information on the
function of the Network dialog box, refer to the Microsoft Windows User Guide.
An image can be selected and resized just like many other graphical objects.
4-4-3-1
Transparency
Picture objects with .gif and .bmp file types support optional transparency. By
clicking the Set Transparent Colour button on the Control toolbar and then
clicking on a colour on the image you can select the colour that will appear
transparent. The Transparency button on the same toolbar toggles
transparency on and off.
4-4-3-2
Resampling
The
Resample Pictures
options available from the
Edit
menu can be used to
reduce the file size of the CX-Supervisor project and pages by intelligently re-
saving picture objects. It is most efficient when a large source image has been
resized on the page to be much smaller than the original.
4-4-3-3
Metafile Conversion to CX-Supervisor Objects
Picture objects with metafiles can be converted into CX-Supervisor page
objects. This allows you to break apart the image and animate its sub-parts.
Both Windows Metafiles (*.wmf) and Enhanced Metafiles (*.emf) can be
loaded into a picture object and then converted to CX-Supervisor objects.
To start the conversion, select a picture object containing a metafile image and
choose Convert to CX-Supervisor Objects from the Edit menu. The picture
object will then be replaced with the corresponding CX-Supervisor objects.
Note:
Resizing a previously resampled picture to much larger dimensions may cause
the image to become 'blocky'. In this case it is recommended to reload the
original image file, and then resize / resample as required
Note:
For more complex metafiles this may take a few moments.
Summary of Contents for CX-Supervisor
Page 1: ...CX Supervisor Software Cat No W10E EN 01 User Manual Software Release 3 1...
Page 3: ...Copyright Notice 2...
Page 16: ...15...
Page 17: ...16...
Page 27: ...Tip of the Day SECTION 1 Graphics Editor 26...
Page 35: ...CX Supervisor Preferences SECTION 2 Pages 34...
Page 79: ...Responding to Events SECTION 5 ActiveX Objects 78...
Page 115: ...Printing the Graphics Library SECTION 7 Graphics Library 114...
Page 181: ...Data Logging SECTION 11 Data Logging 180...
Page 201: ...Examples SECTION 12 Databases 200...
Page 243: ...Performance Monitor SECTION 16 Application Analysis Performance Monitor 242...
Page 253: ...Using with Omron s CX Server OPC SECTION 17 Using CX Supervisor as an OPC Cli 252...
Page 259: ...Creating a CX Supervisor Client application SECTION 18 Connecting to a remote CX 258...
Page 263: ...Adding a Point Linked to a Parameter SECTION 19 Connecting to Omron Industrial 262...
Page 271: ...Data Logging SECTION 20 Best Practices 270...
Page 275: ...Configuring a Server PC running Windows NT or 2000 Appendix A Configuring a PC 274...
Page 277: ...Appendix B Frequently Asked Questions 276...
Page 296: ...Appendix B Frequently Asked Questions 295...
Page 297: ...Appendix B Frequently Asked Questions 296...
Page 298: ...Appendix B Frequently Asked Questions 297...
Page 299: ...Appendix B Frequently Asked Questions 298...
Page 333: ...Revision history 332...


