


Translating User Defined Text with the Translation Tool SECTION 15 Multilingual Fea-
229
The Translation Tool can also be launched manually from the Start button, and
the "Default.UDT" for the required project loaded.
The Translation Tool can be distributed to translators licence free, and an
installation package can be found on the original CD in the folder "Translation
Tool"
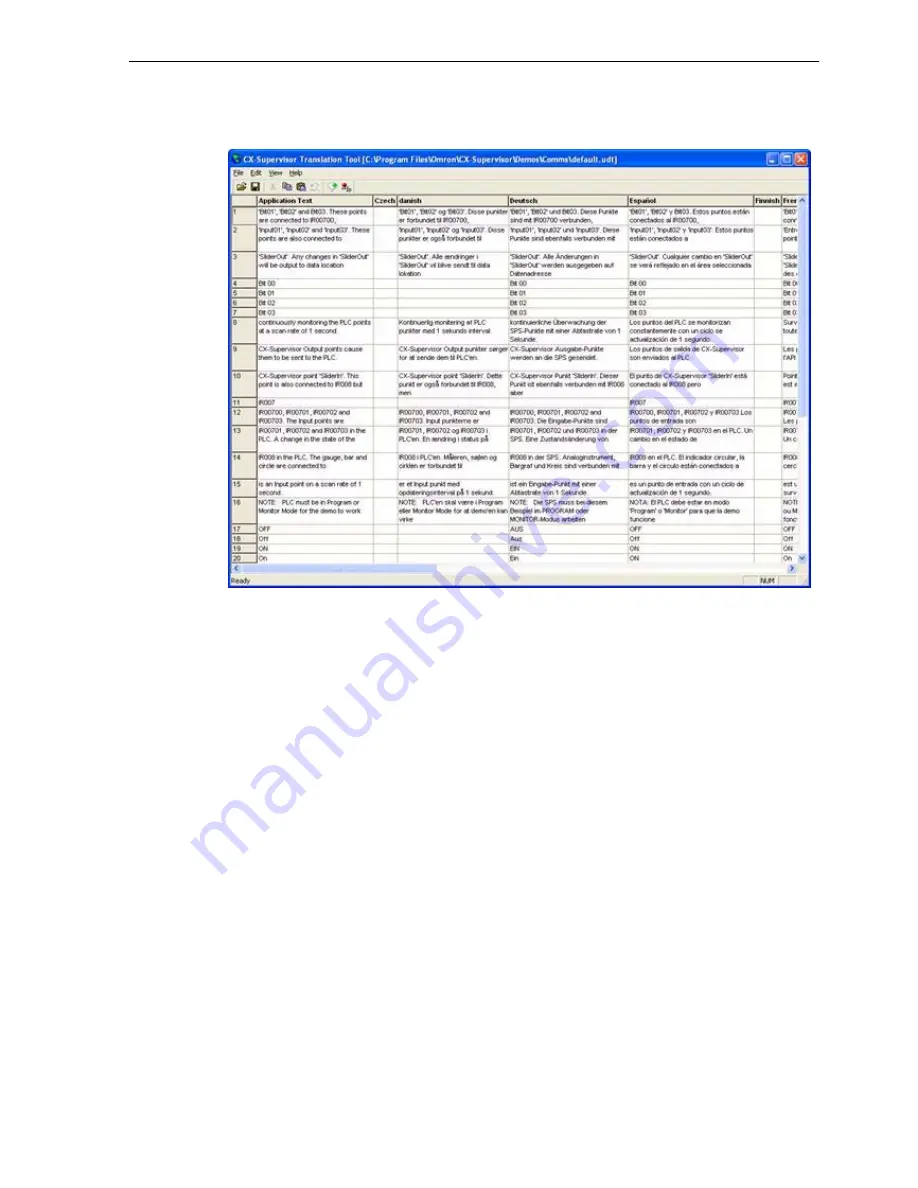
The User Defined Text for the application is shown in the first column, sorted
alphabetically. A column is shown for each existing translated UDT file. To add
new translations, click the Add New Language toolbar button and select the
required language. Now simply select each cell and type the required
translation. Non translatable text (like numbers, product names or formatting
e.g. "1.0", "Microsoft Windows" or "###.###") can be left blank to use the
original translation, or Copy and Pasted from other columns.
When completed, exit the Translation Tool and save the changes. The User
Defined Text will now be loaded when you change languages at Runtime.
If some development text with translations is changed or corrected the
translations will be shown in Red as below, as if the Application text is missing.
Where there are translations for text that is not in the Application Text, the
whole row is shown in Red. To correct this problem either copy the old
translations to the correct row, or just delete the unwanted translation. When
all columns are corrected you can save and close the Translation Tool. When
reopened the highlighted rows have been deleted. Alternatively you can delete
an entire highlighted row by right clicking on the row header (with the row
number) and selecting Delete Selected Row.
Where older .USL files exist, they will be loaded if no corresponding UDT file
exists, and converted to Unicode. When saving, new Unicode UDT files are
always written.
Summary of Contents for CX-Supervisor
Page 1: ...CX Supervisor Software Cat No W10E EN 01 User Manual Software Release 3 1...
Page 3: ...Copyright Notice 2...
Page 16: ...15...
Page 17: ...16...
Page 27: ...Tip of the Day SECTION 1 Graphics Editor 26...
Page 35: ...CX Supervisor Preferences SECTION 2 Pages 34...
Page 79: ...Responding to Events SECTION 5 ActiveX Objects 78...
Page 115: ...Printing the Graphics Library SECTION 7 Graphics Library 114...
Page 181: ...Data Logging SECTION 11 Data Logging 180...
Page 201: ...Examples SECTION 12 Databases 200...
Page 243: ...Performance Monitor SECTION 16 Application Analysis Performance Monitor 242...
Page 253: ...Using with Omron s CX Server OPC SECTION 17 Using CX Supervisor as an OPC Cli 252...
Page 259: ...Creating a CX Supervisor Client application SECTION 18 Connecting to a remote CX 258...
Page 263: ...Adding a Point Linked to a Parameter SECTION 19 Connecting to Omron Industrial 262...
Page 271: ...Data Logging SECTION 20 Best Practices 270...
Page 275: ...Configuring a Server PC running Windows NT or 2000 Appendix A Configuring a PC 274...
Page 277: ...Appendix B Frequently Asked Questions 276...
Page 296: ...Appendix B Frequently Asked Questions 295...
Page 297: ...Appendix B Frequently Asked Questions 296...
Page 298: ...Appendix B Frequently Asked Questions 297...
Page 299: ...Appendix B Frequently Asked Questions 298...
Page 333: ...Revision history 332...


