


Alarm Reporting In Runtime
SECTION 8 Alarms
123
8-9-1
Alarm Acknowledge
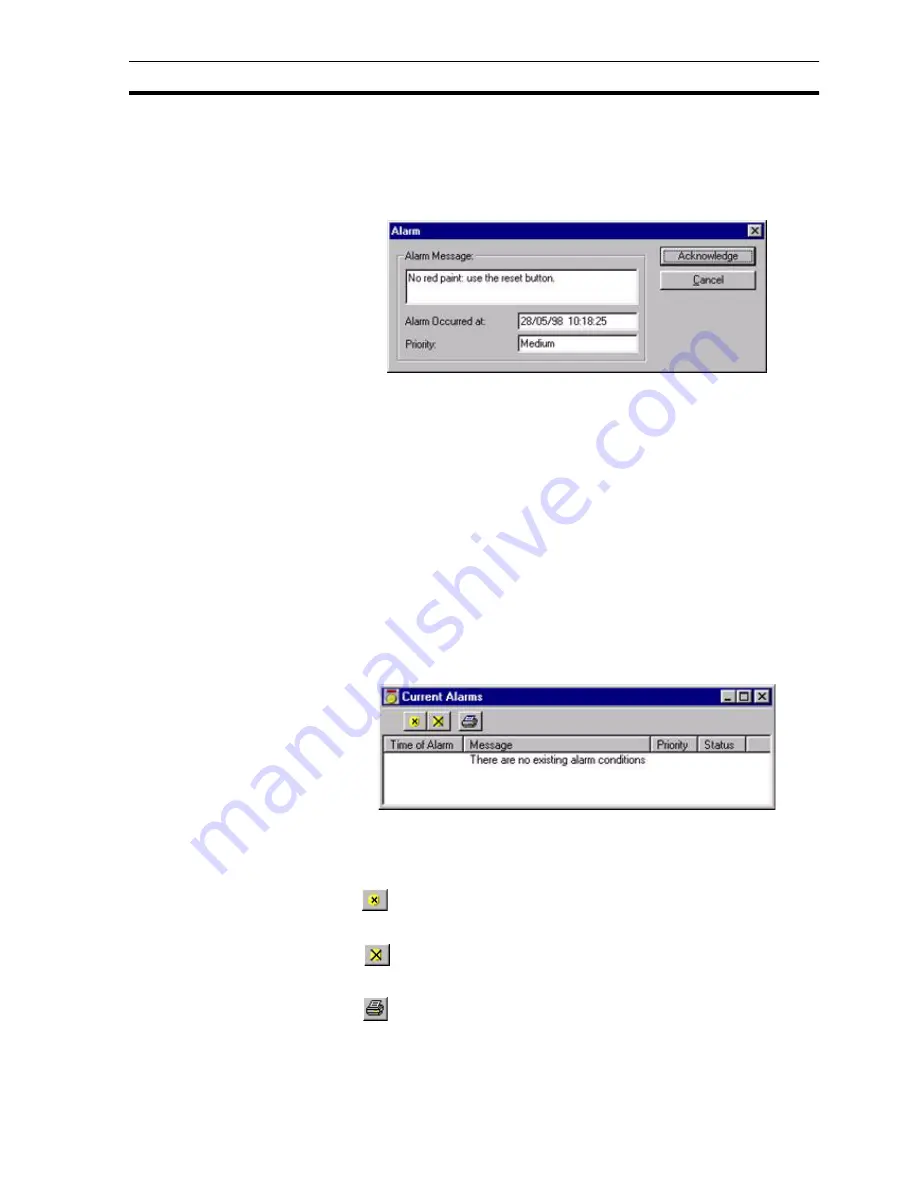
Whenever an alarm is raised during a runtime application, a confirmation
dialog box is optionally displayed requesting acknowledgement of the alarm.
The dialog box shows the alarm message, priority, and the date and time the
alarm was raised. Click the Acknowledge button to close the dialog box.
Alarm messages are queued so that as each message is acknowledged, the
next in the queue becomes visible. If a new alarm occurs which has higher or
equal priority the details are updated to show this newer/more important alarm
first. The dialog box disappears when there are no further alarm messages to
be reported. Each acknowledgement is logged in the alarm history log with the
login name of the current user. An unacknowledged alarm does not affect a
runtime application.
8-9-2
Current Alarms
A list of current alarms can be viewed by accessing the
Current Alarms
dialog box. (A "current" alarm is one which has been raised but is not yet
cleared and acknowledged.) The current alarm status viewer can be accessed
in a variety of ways, and is dependant on the setup of the runtime application.
Some applications may allow access to the dialog box via the context-
sensitive floating menu, while others may allow access via a button. Refer to
chapter 6, Projects or chapter 9, Animation as appropriate. The
Current
Alarms
dialog box is as follows:
The Current Alarm dialog box always shows the alarm messages listed in
order with the highest priority at the top.
The widths of the alarm fields can be widened or narrowed as required using
the mouse to drag the column boundaries.
The
button acknowledges the alarm which is currently highlighted in the
alarm status dialog box. This has no effect if the alarm has already been
acknowledged.
The
button unconditionally acknowledges all outstanding alarms. Any
unacknowledged alarms become acknowledged. This has no effect on alarms
that are already acknowledged.
The
button causes the messages in the alarm status dialog box to be
printed. Before printing, ensure that the printer has been set up correctly.
Summary of Contents for CX-Supervisor
Page 1: ...CX Supervisor Software Cat No W10E EN 01 User Manual Software Release 3 1...
Page 3: ...Copyright Notice 2...
Page 16: ...15...
Page 17: ...16...
Page 27: ...Tip of the Day SECTION 1 Graphics Editor 26...
Page 35: ...CX Supervisor Preferences SECTION 2 Pages 34...
Page 79: ...Responding to Events SECTION 5 ActiveX Objects 78...
Page 115: ...Printing the Graphics Library SECTION 7 Graphics Library 114...
Page 181: ...Data Logging SECTION 11 Data Logging 180...
Page 201: ...Examples SECTION 12 Databases 200...
Page 243: ...Performance Monitor SECTION 16 Application Analysis Performance Monitor 242...
Page 253: ...Using with Omron s CX Server OPC SECTION 17 Using CX Supervisor as an OPC Cli 252...
Page 259: ...Creating a CX Supervisor Client application SECTION 18 Connecting to a remote CX 258...
Page 263: ...Adding a Point Linked to a Parameter SECTION 19 Connecting to Omron Industrial 262...
Page 271: ...Data Logging SECTION 20 Best Practices 270...
Page 275: ...Configuring a Server PC running Windows NT or 2000 Appendix A Configuring a PC 274...
Page 277: ...Appendix B Frequently Asked Questions 276...
Page 296: ...Appendix B Frequently Asked Questions 295...
Page 297: ...Appendix B Frequently Asked Questions 296...
Page 298: ...Appendix B Frequently Asked Questions 297...
Page 299: ...Appendix B Frequently Asked Questions 298...
Page 333: ...Revision history 332...


