


Creating a New Alarm
SECTION 8 Alarms
118
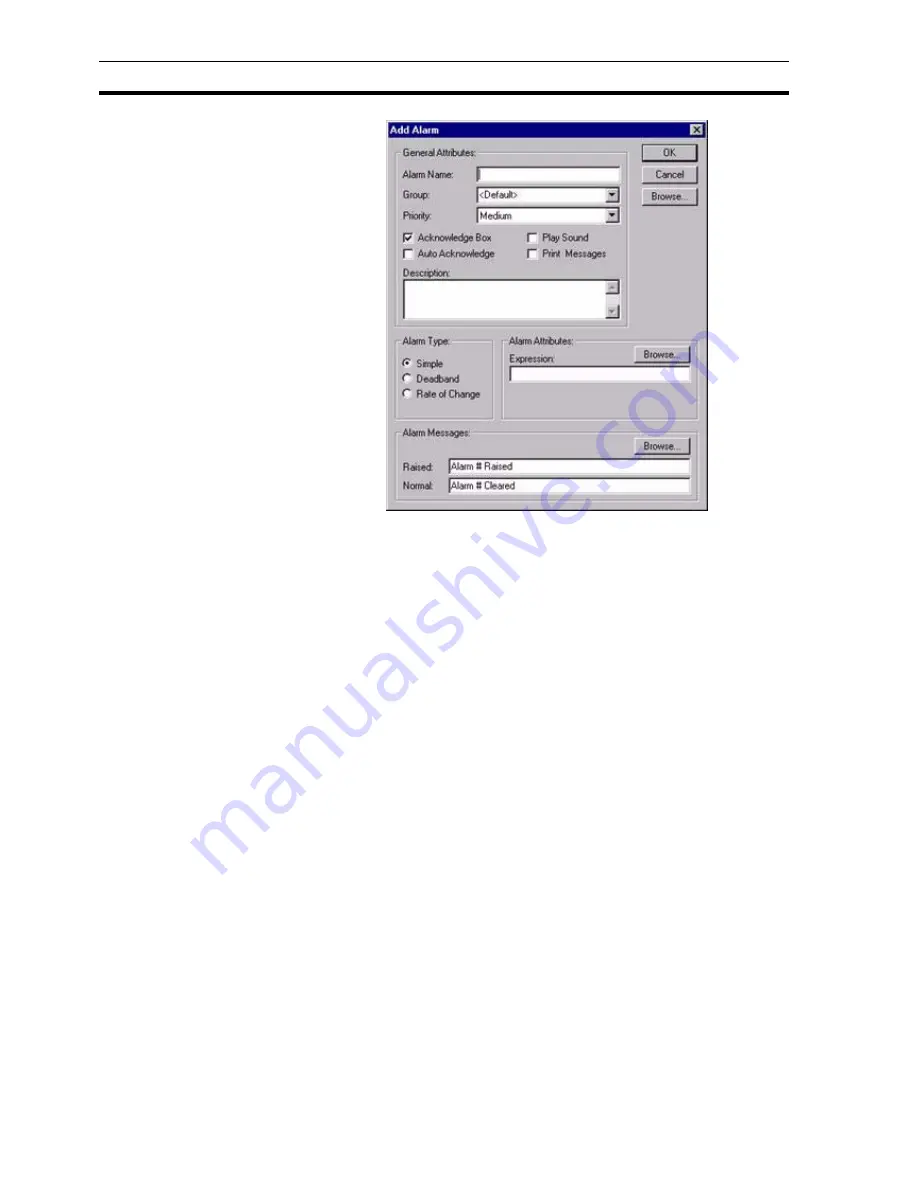
When all the information has been provided for the new alarm, selecting the
OK button commits the new alarm to the alarms database, while the Cancel
button aborts this add operation.
8-4-1
Alarm Header Information
The name of the alarm is entered in the Name: field. The alarm name can be
constructed of up to 20 alphanumeric characters. Any other characters,
including spaces, generate an audible error, or an Invalid Alarm Name entered
message. This field is visible from the Alarm Editor dialog box.
The group to which this alarm is added is selected from the Group: field. To
create a new group name, simply type the name of the new group in the
Group: field. The use of alarm groups allows filtering of alarm messages by
group name.
The priority assigned to the alarm is selected from the Priority: field.
The
Display Alarm Acknowledge
dialog box setting determines whether the
Acknowledge Alarm dialog box opens in runtime when the alarm occurs. The
dialog box notifies the operator of the alarm condition and allows the operator
to acknowledge the alarm. The default value is True.
Activating the Auto Acknowledge Alarm setting causes these messages to be
acknowledged without any operator action. Refer to chapter 8, Alarm
Acknowledge.
Note:
The short-cut keyboard combinations for Cut, Copy and Paste operations are
valid within the Add Alarm dialog box. Highlight part or all of a field and type
<Ctrl>+X to cut the text or <Ctrl>+C to copy the text. Insert the cursor at the
desired field and type <Ctrl>+V to paste the text. Since the cut and copy
operations store the information in the Windows Clipboard, it may be pasted to
another dialog box or application.
Summary of Contents for CX-Supervisor
Page 1: ...CX Supervisor Software Cat No W10E EN 01 User Manual Software Release 3 1...
Page 3: ...Copyright Notice 2...
Page 16: ...15...
Page 17: ...16...
Page 27: ...Tip of the Day SECTION 1 Graphics Editor 26...
Page 35: ...CX Supervisor Preferences SECTION 2 Pages 34...
Page 79: ...Responding to Events SECTION 5 ActiveX Objects 78...
Page 115: ...Printing the Graphics Library SECTION 7 Graphics Library 114...
Page 181: ...Data Logging SECTION 11 Data Logging 180...
Page 201: ...Examples SECTION 12 Databases 200...
Page 243: ...Performance Monitor SECTION 16 Application Analysis Performance Monitor 242...
Page 253: ...Using with Omron s CX Server OPC SECTION 17 Using CX Supervisor as an OPC Cli 252...
Page 259: ...Creating a CX Supervisor Client application SECTION 18 Connecting to a remote CX 258...
Page 263: ...Adding a Point Linked to a Parameter SECTION 19 Connecting to Omron Industrial 262...
Page 271: ...Data Logging SECTION 20 Best Practices 270...
Page 275: ...Configuring a Server PC running Windows NT or 2000 Appendix A Configuring a PC 274...
Page 277: ...Appendix B Frequently Asked Questions 276...
Page 296: ...Appendix B Frequently Asked Questions 295...
Page 297: ...Appendix B Frequently Asked Questions 296...
Page 298: ...Appendix B Frequently Asked Questions 297...
Page 299: ...Appendix B Frequently Asked Questions 298...
Page 333: ...Revision history 332...


