


Quick creation of many points
SECTION 3 Points
44
To select a range click on a point to mark the start of the range and click again
with the <SHIFT> key down to mark the end.
To individually select more than one point click while holding the <CTRL> key
down.
3-7
Quick creation of many points
CX-Supervisor supports up to 8,000 points, which could take much time to
create. Within the Point Editor you can use Copy/Paste which helpfully
increments the point name automatically (BoilerTemp1 becomes
BoilerTemp2, BoilerTemp3 etc) but you still have to edit each point to
configure the PLC address and possibly other information. Using the Copy
and Paste functions, Point data can quickly be edited and created for example
in grid form using Excel. This can prove extremely quick when the design uses
contiguous addresses.
1, 2, 3…
1. Open the
Point Editor
.
2. Select the points to edit, or a single point to act as a template and
Copy
to the Windows Clipboard
3. Start
Excel
.
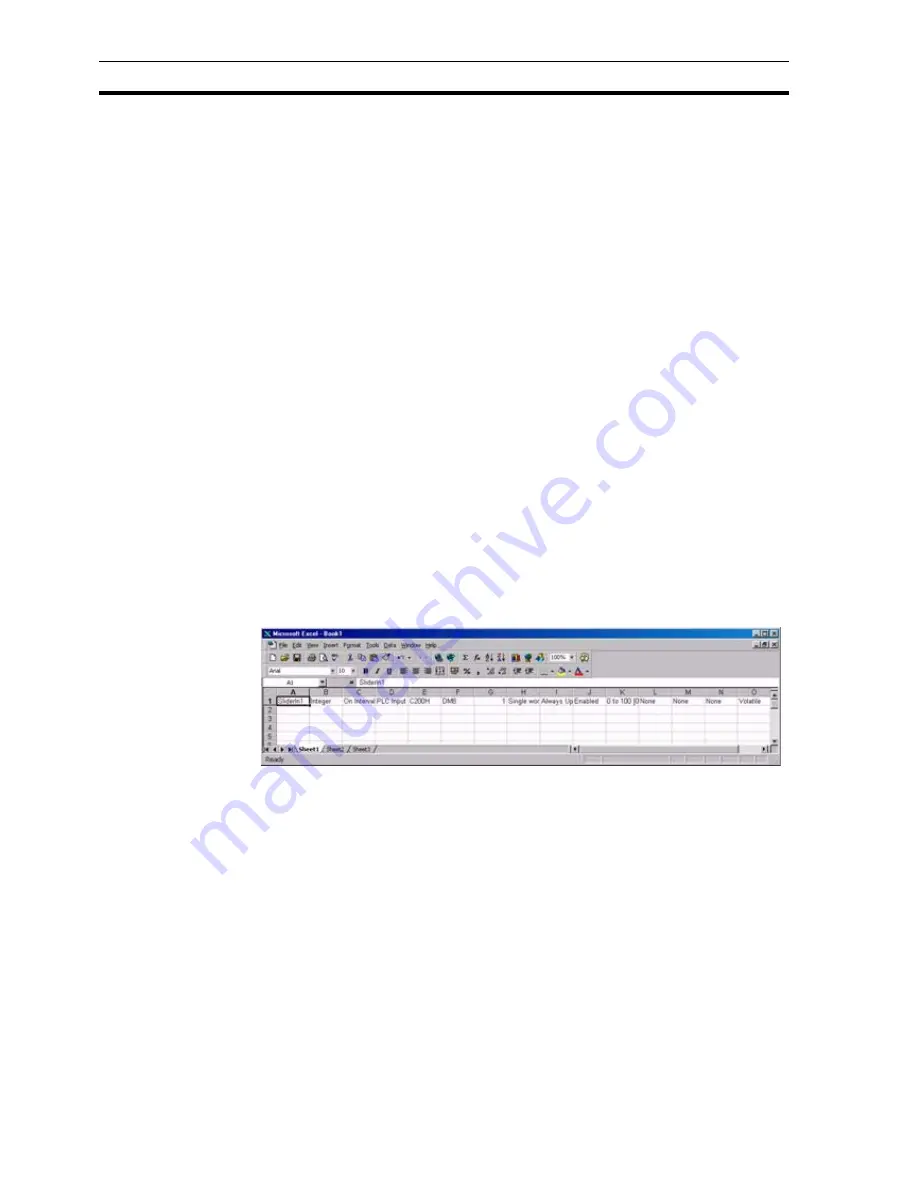
4. Position the cursor in column A and paste the CX-Supervisor Points into
Excel. The worksheet should resemble the following:
Each row is a single point, and each column is a setting of that point.
5. Edit the point details as required.
Excel automatically increments any data ending in a number. This can be
very useful for
Names
and
PLC Addresses
(columns A and F) but take
care with other columns. If other columns are wrongly incremented, like
PLC Name, Array size and
Data Range
(columns E, G and K) these can
quickly be copied by selecting the correct value e.g. G1 then using the
square box to highlight the column of data to fill. To see the fill options hold
down the right mouse button before draging the square box. Repeat for
each column.
6. When editing is completed, select the row(s) to required and select Copy
Note:
It is possible to delete more than one point by either selecting points within a
range or by selecting individually several points.
Note:
If a point is deleted then any animations or scripts that were using the point
become invalid. Run the Analyse Application tool to check for References to
non-existent points.
Note:
Some settings may be hidden on the right. Use the scrollbar to view.
Note:
To quickly create new points with the same settings, select the whole row
by clicking the row number on the left. A range can now be drawn to be
filled by dragging the black square box on the bottom left of the range
selection:
Summary of Contents for CX-Supervisor
Page 1: ...CX Supervisor Software Cat No W10E EN 01 User Manual Software Release 3 1...
Page 3: ...Copyright Notice 2...
Page 16: ...15...
Page 17: ...16...
Page 27: ...Tip of the Day SECTION 1 Graphics Editor 26...
Page 35: ...CX Supervisor Preferences SECTION 2 Pages 34...
Page 79: ...Responding to Events SECTION 5 ActiveX Objects 78...
Page 115: ...Printing the Graphics Library SECTION 7 Graphics Library 114...
Page 181: ...Data Logging SECTION 11 Data Logging 180...
Page 201: ...Examples SECTION 12 Databases 200...
Page 243: ...Performance Monitor SECTION 16 Application Analysis Performance Monitor 242...
Page 253: ...Using with Omron s CX Server OPC SECTION 17 Using CX Supervisor as an OPC Cli 252...
Page 259: ...Creating a CX Supervisor Client application SECTION 18 Connecting to a remote CX 258...
Page 263: ...Adding a Point Linked to a Parameter SECTION 19 Connecting to Omron Industrial 262...
Page 271: ...Data Logging SECTION 20 Best Practices 270...
Page 275: ...Configuring a Server PC running Windows NT or 2000 Appendix A Configuring a PC 274...
Page 277: ...Appendix B Frequently Asked Questions 276...
Page 296: ...Appendix B Frequently Asked Questions 295...
Page 297: ...Appendix B Frequently Asked Questions 296...
Page 298: ...Appendix B Frequently Asked Questions 297...
Page 299: ...Appendix B Frequently Asked Questions 298...
Page 333: ...Revision history 332...


