


Runtime Actions
SECTION 9 Animation
139
9-3-11 Vertical Percentage Fill
Closed objects can be flood-filled along a vertical axis. This can be specified
via the Percentage Fill (Vertical) dialog box.
To access the Percentage Fill (Vertical) dialog box to add an action, select
Percentage Fill (Vertical) from the animation list and click the Add Action
button. To access the Percentage Fill (Vertical) dialog box to modify an action,
select Percentage Fill (Vertical) from the animation list and click the Modify
Action button. Refer to chapter 9, Objects, for a list of the objects to which this
action is applicable.
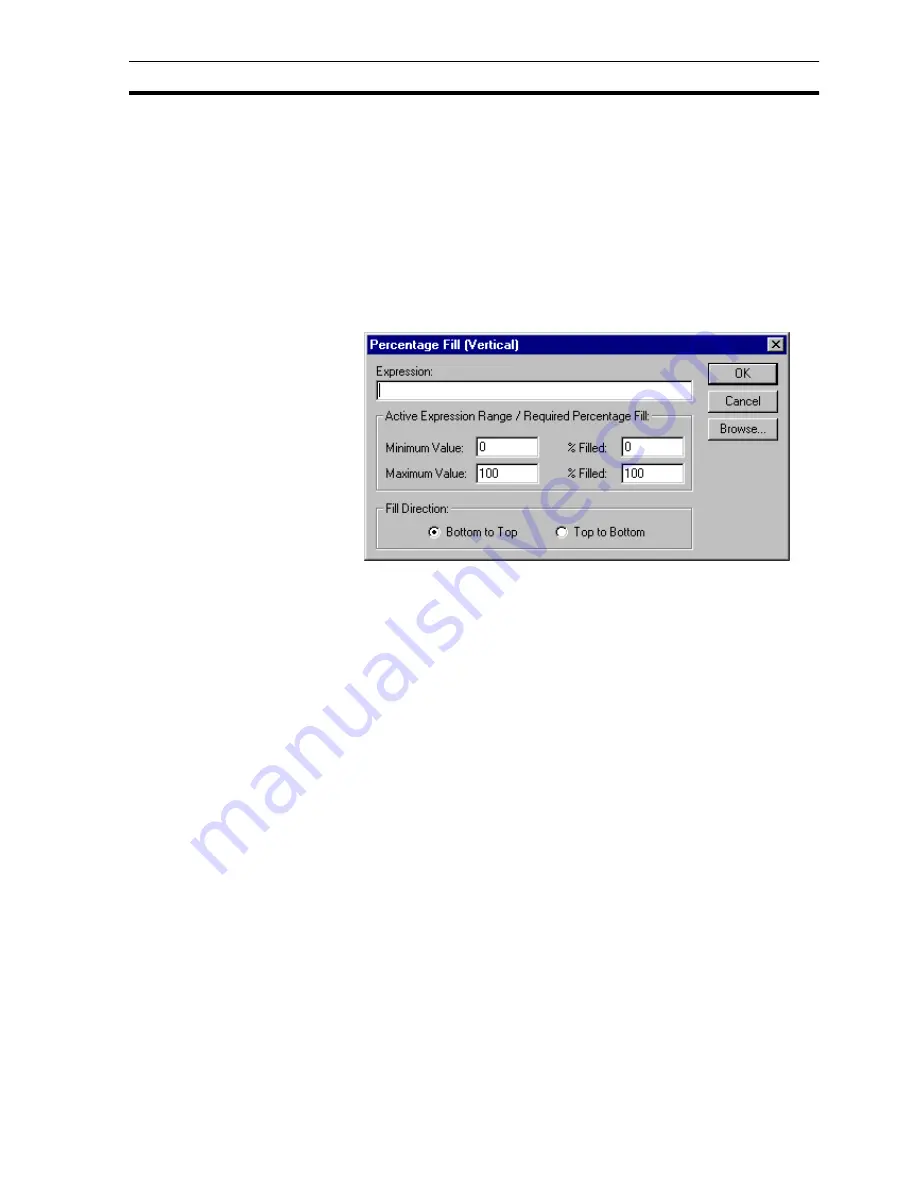
On selection of the Percentage Fill (Vertical) action, the Percentage Fill
(Vertical) dialog box opens:
To define the animation, an expression consisting of a number of operators
and operands, which may be based on the status of a point, must be entered
in the Expression: field.
The boundaries in which the object moves are inserted into the Active
Expression Range/Required Percentage Fill: fields. The % Filled fields specify
the percentage of the object to fill when the expression reaches its maximum
and minimum values. The flood-fill also requires a direction. This can be
specified as top to bottom or bottom to top, by selecting the appropriate Fill
Direction: setting.
To abort the Vertical Percentage Fill definition, click the Cancel button. By
clicking the Browse button, a point may be directly specified, as described in
chapter 9, Runtime Actions. When completed, click the OK button. If invalid
data has been inserted into any field, a descriptive error message opens.
9-3-12 Display Page
CX-Supervisor allows the specification of pages within a project for display.
This is set up using the Display Page dialog box.
To access the Display Page dialog box to add an action, select Display Page
from the animation list and click the Add Action button. To access the Display
Page dialog box to modify an action, select Display Page from the animation
list and click the Modify Action button. Refer to chapter 9, Objects, for a list of
the objects to which this action is applicable.
On selection of the Display Page action, the Display Page dialog box opens:
Summary of Contents for CX-Supervisor
Page 1: ...CX Supervisor Software Cat No W10E EN 01 User Manual Software Release 3 1...
Page 3: ...Copyright Notice 2...
Page 16: ...15...
Page 17: ...16...
Page 27: ...Tip of the Day SECTION 1 Graphics Editor 26...
Page 35: ...CX Supervisor Preferences SECTION 2 Pages 34...
Page 79: ...Responding to Events SECTION 5 ActiveX Objects 78...
Page 115: ...Printing the Graphics Library SECTION 7 Graphics Library 114...
Page 181: ...Data Logging SECTION 11 Data Logging 180...
Page 201: ...Examples SECTION 12 Databases 200...
Page 243: ...Performance Monitor SECTION 16 Application Analysis Performance Monitor 242...
Page 253: ...Using with Omron s CX Server OPC SECTION 17 Using CX Supervisor as an OPC Cli 252...
Page 259: ...Creating a CX Supervisor Client application SECTION 18 Connecting to a remote CX 258...
Page 263: ...Adding a Point Linked to a Parameter SECTION 19 Connecting to Omron Industrial 262...
Page 271: ...Data Logging SECTION 20 Best Practices 270...
Page 275: ...Configuring a Server PC running Windows NT or 2000 Appendix A Configuring a PC 274...
Page 277: ...Appendix B Frequently Asked Questions 276...
Page 296: ...Appendix B Frequently Asked Questions 295...
Page 297: ...Appendix B Frequently Asked Questions 296...
Page 298: ...Appendix B Frequently Asked Questions 297...
Page 299: ...Appendix B Frequently Asked Questions 298...
Page 333: ...Revision history 332...


