


OmniTek OTR 1001 User Guide, v3.1
D-1
D
: View Screen Layout
The quad-split screen used by default for the View window is simply one possible screen layout.
Where a mouse is attached, other layouts may be set up to the user’s own specification.
Moreover, when recorded as ‘Presets’ (see Section B.4), these layouts then become as easy to
call up as the default quad-split.
This section describes how to set up a new layout and how to save this layout for future use.
D.1 Overview
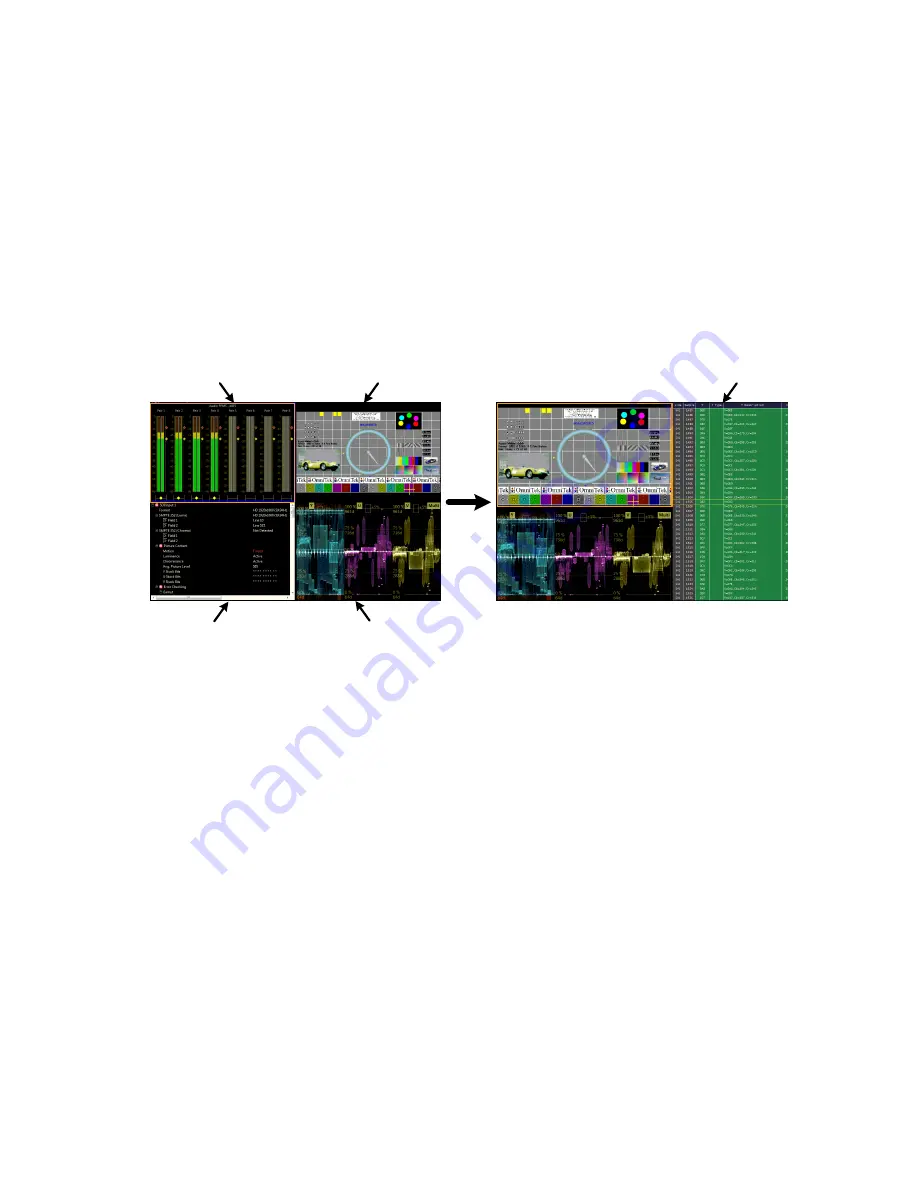
A new layout is created for the View window by modifying the layout you are currently using.
Close
Close
Move left and stretch
Move left and stretch
Add new tile
Figure D-1
: Example set of changes
To make the required changes, you need to put the View window into its ‘
Edit mode
’. In this
mode, the View window continues to offer the same basic facilities as it does in its standard
display mode (e.g. switching the View shown on any tile and setting tile properties) but the tile
that is currently selected isn’t simply outlined with a coloured box. Instead it is shown with
Microsoft Windows-style handles which allow the user to move the tile, re-size it or delete it.
New tiles can also be added in Edit mode.
In outline, the steps used to set up an alternative screen layout are as follows. A mouse is
required for many of these actions. Indeed, it is not possible to enter Edit mode without a mouse.
1.
Put the screen into Edit mode.
2.
Close any tiles that are not required. Alternatively, add further tiles (there are two ways
of doing this: see below).
3.
Set the size and position of all the various different tiles shown on the screen.
4.
Leave Layout Edit mode.
5.
Check that the different tiles of the display are set to show the Views that you require.
6.
Record the layout as a View Preset (see Section B.4). If the new layout is not recorded as
a Preset, it will be lost the moment you either make any further changes to the layout or
call up another View Preset.
Summary of Contents for OTR 1001
Page 1: ...Advanced Measurement Technology OTR 1001 User Guide Software Version 3 1 October 2013...
Page 28: ...OmniTek OTR 1001 User Guide v3 1a A 16...
Page 52: ...OmniTek OTR 1001 User Guide v3 1 B 24...
Page 96: ...OmniTek OTR 1001 User Guide v3 1a E 24...
Page 116: ...OmniTek OTR 1001 User Guide v3 1 G 6...
Page 124: ...OmniTek OTR 1001 User Guide v3 1 H 8...
Page 184: ...OmniTek OTR 1001 User Guide v3 1 J 22...
Page 238: ...OmniTek OTR 1001 User Guide v3 1 M 14...
Page 250: ...OmniTek OTR 1001 User Guide v3 1 N 12...
Page 254: ...O 4 OmniTek OTR 1001 User Guide v3 1...
Page 292: ...Q 26 OmniTek OTR 1001 User Guide v3 1...
Page 326: ...OmniTek OTR 1001 User Guide v3 1a S 26...
Page 358: ...OmniTek OTR1001 User Guide v3 1 U 12...
Page 364: ...OmniTek OTR 1001 User Guide v3 1 V 6...
Page 379: ...OmniTek OTR 1001 User Guide v3 1 I 15 Example XML Statements Example Result...
Page 386: ...OmniTek OTR 1001 User Guide v3 1 II 6...
Page 389: ...OmniTek OTR 1001 User Guide v3 1...


