


One-Net/DASDEC User Manual
5-74
v3.0 | r1016
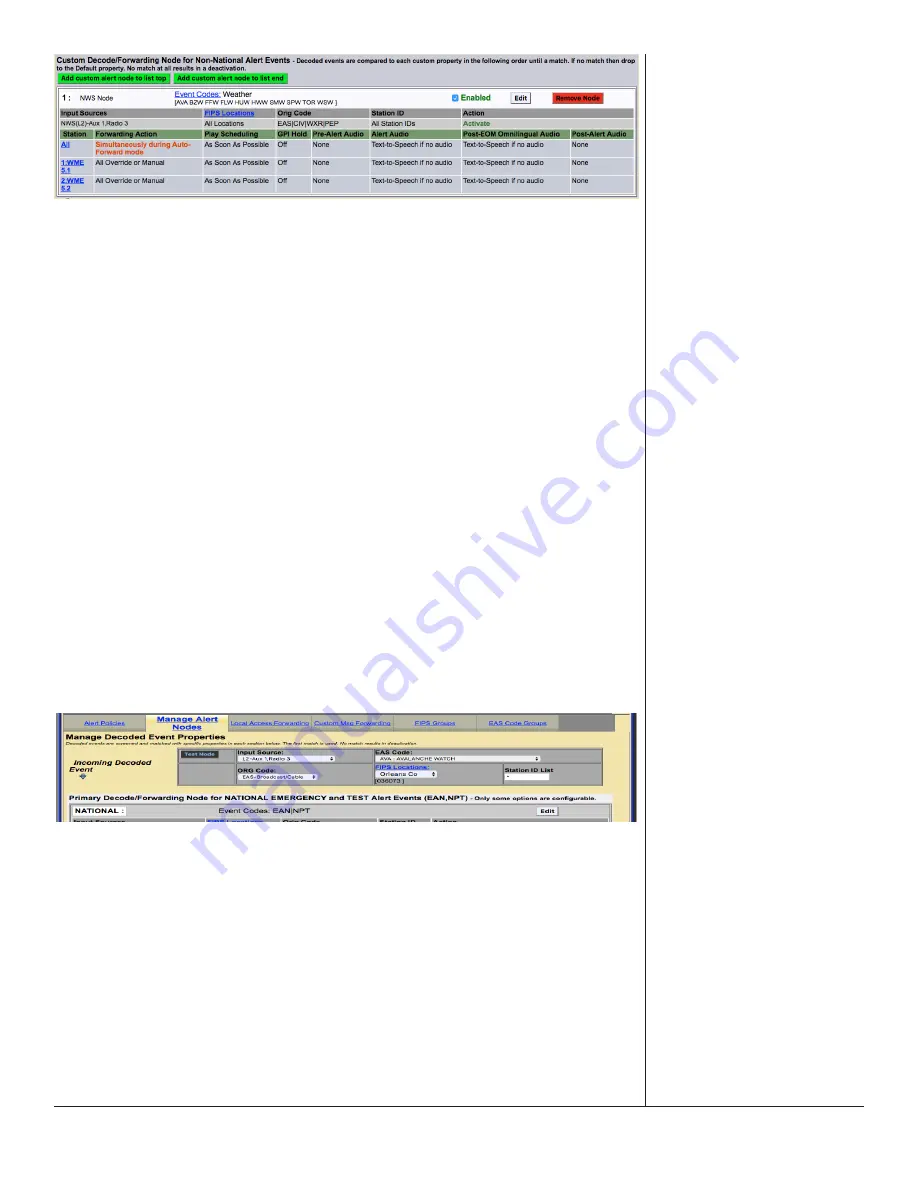
MultiStation Mode
When utilizing MultiStation Mode, Alert Nodes will enable separate Alert Definition
settings for each station. When a Node Criteria is matched with the incoming EAS
alert, each stations’ Alert Definition settings can be configured separately.
Forwarding Action, Play Scheduling, GPI Hold, Pre-Alert Audio, Alert Audio, Post-
EOM Omnilingual Audio, and Post-Alert Audio settings can be defined for each
station. This enables each station to customize how to handle the playout of the
incoming alert and what audio is associated with that alert message.
To create a Custom Decode/Forwarding Alert Node:
•
Click the green
Add custom alert node
button found below the RWT node.
If this is the first custom node, there are three available button options:
-
Add first custom alert node
-
Add custom alert node to list top
-
Add custom alert node to list end
•
Once a new Alert Node is added, modify it by clicking the
Edit
button for
that node.
•
Assign a descriptive name
•
Configure the desired Node Criteria
•
Select the appropriate Action (Deactivate/Log Only or Activate)
•
Configure the Action Definition settings
•
Click the
Accept Changes
button
Test Node Interface Section
Test Node Interface
After creating new Alert Nodes, it is a good idea to test if they are configured
properly. The Test Node interface was created for this purpose. It is located at the
top of the
Manage Alert Nodes
sub-tab and has five settings and an action but
-
ton along with a results field. This test simulates the conditions of an incoming EAS
alert against the list of configured Alert Nodes. The test starts at the top of the list
(NATIONAL) – stopping when it finds the first Alert Node with a matching Node
Criteria.
The first step in running an Alert Node test is to input the test settings. They are as
follows:


