C70 Setup Manual
Appendix 2.16 Troubleshooting
575
Alarm No.
53
Excessive error 2
A difference between the actual and theoretical motor positions during servo OFF exceeded the setting value.
Investigation details
Investigation results
Remedies
SV
SP
1
Check the follow-up function while the NC is
in the servo OFF state.
The axis detachment function (NC
parameter) is invalid.
(Note) For the axis detachment function,
refer to the NC manual.
Check the investigation item No. 2.
The axis detachment function (NC
parameter) is valid.
(Note) For the axis detachment function,
refer to the NC manual.
Check the investigation item No. 3.
2
Check whether the axis has moved during
servo OFF (either by visual inspection or
monitor the position droop waveform).
[1] Check if the motor brake is released in
the middle.
[2] Check if the axis moves because the
servo OFF is applied during the C axis
mode.
[1] The axis has moved.
[2] The servo OFF is applied during the
mode.
[1] Adjust the brakes, etc. so that the axis
does not move.
[2] Avoid the servo OFF from being applied
during position control.
The axis has not moved.
Check the investigation item No. 3.
3
Check the excessive error detection width.
SV026 (Servo)
(Note) Set the same value to SV023.
The excessive error detection width is too
small.
SV026 ={RAPID/(60*PGN1)}/2
Set an appropriate value.
An appropriate value is set.
Check for problems on the NC side, such as
the position FB follow-up control.
Alarm No.
54
Excessive error 3
When an excessive error 1 occurred, detection of the motor current failed.
Investigation details
Investigation results
Remedies
SV
SP
1
Check that the PN voltage is supplied to the
drive unit.
[1] Is the CHARGE lamp ON?
The voltage is not supplied.
Correctly supply the PN voltage.
It is correctly supplied (DC300V).
Investigate item 2.
2
Check the motor power cable (U, V, W
phases).
[1] The power cable is not connected.
[2] Is the cable connected to the motor for
another axis?
The connections are incorrect.
Connect correctly.
The connections are correct.
Replace the drive unit.
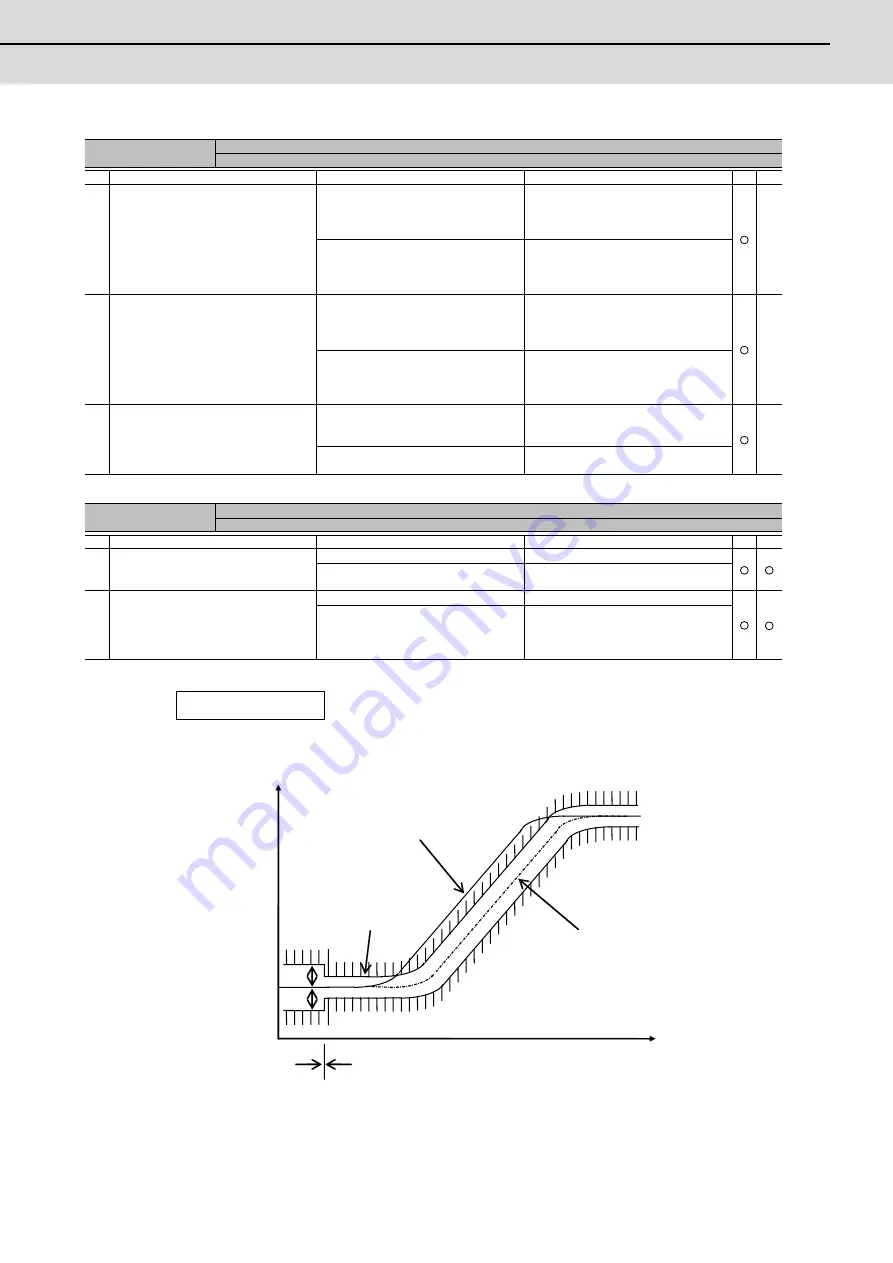
Servo OFF
Servo ON
Time
OD1
OD1
OD2
OD2
Position
Depending on the ideal machine position in respect to the command position, the actual machine
position could enter the actual shaded section shown below, which is separated more than the
distance set in OD1.
Supplement (servo)
Ideal machine position
Command position
Summary of Contents for C70
Page 1: ......
Page 3: ......
Page 9: ......
Page 11: ......
Page 13: ......
Page 18: ...1 1 Outline ...
Page 21: ...1 Outline MITSUBISHI CNC 4 ...
Page 22: ...5 2 GOT Initial Setup ...
Page 73: ...2 GOT Initial Setup MITSUBISHI CNC 56 ...
Page 74: ...57 3 PLC CPU Initial Setup ...
Page 91: ...3 PLC CPU Initial Setup MITSUBISHI CNC 74 ...
Page 92: ...75 4 CNC CPU Initial Setup ...
Page 105: ...4 CNC CPU Initial Setup MITSUBISHI CNC 88 ...
Page 106: ...89 5 Connecting and Setting up Multiple CNC CPU Modules ...
Page 115: ...5 Connecting and Setting up Multiple CNC CPU Modules MITSUBISHI CNC 98 ...
Page 116: ...99 6 Setting Machine Parameters ...
Page 130: ...113 7 Setting the Position Detection System ...
Page 153: ...7 Setting the Position Detection System MITSUBISHI CNC 136 ...
Page 154: ...137 8 Deceleration Check ...
Page 159: ...8 Deceleration Check MITSUBISHI CNC 142 ...
Page 160: ...143 9 Setting the Tool Entry Prohibited Range ...
Page 169: ...9 Setting the Tool Entry Prohibited Range MITSUBISHI CNC 152 ...
Page 170: ...153 10 Data Backup and Restoration ...
Page 184: ...167 Appendix 1 Explanation of Parameters ...
Page 435: ...Appendix 1 Explanation of Parameters MITSUBISHI CNC 418 ...
Page 436: ...419 Appendix 2 Explanation of Alarms ...
Page 608: ...591 Appendix 3 Display on 7 segment LED ...
Page 624: ......
Page 628: ......


