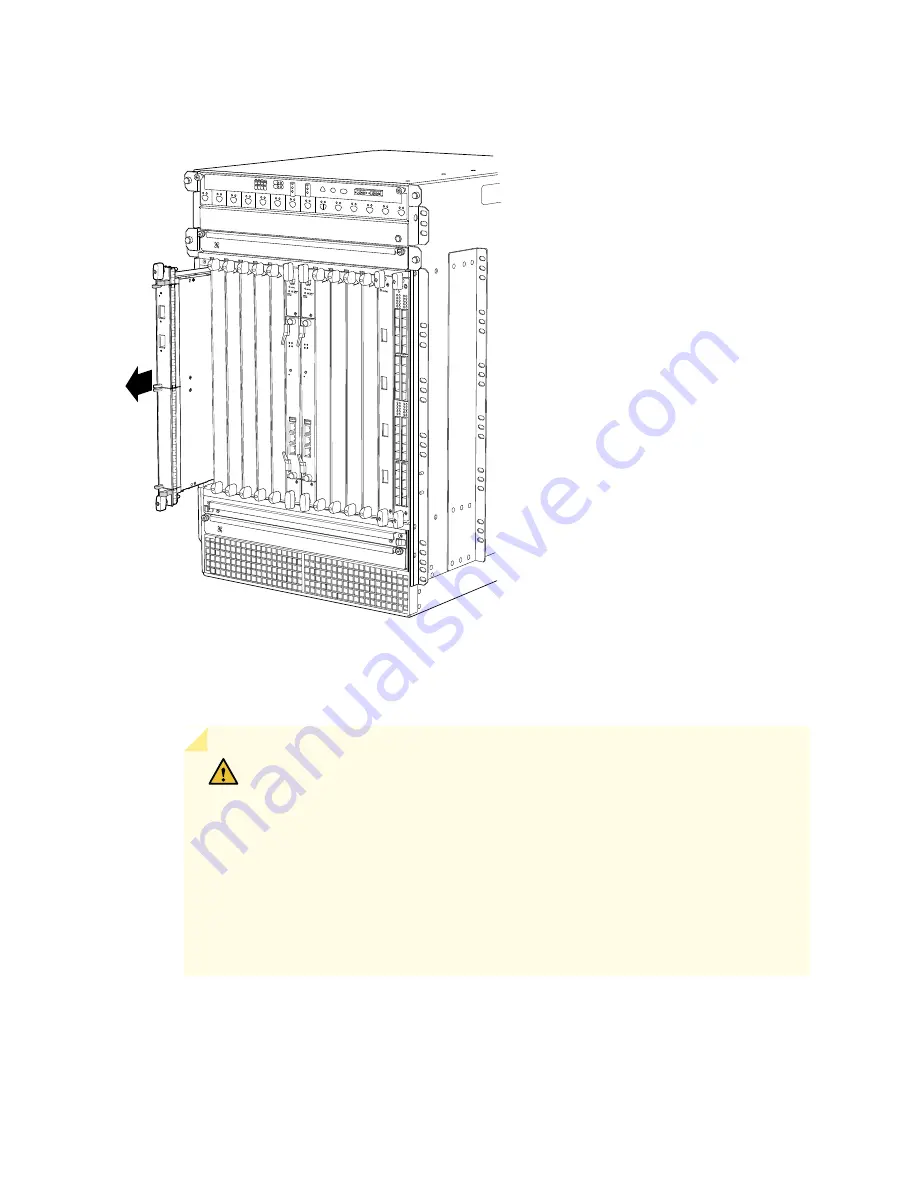
Figure 147: Removing an MPC
g030320
OK
0
FAIL
ONLINE
OK
1
FAIL
ONLINE
OK
2
FAIL
ONLINE
OK
3
FAIL
ONLINE
OK
4
FAIL
ONLINE
OK
5
FAIL
ONLINE
OK
0
FAIL
ONLINE
MASTER
ONLINE
OFFLINE
RE0
FAN
PEM
1
0
0 1 2 3
RE1
OK
1
FAIL
ONLINE
OK
7
FAIL
ONLINE
OK
8
FAIL
ONLINE
OK
9
FAIL
ONLINE
OK
10
FAIL
ONLINE
OK
11
FAIL
ONLINE
OK
2 6
FAIL
ONLINE
ACO/LT
YELLOW ALARM
RED ALARM
NC
NO
C
NC
NO
C
1
0
1
0
1
0
1
0
1
0
1
1
0
0
1
0
1
0
9. Place one hand around the front of the MPC (the MIC housing) and the other hand under it to support
it. Slide the MPC completely out of the chassis, and place it on the antistatic mat or in the electrostatic
bag.
CAUTION:
The weight of the MPC is concentrated in the back end. Be prepared
to accept the full weight—up to 18.35 lb (8.3 kg)—as you slide the MPC out of
the chassis.
When the MPC is out of the chassis, do not hold it by the ejector handles, bus
bars, or edge connectors. They cannot support its weight.
Do not stack MPCs on top of one another after removal. Place each one
individually in an electrostatic bag or on its own antistatic mat on a flat, stable
surface.
10. If necessary, remove each installed MIC from the MPC. See
“Removing an SRX5800 Services Gateway
385
Summary of Contents for SRX 5800
Page 1: ...SRX5800 Services Gateway Hardware Guide Published 2020 02 10 ...
Page 23: ......
Page 30: ...Figure 2 Rear View of a Fully Configured AC Powered Services Gateway Chassis 31 ...
Page 111: ...LEDs 112 ...
Page 121: ...Port and Interface Numbering 122 ...
Page 127: ...Port and Interface Numbering 128 ...
Page 161: ......
Page 179: ... One SRX5K MPC IOC2 Modular Port Concentrator with two Modular Interface Cards MICs 180 ...
Page 180: ... One SRX5K 40GE SFP I O card IOC 181 ...
Page 205: ......
Page 261: ......
Page 324: ...c Upload the configuration to RE2 from the USB device 325 ...
Page 365: ...Figure 143 Installing an SPC 366 ...
Page 367: ...368 ...
Page 422: ...5 CHAPTER Troubleshooting Hardware Troubleshooting the SRX5800 425 ...
Page 423: ......
Page 457: ......
Page 473: ...475 ...
Page 476: ...Restricted Access Area Warning 478 ...
Page 483: ...485 ...
Page 496: ...Jewelry Removal Warning 498 ...
Page 499: ...Operating Temperature Warning 501 ...
Page 509: ...DC Power Disconnection Warning 511 ...
Page 513: ...DC Power Wiring Sequence Warning 515 ...
Page 516: ...DC Power Wiring Terminations Warning 518 ...
Page 519: ...DC Power Disconnection Warning 521 ...
Page 523: ...DC Power Wiring Sequence Warning 525 ...


