WARNING:
Do not touch the power connector on the top of the power supply.
It can contain dangerous voltages.
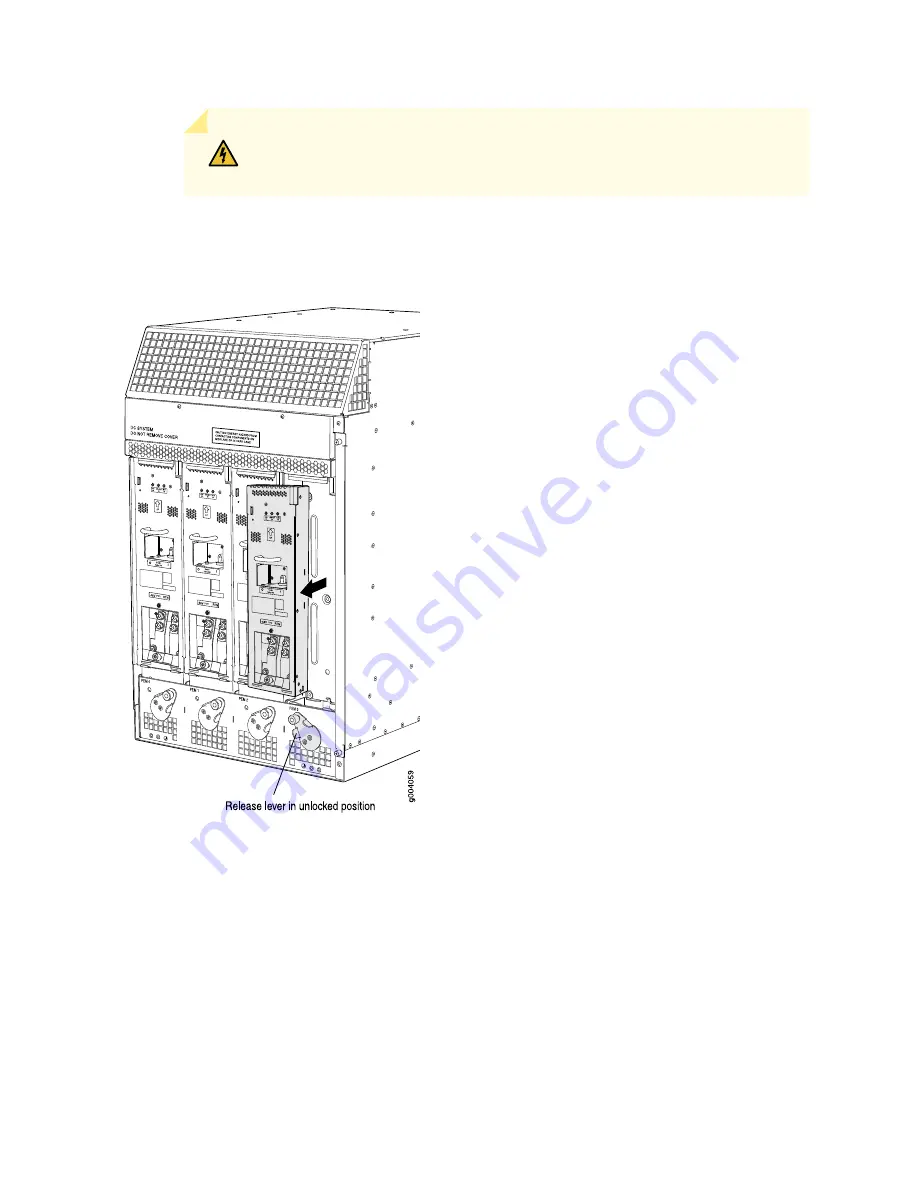
Figure 88: Removing a Power Supply Before Installing the Services Gateway (Standard-Capacity Power
Supply Shown, High-Capacity Similar)
Removing the Cable Manager Before Installing the SRX5800 Services Gateway Chassis
To remove the cable manager (see
1. Attach an ESD grounding strap to your bare wrist, and connect the strap to one of the ESD points on
the chassis.
2. Using a 7/16-in. nut driver, unscrew the nuts on the corners of the cable manager.
3. Grasp the bottom of the cable manager and pull it straight out from the studs on the front of the chassis.
218
Summary of Contents for SRX 5800
Page 1: ...SRX5800 Services Gateway Hardware Guide Published 2020 02 10 ...
Page 23: ......
Page 30: ...Figure 2 Rear View of a Fully Configured AC Powered Services Gateway Chassis 31 ...
Page 111: ...LEDs 112 ...
Page 121: ...Port and Interface Numbering 122 ...
Page 127: ...Port and Interface Numbering 128 ...
Page 161: ......
Page 179: ... One SRX5K MPC IOC2 Modular Port Concentrator with two Modular Interface Cards MICs 180 ...
Page 180: ... One SRX5K 40GE SFP I O card IOC 181 ...
Page 205: ......
Page 261: ......
Page 324: ...c Upload the configuration to RE2 from the USB device 325 ...
Page 365: ...Figure 143 Installing an SPC 366 ...
Page 367: ...368 ...
Page 422: ...5 CHAPTER Troubleshooting Hardware Troubleshooting the SRX5800 425 ...
Page 423: ......
Page 457: ......
Page 473: ...475 ...
Page 476: ...Restricted Access Area Warning 478 ...
Page 483: ...485 ...
Page 496: ...Jewelry Removal Warning 498 ...
Page 499: ...Operating Temperature Warning 501 ...
Page 509: ...DC Power Disconnection Warning 511 ...
Page 513: ...DC Power Wiring Sequence Warning 515 ...
Page 516: ...DC Power Wiring Terminations Warning 518 ...
Page 519: ...DC Power Disconnection Warning 521 ...
Page 523: ...DC Power Wiring Sequence Warning 525 ...


