background image

PROJECTORS PALETTE 

Mari 2.0v1

129

The Foundry

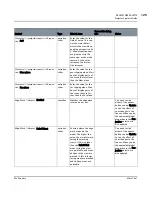
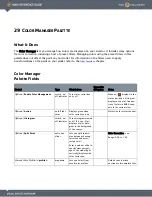
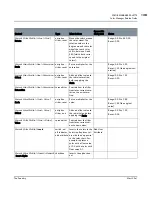
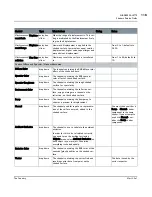
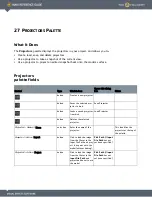
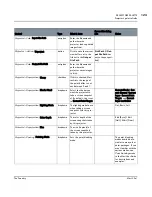
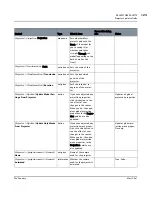
Projectors palette fields 

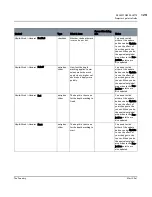
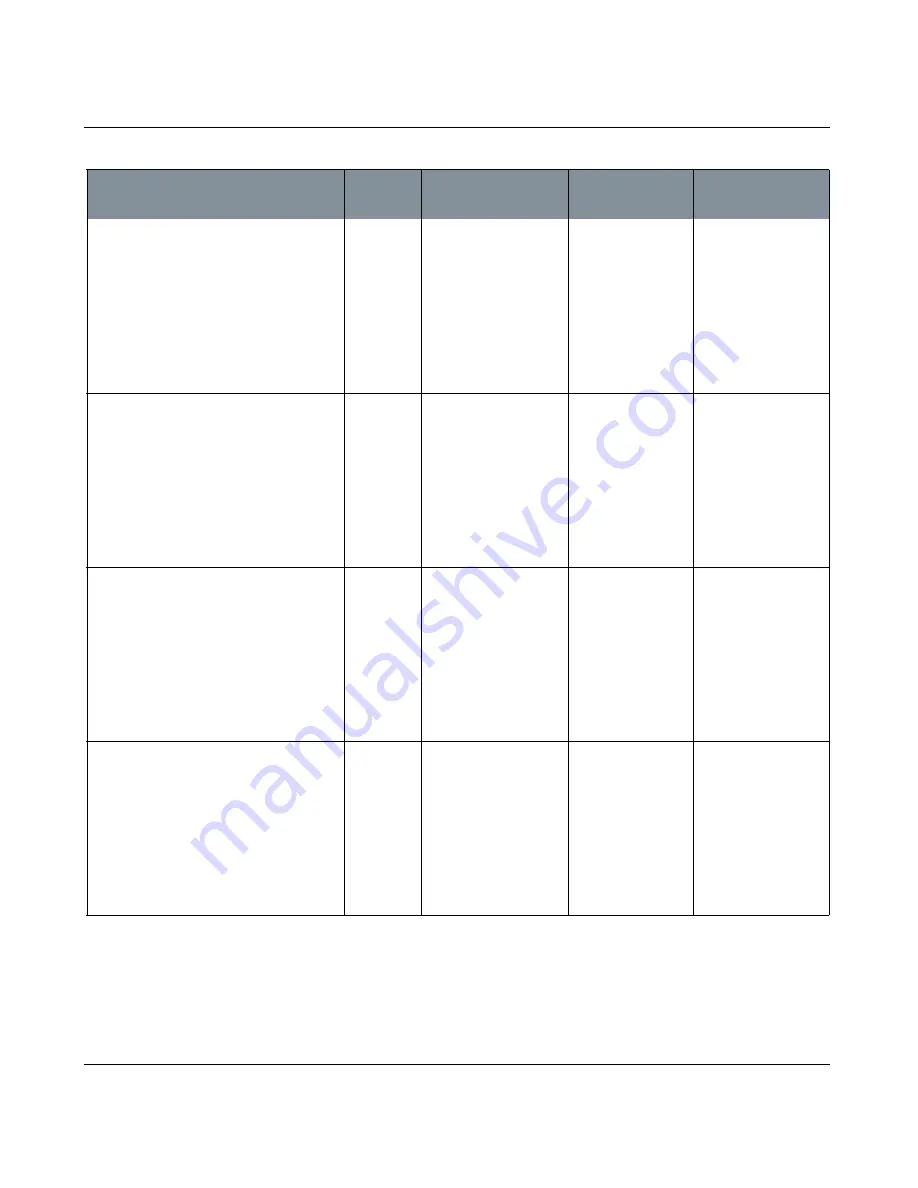
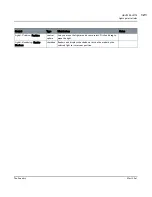
Depth Mask > General 

| Enabled

checkbox

Whether the depth mask 
is turned on or not.

You need to click 
either of the update 
buttons under Update 
to see the effect of 
your changes in the 
canvas. When you do, 
the equivalent global 
properties in the Pro-
jection palette are 
also updated.

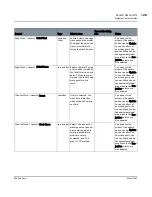
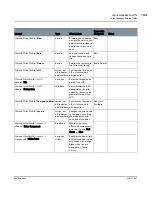
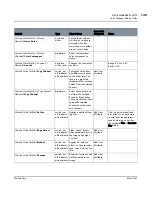
Depth Mask > General 

| Falloff

entry box, 
slider

How fast the depth 
masking applies. Lower 
values make the mask 
apply slowly, higher val-
ues make it apply more 
quickly.

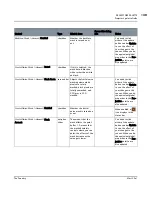
You need to click 
either of the update 
buttons under Update 
to see the effect of 
your changes in the 
canvas. When you do, 
the equivalent global 
properties in the Pro-
jection palette are 
also updated.

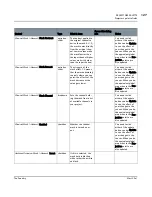
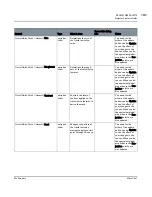
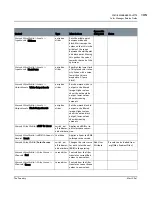
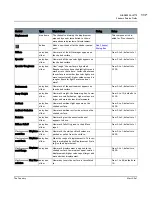
Depth Mask > General 

| End

entry box, 
slider

The depth in the scene 
for the depth masking to 
finish.

You need to click 
either of the update 
buttons under Update 
to see the effect of 
your changes in the 
canvas. When you do, 
the equivalent global 
properties in the Pro-
jection palette are 
also updated.

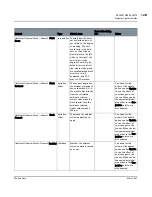
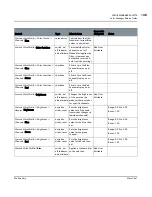
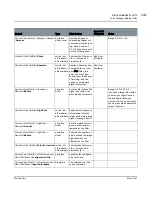
Depth Mask > General 

| Start

entry box, 
slider

The depth in the scene 
for the depth masking to 
start.

You need to click 
either of the update 
buttons under Update 
to see the effect of 
your changes in the 
canvas. When you do, 
the equivalent global 
properties in the Pro-
jection palette are 
also updated.

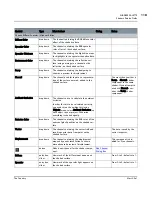
Control

Type

What it does

Opens this dialog 
box

Notes

Summary of Contents for Mari

Page 1: ...REFERENCE GUIDE VERSION 2 0V1...

Page 2: ...but not limited to the removal of the following or any other copyright trademark or other proprietary rights notice included herein Mari software 2013 The Foundry Visionmongers Ltd All Rights Reserve...

Page 3: ...FUNCTIONS 12 SELECTION FUNCTIONS 13 OBJECT FUNCTIONS 19 CHANNEL FUNCTIONS 20 LAYER FUNCTIONS 25 PTEX FUNCTIONS 31 PATCH FUNCTIONS 32 SHADING FUNCTIONS 36 PAINTING FUNCTIONS 38 FILTER FUNCTIONS 40 CAME...

Page 4: ...CHES PALETTE 100 OBJECTS PALETTE 101 SHADERS PALETTE 103 LIGHTS PALETTE 120 PROJECTORS PALETTE 122 SELECTION GROUPS PALETTE 132 COLOR MANAGER PALETTE 133 IMAGE MANAGER PALETTE 143 HISTORY VIEW PALETTE...

Page 5: ...5 SNAPSHOTS PALETTE 176 NEW PROJECT DIALOG BOX 178 SELECT COLOR DIALOG BOX 182 ADD CHANNEL DIALOG BOX 184 ADD MULTIPLE CHANNELS DIALOG BOX 186 CHANNEL PRESETS DIALOG BOX 188 CONVERT TYPE DIALOG BOX 19...

Page 6: ...6 LOAD CAMERA DIALOG BOX 207 MANAGE TOOLBAR DIALOG BOX 209 MANAGE KEYBOARD SHORTCUTS DIALOG BOX 211 HUD MANAGER DIALOG BOX 213 MARI PREFERENCES DIALOG BOX 216 DISPLAY PROPERTIES DIALOG BOX 225 SCREENS...

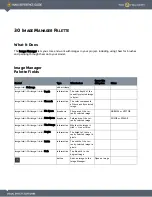
Page 7: ...rovides a complete reference for all the functions and fields within Mari It does not give you any instructions on using Mari For details on installing Mari read the Getting Started Guide For full ins...

Page 8: ...d output values 45 the same Bar along the bottom displays the effect at each point Drag to move points on the graph Add points by clicking on the curve or bar Edit a point by right click ing it You ca...

Page 9: ...elected Sometimes called radio buttons Remove attribute Lets you remove an attribute from a property Click the icon then click Remove to con firm Reset button Reset to the default Click the icon Often...

Page 10: ...tegories of brush tips in the Brush Editor Palette Click a tab to view it to view the previous or next tab to add a tab to delete a tab to open the current tab in a separate window Thumbnail Displays...

Page 11: ...lbar Saves the current project Close project Menubar File Close Keyboard Ctrl W Toolbar Closes the current project Save Changes Before Closing if unsaved changes Delete project Projects tab Delete but...

Page 12: ...Mari Preferences Dialog Box Edit toolbars Menubar Edit Toolbars Lets you create and edit cus tom toolbars Manage Toolbar Dialog Box Edit shortcuts Menubar Edit Shortcuts Lets you add or edit keyboard...

Page 13: ...e Sets Mari to select patches on objects Faces selection mode Selection toolbar Menubar Selection Face Mode Right click canvas Face Mode Sets Mari to select areas on the objects Hide unselected areas...

Page 14: ...w Selected Right click Patches Pal ette Show Selected Patches Shows the selected areas on the canvas Show all areas Menubar Selection Show All Right click canvas Visibility Show All Right click Patche...

Page 15: ...ect Invert Right click Patches Pal ette Select Invert Patches Keyboard Ctrl I De selects the current selection and selects every thing currently unselected Depends on your current selection mode eithe...

Page 16: ...ck All Right click Patches Pal ette Lock All Patches Locks all areas so they can not be painted Unlock all areas Menubar Selection Unlock All Right click canvas Locking Unlock All Right click Patches...

Page 17: ...ette Reselects the current selec tion group Lock the selection group Right click selection group in Selection Groups Palette Lock Selection Group Button Selection Groups Palette Locks the selection gr...

Page 18: ...roups Palette Show Selection Group Button Selection Groups Palette Shows the contents of the selection group Remove the selection group Right click selection group in Selection Groups Palette Remove S...

Page 19: ...cts Palette Rename Object Version Renames the current object version Remove object version Right click Objects Palette Remove Object Version Deletes the current object version Objects must always have...

Page 20: ...e Channel Right click in Channels Palette Remove Channel Button Channels Palette Removes the selected channel and any layers associated with it from the channels list Convert channel Menubar Channels...

Page 21: ...thing Menubar Channels Export Export Everything Right click canvas Export Export Everything Right click in Channels Palette Export Export Everything Exports the channels for all the objects in your pr...

Page 22: ...your cur rent selected channel Import Dialog Box Import into a new channel Menubar Channels Import Import into New Channel Right click canvas Import Import into New Channel Right click in Channels Pal...

Page 23: ...ette regardless of what is selected In addition to the unlock options listed here you can also unlock channels by selecting Unlock Entire Object View the Next Channel Menubar Channels Next Channel Rig...

Page 24: ...nage Snapshots Right click in Channels Palette Snapshots Manage Snapshots Opens the Snapshots Palette Delete all snap shots Menubar Channels Snapshots Delete All Snapshots Right click in Channels Pale...

Page 25: ...ight click in Layers Palette Add Procedural Layer Button Layers Palette Adds the selected Basic Environment Geometry or Procedural layer to the layers list Following the arrows in the Add Proce dural...

Page 26: ...r in Layers Pal ette Merge Layers Merges two or more lay ers together into a single new layer Any masks or layer groups contained in the selection will also be merged into the layer and are no lon ger...

Page 27: ...k group palette Flatten mask group Menubar Layers Layer Mask Make Mask Group Right click layer in Layers Pal ette Flatten Mask Group Reduces the masks in a mask group back into a single mask on the la...

Page 28: ...ick layer in Layers Pal ette Adjustment Stack Remove Adjustment Stack Removes any adjustment stack that has been applied to the selected layer This only applies to layers other than adjustment layers...

Page 29: ...yer Menubar Layers Cache Layer Right click layer in Layers Pal ette Cache Layer Bakes the layer to speed up layer performance Caching a layer caches it to the hard disk Cache up to here Menubar Layers...

Page 30: ...tened Exports all the layers in the layer stack flattened into a single file to an external source Export Dialog Box Import into layer Menubar Layers Import Import into Layer Right click layer in Laye...

Page 31: ...ar Ptex World Space Face Reso lution Button Ptex Toolbar Set the world space face resolu tion for the selected face Set the face resolu tion for the selected face Menubar Ptex Set Face Resolution Butt...

Page 32: ...IM of the selected patch es to the system clipboard for use in other applica tions Paste selected patch Menubar Patches Quick Paste Right click canvas Patches Quick Paste Keyboard Ctrl V Pastes a copi...

Page 33: ...ar Patches UV Wireframe to Image Manager Right click canvas Patches UV Wireframe to Image Manager Copies the wireframe of the UVs on the patch to the Image Manager Extend the patch bleed area Menubar...

Page 34: ...k canvas Patches Mirror Mirror Top to Bottom Mirrors the paint on the selected patch es from top to bottom Mirror patch from bottom to top Menubar Patches Mirror Mir ror Bottom to Top Right click canv...

Page 35: ...hes palette Unlinks all linked patches Menubar Patches Link Unlink All Linked Patch Images Right click canvas Link Unlink All Linked Patch Images Right click Patches Palette Unlink All Linked Patch Im...

Page 36: ...tton Shaders Palette Makes a copy of the selected shader Delete shader Menubar Shading Remove Shader Right click in Shaders Palette Remove Shader Button Shaders Palette Deletes the selected shader fro...

Page 37: ...does not enable or disable shadow pro cessing To enable shadow processing enable Depth Projec tions in the Preferences By default this prefer ence is disabled Toggle wireframe view Menubar Shading Tog...

Page 38: ...sture press and hold click and drag in the direc tion indicated A thin red line traces gestures onscreen See also the History View Palette Bake painting into the model Keyboard B Menubar Painting Bake...

Page 39: ...r Painting Load Painting Loads an exr file and proj ects it onto the model as the current painting Load Window Painting Draw straight line between two points Mouse Click then Shift click Draws a line...

Page 40: ...ore blurred the results If you use a larger blur radius you may get slight lines on the boundaries between patches This is an artifact of the way that Mari handles patch edges This filter is not suppo...

Page 41: ...multiplier from 0 to 2 where 1 00 is the original sat uration value Offset an offset value to add to the initial saturation value before applying the scale You can also edit the Saturation curve This...

Page 42: ...set the Color Component whether this affects all color components or a specific one Red Green or Blue White Point the upper limit of dis played color intensity Areas with a value higher than this are...

Page 43: ...ts on or off Apply Color Switches Use the checkboxes to select which color components are displayed When Mari applies the filter it removes any unchecked color compo nents from the painting Apply Tone...

Page 44: ...ies an emboss effect so that textures look raised on the surface Apply Emboss This filter is not supported with Ptex channels Apply Sharpen filter Menubar Filters Sharpen Removes fuzziness and clarifi...

Page 45: ...ng in the Output ColorSpace dropdown Apply Add Noise filter Menubar Filters Add Noise Applies noise to the current channel or painting Apply Add Noise Use the Amount slider to adjust how much noise is...

Page 46: ...oject onto all images from the current view Menubar Camera Quick Project Through Loads the data from the file set in the Quick Projection dialog The result is pro jected onto all patches of the model...

Page 47: ...projector Right click Projector in Projectors Palette Make Projector Current Changes the current view to the view set in the selected projector Save the current camera view Right click Projector in P...

Page 48: ...s Palette Render Turntable Takes the scene as viewed through the selected projec tor and creates a series of images showing the scene rotating through an axis You can include custom text or thumbnails...

Page 49: ...witch to UV Camera Keyboard F12 Switches the canvas view to UV mode Reset the model position Keyboard 1 In the UV view resets the model to its default position Rotate the model 90 degrees coun ter clo...

Page 50: ...urrent canvas Menubar View Take Screenshot Saves the current view of the canvas as an image file Various image formats available Adjust the screenshot settings Menubar View Screen shot Settings Opens...

Page 51: ...ou can only add or remove addi tional cache locations when there are no projects Once projects have been created for a given set of cache locations that set must not be changed or project corruption w...

Page 52: ...the Python Console View Python API docu mentation Menubar Python Documenta tion Displays the Python API documentation in a web browser View Software API Over view documentation Menubar Python Readme...

Page 53: ...rence guide View the Mari Release Notes Menubar Help Release Notes Displays a web page that links to the release notes View the Mari Training Resources web page Menubar Help Training and Tutorials Dis...

Page 54: ...ol Type What it does Opens this dialog box Notes button Create a new project New Project Dialog Box Name the project select options and add geometry button Close the current project Save Changes Befor...
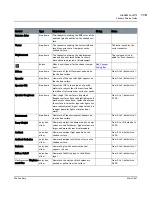
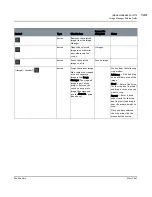
Page 55: ...he lighting on the object to flat In this mode the position of the lights has no effect button Set the lighting on the object to basic In this mode you can move lights around on the canvas or make fin...

Page 56: ...ets you resize rotate and move the paint buffer and any unbaked paint in the buffer It works on the entire paint buffer at once You can also make these transfor mations by manually editing the val ues...

Page 57: ...Shift click to create a pin button Activate the Paint tool This tool lets you draw paint strokes in the paint buffer button Activate the Vector Paint tool This tool lets you draw vector paint strokes...

Page 58: ...e cloned selection button Activate the Color Picker Pixel Analyzer tool This tool lets you pick a color from the paint on the model Color swatch button Select a foreground color Select Color button Sw...

Page 59: ...ects button Set Mari to select patches on objects You can hold down Shift to add to the selection Ctrl to remove from the selection and Meta Windows to intersect the selec tion button Set Mari to sele...

Page 60: ...to the perspective camera view In this view you can set the near and far clipping planes and the field of view button Switch to the UV camera view the UV tab This gives you a flat view of the patches...

Page 61: ...aw any shape you want This control only works in Face selec tion mode button Activate Smart Selection mode This lets you cre ate selections based on the surface of the model Smart selection only works...

Page 62: ...row the current selection This control only works in Face selec tion mode Shrink button Shrink the current selection This control only works in Face selec tion mode Grow Shrink by dropdown Choose whet...

Page 63: ...wn Ctrl click and drag to rotate the current selec tion or hold down Shift Ctrl click and drag to scale the current selection Invert button Invert the current selection Unselected areas become selecte...

Page 64: ...width entry box slider Adjust the width thickness of the directional markers Start Color button Change the color at the base of the directional markers End Color button Change the color at the tip of...

Page 65: ...the brush tip is Opacity entry box slider Set the strength of the Slerp effect Reset Pins button Undo all the distortions you ve applied moving the pins back to their original positions You can also p...

Page 66: ...heckbox Whether more pressure increases the flow Radius entry box Set how big the brush tip is in pixels You can also adjust the opacity by press ing R and clicking and dragging Opacity entry box How...

Page 67: ...int The Image clone mode is like the normal Clone Stamp tool but you have more control over the source image you can resize stretch and rotate it Stamp button Stamp the image straight onto the model Y...

Page 68: ...similarly to Stencil The following options exist within the same dropdown menu as the Stencil options Luminance Works well for dirt noise and other similar images by using the luminance value of an i...

Page 69: ...on the outside Same as Paint plus the following Source dropdown Clone from Current Paint Target the model s surface baked paint in the active channel Painting the current unbaked paint in the paint bu...

Page 70: ...ontrol Type What it does Notes button Double the selected face resolution button Halve the selected face resolution button entry box Set the world space face resolution for the selected face Enter the...

Page 71: ...alue of the LUT InputColor Space dropdown Set the colorspace of the scene Display Device dropdown Set the colorspace of the display device used to view the scene View Trans form dropdown Select a colo...

Page 72: ...utton dropdown Provides the following options for panning Pan All allows panning in any direction Pan X allows panning on the x axis only Pan Y allows panning on the y axis only Pan Disabled disables...

Page 73: ...ly Orbit Disabled disables all orbiting The button changes to reflect the selected option button dropdown Provides the following options Snap 45 degrees when rotating the model it snaps at 45 degree a...

Page 74: ...strokes made on either the left or right side of the divider are mirrored on the opposite side This applies to paint strokes only button Mirroring top and bottom splits the paint buffer down the cent...

Page 75: ...s click the button again Can also be done by using the Shift I shortcut button Sets up two default vector shaders with default channels and layers for painting flow or normal maps Also changes the too...

Page 76: ...t in the current channel button Selects the default Current Layer and Below shader from the Shaders palette and displays only the paint in the current layer stack button Selects the default Current La...

Page 77: ...lows you to save Click on the icon to save changes Notifies you that your painting is hidden Notifies you that color management is active Notifies you that you are currently projecting on the front of...

Page 78: ...cur A simple way to free disk space is to close the project and re open it Mari saves your session history but closing your project clears this used disk space up for use Warns you that there is no di...

Page 79: ...hat palette give you fine control over aspects of each channel Below are the controls you can expect to find on the Channels palette Channels Palette Fields Control Type What it does Dialog Notes butt...

Page 80: ...the channel size used when creating a Quick Channel from the options 256x256 512x512 1024x1024 2048x2048 4096x4096 8192x8192 16384x16384 32768x32768 Ensure this is set to the size you want before cre...

Page 81: ...te Fields channel name General Color Space information Sets whether the channel is Color or Scalar channel name General Size information Lists the size of the patches in the channel channel name Gener...

Page 82: ...associated icons filter for the color tags of the selected color icon Both Type and Attribute provide icons that allow you to set the parameters for your filter Quickly clear the entry box by press in...

Page 83: ...yer To distinguish whether the layer is an adjustment layer or simply has an adjustment on it look for the posi tion of the icon If the icon is in the left most column where the icon is normally locat...

Page 84: ...try box slider Controls the brightness of the paint on the model Adjustment Brightness Lookup Map curve editor Adjusts the brightness to a specific lookup value using a curve map Adjustment Clamp Min...

Page 85: ...hadows Magenta Green entry box slider Adjusts the Green color component Dragging the slider to the left pulls the scale towards magenta whereas dragging the slider to the right pulls it towards green...

Page 86: ...el on or off Disabling the alpha channel removes it from the painting Adjustment Contrast Contrast entry box slider Adjusts the contrast for the layer stack Contrast Pivot entry box slider Sets the po...

Page 87: ...vel as tied to the HSL for the layer stack Adjustment HSV Hue Shift entry box slider Adjusts the hue level as tied to the HSV for the layer stack Saturation Scale entry box slider Adjusts the saturati...

Page 88: ...color component when checked Uncheck the parameter to leave the component unchanged It is uncommon that only one compo nent would be selected however if the need arises you can choose to invert only o...

Page 89: ...ds cyan whereas dragging the slider to the right pulls it towards red G entry box slider Adjusts the Green color component Dragging the slider to the left pulls the scale towards magenta whereas dragg...

Page 90: ...ncoded vectors in screen space Adjustment Tangent To World Suppress Blue checkbox Suppresses the blue value from the color encoded vectors in world space Adjustment sRGB2Linear Invert checkbox Applies...

Page 91: ...projected image along the X axis This affects the position of where the camera sits in the scene Offset Y entry box slider The offset of the projected image along the Y axis This affects the position...

Page 92: ...nly Cull Backfaces checkbox When the checkbox is ticked this setting ensures that projection does not affect areas facing away from the camera when factoring edge falloff Offset X entry box The offset...

Page 93: ...t entry box slider Specifies how much the image on the top of your model is offset by on the U axis Top Top V Offset entry box slider Specifies how much the image on the top of your model is offset by...

Page 94: ...f your model Right Right Repeat entry box slider Specifies the frequency at which the image is repeated across the side of your model Right Right Angle entry box slider Specifies the rotation angle of...

Page 95: ...or Color B swatch Sets the color to be used for the pattern s B input Procedural Procedural Fractal Turbulence Size entry box slider Adjusts the size of the turbulence pattern Roughness entry box slid...

Page 96: ...thod dropdown Changes the shape of the cells to affect the dis tance the cells are from each other Color Color A swatch Sets the color to be used to the pattern s color A input Color Color B swatch Se...

Page 97: ...on a curve Rotation X entry box slider Adjusts how the gradient appears on the model by rotating the gradient on the X axis Rotation Y entry box slider Adjusts how the gradient appears on the model b...

Page 98: ...Repeat entry box slider Specifies the repeat rate for the grid on the model s surface Thickness entry box slider Sets the thickness of the grid lines Procedural Procedural Pattern UV Linear Gradient...

Page 99: ...slider to lower values makes the transi tion from color A to color B more distinct Stretch X entry box slider Stretches the wood pattern across the model on the x axis Stretch Y entry box slider Stre...

Page 100: ...Lets you specify whether to list patches by UDIM or a custom sort by dragging patches up and down the list icon Click to toggle whether a patch is visible or not icon Click to toggle whether a patch i...

Page 101: ...on Click to toggle whether an object is visible or not icon Click to toggle whether an object is locked or not button Add another object to the project button Removes the selected object from the proj...

Page 102: ...e User Attributes Cre ated info The creation date of the model file object name User Attributes Modi fied info The last modification date of the model file object name User Attributes Owner info The u...

Page 103: ...selected layer This shader can also be found on the Default Shaders toolbar Current Layer shader Default shader that displays only the paint able paint and masks in your selected layer This shader ca...

Page 104: ...paint of the currently selected target Lambertian Phong Diffuse Color dropdown The channel containing the RGB diffuse color effect of the shaded surface Specular Color dropdown The channel containing...

Page 105: ...box slider How much of the specular light appears on the shaded surface From 0 to 2 defaults to 1 Specular Shininess entry box slider How much shininess the specularity appears to have on the shaded...

Page 106: ...ronment Color dropdown The channel containing the reflective sur face using an image in a channel as the reflection on the shaded surface Bump dropdown The channel containing the bump map to show as a...

Page 107: ...much of the environment appears on the shaded surface From 0 to 2 defaults to 1 Bump Weight entry box slider How much weight the bump map has Lower values are smaller bumps higher values are larger a...

Page 108: ...mbient Occlusion dropdown The channel to use to calculate the ambient occlusion In order for this to be calculated correctly you need to run the ambient occlusion Objects menu select Ambient Occlusion...

Page 109: ...ias entry box slider How much the white or black values are pushed or pulled from the surface From 0 to 1 defaults to 0 500 Displacement Displace ment Scale entry box slider What the range of displace...

Page 110: ...advanced preview of displacement This component is dis abled for Ptex channels button Adds a new channel for the shader compo nent Add Channel Dialog Box Diffuse entry box slider How much of the diff...

Page 111: ...e channel containing the displacement map and dynamic tessellation to show a more advanced preview of displacement This component is dis abled for Ptex channels button Adds a new channel for the shade...

Page 112: ...the surface From 0 to 1 defaults to 0 500 Displacement Displace ment Range entry box What the range of displacement is This set ting is multiplied by the Displacement Scale to give the displacement Di...

Page 113: ...show a more advanced preview of displacement This component is dis abled for Ptex channels button Adds a new channel for the shader compo nent Add Channel Dialog Box Diffuse entry box slider How much...

Page 114: ...of the shaded surface Specular Color dropdown The channel containing the RGB specular color effect of the shaded surface Specular Roughness dropdown The channel containing the rough shaded surface for...

Page 115: ...ss dropdown How rough the surface is by default Rougher surfaces have the highlight spread more across the surface Lower values mean the surface is smoother specular lights are more concentrated highe...

Page 116: ...face for specularity Environment Color dropdown The channel containing the reflective sur face using an image in a channel as the reflection on the shaded surface Bump dropdown The channel containing...

Page 117: ...values are smaller bumps higher values are larger and more obvious displacements From 0 to 10 defaults to 0 100 Ambient entry box slider How much ambient light appears on the shaded surface From 0 to...

Page 118: ...Bump shader component Ambient Occlusion dropdown The channel to use to calculate the ambient occlusion In order for this to be calculated correctly you need to run the ambient occlusion Objects menu s...

Page 119: ...to 1 Emissive entry box slider How much glow the emissive channel appears to have From 0 to 2 defaults to 1 Diffuse Falloff entry box slider How much falloff is given to the diffuse input From 0 to 5...

Page 120: ...current camera position Light Color Specular swatch Sets the specular color of the light the shiny color of the light Defaults to white Light Color Diffuse swatch Sets the diffuse color of the light...

Page 121: ...tion Position control sphere Lets you move the light around your project Click and drag to move the light Light Rendering Render Shadows checkbox Renders and displays the shadows cast on the model by...

Page 122: ...o disk Save Projector button Loads a saved projector from disk Load Projector button Deletes the selected projector Projector General Name entry box Enter the name of the projector This identifies the...

Page 123: ...tor to take a screen snapshot of By default this is set to Current Paint Target Current Shader Cur rent Channel Current Layer Current Paint Target and Current Layer and Below Projector Unprojection Li...

Page 124: ...d any projection properties click this button to see the effect of your changes in the canvas When you do the equiv alent global projection properties in the Projec tion palette are also updated Updat...

Page 125: ...are fur ther than the Far plane Edge Mask General Enabled checkbox Whether the edge mask is turned on or not You need to click either of the update buttons under Update to see the effect of your chan...

Page 126: ...to see the effect of your changes in the canvas When you do the equivalent global properties in the Pro jection palette are also updated Channel Mask General Invert checkbox If this is selected the ma...

Page 127: ...click either of the update buttons under Update to see the effect of your changes in the canvas When you do the equivalent global properties in the Pro jection palette are also updated Channel Mask Ge...

Page 128: ...than the ambient occlusion higher values make it sharper You need to click either of the update buttons under Update to see the effect of your changes in the canvas When you do the equivalent global p...

Page 129: ...see the effect of your changes in the canvas When you do the equivalent global properties in the Pro jection palette are also updated Depth Mask General End entry box slider The depth in the scene for...

Page 130: ...50 grey is 50 masked You need to click either of the update buttons under Update to see the effect of your changes in the canvas When you do the equivalent global properties in the Pro jection palette...

Page 131: ...equivalent global properties in the Pro jection palette are also updated Fractal Noise Mask General Contrast entry box slider Controls the level of contrast applied to the fractal noise features to de...

Page 132: ...trol Type What it does Opens this dialog box Notes Sorted by Dropdown Sets how to sort the entries in the list At present you can only sort by name button Adds a new selection group based on the curre...
Page 133: ...When on displays in the status bar and a histogram displays a count of frequen cies of colors in RGBA chan nels in the current view Options Active on off indi cator Displays green when color correcti...

Page 134: ...rofile LUT General Extrapolate checkbox Sets whether the GPU extrapolates the grid values or clamps to the maximum value of the LUT Current Color Profile Composite Filter switch on off indicator add a...

Page 135: ...t Color Profile Levels Output Levels Black Output Levels entry box slider Sets how much black is output in the filtered image Higher values show the entire black output lower values show decreasing am...

Page 136: ...rofile Brightness switch on off indicator add attribute Changes the brightness of the paint on the model either overall or for specific channels Add User Attribute Current Color Profile Brightness Gen...

Page 137: ...ider reset Sets the exposure lower exposures give darker images higher exposures give lighter ones Range 0 00 to 10 00 Reset 1 00 Current Color Profile Gamma switch on off indicator add attribute Chan...

Page 138: ...turation curve editor Controls how the filter translates current satu ration to new satura tion Current Color Profile Hue Value Scale entry box slider reset Sets a multiplier for the value Range 0 00...

Page 139: ...o it Add User Attribute Current Color Profile Luminosity switch on off indicator add attribute Outputs just the lumi nosity value of each pixel in the selection That is it outputs a grayscale image ba...

Page 140: ...l General Copy Channel dropdown Select the source chan nel from the list Red Green or Blue When you apply the filter Mari copies the selected channel over the other two channels Current Color Profile...

Page 141: ...o 50 00 If you use a larger blur radius you may get slight lines on the boundaries between patches This is an artifact of the way that Mari handles the edges of patches Current Color Profile High Pass...

Page 142: ...s Amount entry box slider Adjusts how much noise is applied Current Color Profile Add Noise User Attributes Color Component dropdown Sets the channel you want to affect Current Color Profile Add Noise...

Page 143: ...ts of the currently selected image Image Info MriImage Info File Space dropdown File space of the cur rently selected image NORMAL or VECTOR Image Info MriImage Info ColorSpace dropdown Colorspace of...

Page 144: ...n the Image Manager The cropped image is part of the project but won t be saved as a separate image file unless you use the Save As option see above Choose from the following crop modes Arbitrary Clic...

Page 145: ...31 HISTORY VIEW PALETTE What It Does The History View palette displays a list of actions performed in the current session Click an action to step back to that version of the project...

Page 146: ...each splat This is a little bit of noise added to the splat itself to soften the appearance and reduce banding Lower values give a harder brush higher val ues a softer brush Properties General Spacing...

Page 147: ...perties Pressure Colors checkbox Whether more pressure causes the color to vary from slightly darker to the target color Properties Pressure Radius checkbox Whether more pressure increases the radius...

Page 148: ...ation checkbox Whether to randomly vary the rotation Properties Rotation Rotation entry box slider reset The degree to which the brush rotates to match the direction you re painting if Align to Stroke...

Page 149: ...eset 50 Properties Geometry Horizontal Scale entry box slider reset How much to distort the brush tip horizontally Range 0 00 to 2 00 Reset 50 Properties Noise Octaves entry box slider reset Number of...

Page 150: ...i 2 0v1 150 The Foundry Brush Editor Palette Fields Presets tabs Select shelves click to dis play more to the left or right Scratch pad Provides a space to test the brush Control Type What it does Ope...

Page 151: ...ation sequence What It Looks Like Play Controls Palette Fields Control Type What it does Opens this dialog box Notes Timeline timeline Shows where in the animation sequence you are currently viewing K...
Page 152: ...play the selected frames through repeating again from the start when it finishes Bounce play the selected frames through from start to finish then back wards from the finish to start and then repeati...

Page 153: ...ctions a Script Path entry box that loads Python scripts from a defined location an input pane that is used to enter and execute Python statements in the lower half of the palette an output pane that...

Page 154: ...t does Notes Output Pane information Displays Python statements and their outputs Input Pane entry box Click inside to enter Python statements Script Path entry box Enter the filename and path where t...

Page 155: ...e been selected with the Color Picker Pixel Analyzer tool when Accumulate is enabled Colors Maximum swatch Displays the maximum color of the pixels that have been selected with the Color Picker Pixel...

Page 156: ...icking on this swatch opens the Select Color dialog box Foreground Background Background swatch Shows the current background color Clicking on this swatch opens the Select Color dialog box Foreground...

Page 157: ...an image by right clicking and selecting Load Image then choosing a file from the Load dialog box To clear an image right click it and select Clear Image Grey tab slid ers but tons Use this to pick a...

Page 158: ...MriMarqueeSelectTool General Crawling Ants checkbox Controls whether the selection edges are animated If on the edges are animated Marquee Select Tool MriMarqueeSelectTool General Type dropdown The s...

Page 159: ...ion Unselected areas become selected and vice versa Marquee Select Tool MriMarqueeSelectTool General Clear Marquee Selection button Clears the current selection Marquee Select Tool MriMarqueeSelectToo...

Page 160: ...n area Marquee Select Tool MriMarqueeSelectTool Transform Center entry box Sets the center of the marquee selection Use the break link button to break the link between the two fields Marquee Select To...

Page 161: ...riVectorIn spectorTool General End color swatch Change the color at the tip of the directional markers Vector Inspector MriVectorIn spectorTool General Vector Space dropdown Set whether the vector ins...

Page 162: ...r Paint Vector Paint add attri bute Click to add attributes Add User Attributes Vector Paint Vector Paint General Description informa tion Vector Paint Vector Paint General Name informa tion Vector Pa...

Page 163: ...y changes to scale are applied proportionately to both axes Texture Transform Pan Lock checkbox Locks the image position relative to the model If you pan the model the image that you re painting throu...

Page 164: ...y box slider How far through the gradient the start color lasts for before it starts graduating into the end color 0 00 to 1 00 higher values imply the start color finishes later Texture Gradient Grad...

Page 165: ...lower values blend the whole patch in with the back ground as you move it Eye Dropper General Sample Size entry box slider Radius in pixels that the eyedropper uses when sampling colors off the surfac...

Page 166: ...ter Source Grade Enabled checkbox Enables source image grading Used this to grade your source image when cloning from or painting through an image Painter Source Grade Rgb entry box slider Changes the...

Page 167: ...d Mari restricts the range of the image to values between 0 and 1 Paint Buffer Transform Translation entry boxes The amount that the buffer has been translated moved onscreen from the default Paint Bu...

Page 168: ...bled checkbox Shows the masking Areas that are covered by the current defined mask s are shown colored This includes all the masking currently in use for example if you have both the edge mask and dep...

Page 169: ...es and then clears the paint buffer whenever you move the model Projection Settings Projection Projection dropdown One of Front paint only applies to the front of the model as it is visible in the cur...

Page 170: ...this is on but Mask Preview Enabled is off the model is masked but you won t see the masking That is you can see the mask s effects but not the mask itself When enabled a icon displays in the status b...

Page 171: ...ings Ambient Occlusion Mask toggle Whether the ambient occlusion mask is turned on or not If this is on but Mask Preview Enabled is off the model is masked but you won t see the masking That is you ca...

Page 172: ...ider reset The depth in the scene for the depth masking to finish Projection Settings Depth Mask Gen eral Falloff entry box slider reset How fast the depth masking applies Lower values make the mask a...

Page 173: ...k decrease as the value gets lower Projection Settings Fractal Noise Mask General Mask Curve curve editor reset Controls how the fractal noise relates to the degree of masking based on the above field...

Page 174: ...hard surface brushes Organic Brushes shelf a set of predefined organic brushes Project shelf items for just the current project Shelf palette fields Control What it does Notes Types of Controls Selec...

Page 175: ...V palette is a cut down version of the Colors palette only containing the HSV color picker control HSV Palette Fields Control Type What it does HSV field sliders option buttons Use this to pick colors...

Page 176: ...project Channels Current button Displays a list of snapshots for the currently selected channel Created info The date and time when the snapshot was taken Preview thumbnail A thumbnail preview of the...

Page 177: ...OTS PALETTE Mari 2 0v1 177 The Foundry Snapshots Palette Fields button Loads the selected snapshot button Deletes the selected snap shot Delete Snapshot Control Type What it does Opens this dialog box...

Page 178: ...pe Mari checks the model for any errors that might prevent it from processing for example whether UVs overlap or touch border edges A Mesh Sanity Check dialog displays any warnings or errors Errors ca...

Page 179: ...y and replaces the existing UV map with a Ptex map Geometry Mesh Options Selection Sets dropdown Selection sets have two options to either Create From Face Groups this is the default behavior and allo...

Page 180: ...Path you should always set the Size of the tex ture files manually The default values Mari sets may not be correct as chan nels can contain many different patch sizes Texture Prefix entry box Filename...

Page 181: ...on to open a dialog allowing you to manually pick the files Texture button Opens a dialog box allowing you to pick the textures for Mari to import into the new channel Import Dia log Box Texture image...

Page 182: ...r Background color swatch Colors palette Foreground color swatch Colors palette Background color swatch Add Channel dialog Color color swatch HSV palette Color swatch Select Color dialog box fields Co...

Page 183: ...ption buttons Use this to pick colors from a Hue Saturation Value field To create custom color spec trums Adjust the field values using the controls on the right then click in the field to set the for...

Page 184: ...Channel Dialog Box Fields Control Type What it does Opens this dialog box Notes Previous channel names dropdown This holds the names of recently created channels Select a channel from the list and th...
Page 185: ...log Box Fields File Space dropdown The type of file space used for vector painting Either Normal or Vector Color swatch Color to fill the new channel Click the swatch to change the color Select Color...

Page 186: ...field See the Extending Mari chapter in the Mari User Guide for details How to Access It Menubar Channel Channel Presets Right click channel in Channels Palette ChannelPresets Button Channels Palette...

Page 187: ...orDe tailMask Size dropdown Patch size for the new channel Mari sets a default value but you can change this Type dropdown Channel type Either Color or Scalar Mari sets a default value but you can cha...

Page 188: ...dropdown button Specify the file path for the creation of new channel templates The browse and scan buttons also allow you to search for the file location Import dropdown Select which patches to impor...

Page 189: ...Options are Color or Scalar File Space dropdown Select a file space for the created channel template Options are Normal and Vector Fill swatch Select a color to use for the background of channel tem...

Page 190: ...Convert Type dialog box How to Access It Menubar Channels Convert Channel Right click in Channels Palette Convert Channel Button in Channels Palette Convert Type Dialog Box Fields Control Type What it...

Page 191: ...ct By dropdown Select how to identify the patches on the source layer Source Range entry box The patch numbers of the patches to copy textures from Enter the patch numbers You can separate patch numbe...

Page 192: ...re scaled up to fill the entire patch How to Access It Menubar Channels Export any of the dropdown options Menubar Channels Export Flattened any of the dropdown options Menubar Layers Export any of th...

Page 193: ...they haven t been painted Alpha Channels dropdown Choose whether to Keep or Remove alpha channels when exporting textures This can help decrease the resulting file size when exporting images that don...

Page 194: ...tion Last modified date for the images in the sequence Template entry box dropdown Sets the Template for Mari to use when gathering the names of images in the selected sequence Variables available are...

Page 195: ...that hasn t been fully painted Disable Small Textures if you want Mari to always export patches at their full size even if they haven t been painted Alpha Channels dropdown Choose whether to Keep or R...

Page 196: ...ar Channels Import any of the dropdown options Menubar Layers Import any of the dropdown options Right click Channels Palette Import any of the dropdown options Right click Layers Palette Import any o...

Page 197: ...riting your textures button Resets the path to the default location button Goes back to the previous directory button Goes forward to the next directory that you have browsed Only available if you hav...

Page 198: ...tion Last modified date for the images in the sequence Template entry box dropdown Specify or select a preset format for automati cally naming and numbering files on import Vari ables available are EN...

Page 199: ...Import Channel Dialog Box Fields Import Selected Patches button Appears instead of Import All Patches when at least one patch is selected Cancel button Closes the dialog box without importing Control...

Page 200: ...o Maya Export Dialog Box Fields Control Type What it does Opens this dialog box Notes Output Folder entry box Displays the selected filepath for the exported files You can also manually type in the fi...
Page 201: ...the exported images Available formats exr psd tif and tiff Force Over write checkbox Forces Mari to overwrite previously exported files to the same location effectively replacing them OK button Accept...

Page 202: ...r Button in Shaders Palette Choose Diffuse Specular New Shader Dialog Box Fields Control Type What it does Opens this dialog box Notes Diffuse Diffuse Lighting Dif fuse Lambertian dropdown Sets the Di...
Page 203: ...own menu is Lam bertian Cook Torrance Specular Lighting Specular Beckman dropdown Sets the Specular component of the shader to Beck man By default the Beckman shader in the Add New Shader dropdown men...

Page 204: ...Shader Choose Diffuse and Specular Right click Shaders Palette Choose Diffuse and Specular Shaders Palette Choose Diffuse and Specular Create Shader dialog box fields Control Type What it does Opens...

Page 205: ...lpha Mask Channel to Alpha Dialog Box Fields Control Type What it does Opens this dialog box Notes New Channel Name entry dropdown Enter the name for the new channel to create RGB Channel dropdown Sel...
Page 206: ...tches Select Range Select Patches By Range dialog box fields Control Type What it does Opens this dialog box Notes Select By dropdown Gives you the choice of selecting a range of patches by either the...
Page 207: ...opdown The directory of the camera file that is to be loaded into the current project button Goes back to the previous directory button Goes forward to the next directory that you have browsed Only av...

Page 208: ...ected file to be imported into the project This field is automati cally filled in when a file is selected from the above directory location File Type entry box dropdown Displays the file formats avail...

Page 209: ...s Control Type What it does Opens this dialog box Notes Search Actions entry box drop down Search for actions in the list below to quickly find a particu lar action shortcut or informa tion button Cle...
Page 210: ...description of the action actions Shortcut information entry Displays assigned keyboard shortcuts toolbars Visible checkbox Whether the action is currently displayed Grouped by Default the standard t...

Page 211: ...otes Search Actions entry box dropdown Search for actions in the list below to quickly find a particular action shortcut or information button Clear the search bar for the Search Actions field button...

Page 212: ...212 The Foundry Edit Shortcuts dialog box fields actions Description information A brief description of the action actions Shortcut information Displays assigned keyboard shortcuts Click and type ove...

Page 213: ...dit HUD Manager HUD Manager Dialog Box Fields Control Type What it does Notes Shader Network GLSL Code Generator Manager General GLSL Generator QString Shows the GLSL for the shader network Project Pr...

Page 214: ...0 Driver Version QString Debug info GPU 0 Driver Vendor QString Debug info GPU 0 Resources Memory Info QString Shows the memory usage and free memory information for the project GPU 0 Resources Used T...

Page 215: ...d the project Project Creation Creation Date QDate Displays the initial creation date of the project Project Debug Unique Id QString Debug info Project Editing Last Edited QDate Displays date that the...

Page 216: ...pace configuration file that is loaded by the colorspace toolbar Display Defaults Input ColorSpace dropdown Sets the default colorspace of the scene Display Defaults Display dropdown Sets the default...

Page 217: ...s of which there are three per cache direc tory Cache Max Memory entry box incrementers Sets the maximum amount of memory Mari uses for the DDI cache blocks You can t set this to a value higher than 8...

Page 218: ...akes longer Channels Export Mask Stacks dropdown Determines how mask stacks are exported Either Export Baked Mask Stack and an Invisible Group exports a group along with the mask stack in order to gro...

Page 219: ...baking time but may impact stability Canvas Deferred Shading checkbox Specifies whether to use deferred shading This is on by default and should increase painting and navigation speed Canvas Deferred...

Page 220: ...additional GPU memory Mari uses for tasks other than painting for example filter operations General Deferred Quad Split Count entry box slider Sets the quad split count Increasing this value splits t...

Page 221: ...slider Adjusts point size of the custom font Use Custom Font must be enabled in order for this to have an affect Image Import Export Show Summary Dialog on Import checkbox Sets whether Mari displays...

Page 222: ...ther to show Mari s preset brushes in the Shelf tab If off only your personal and custom shelves are displayed Shelf Remake Icons button Regenerates Mari s icons for shelf items If these have become c...

Page 223: ...other application specified in the dropdown list Applications include Nuke Maya LightWave and Houdini Orbit Lock To World Up checkbox If this is on it locks the y axis to world up view Orbit Center Mo...

Page 224: ...button Adds or removes directories that Mari checks for compositing shaders Ptex Face Textures Minimum Size dropdown Sets the minimum face texture size The options provide increments in powers of two...

Page 225: ...ct back ground in the canvas If not set the colors in the Bottom and Top fields are used for the back ground Canvas Background Bottom swatch Sets the color to display at the bottom of the screen To us...

Page 226: ...10 Canvas Rendering Render Cameras checkbox Show the cameras on the canvas Canvas Rendering Render Lights checkbox Show the lights on the canvas Canvas Rendering Render UV Image checkbox Show the patc...

Page 227: ...utline Render dropdown When to show the selection outline This appears around the outside of selected areas The options are the same as for Fill Render above Canvas Selection Outline Color swatch The...

Page 228: ...shot Settings dialog box fields Control Type What it does Opens this dialog box Notes Output entry box dropdown The directory where the screenshots are to be saved Type the directory or click the file...
Page 229: ...What it does Notes Settings Size dropdown Selects the size of the generated images Settings Antialias dropdown How much anti aliasing to use in the generated images Settings Background dropdown Select...

Page 230: ...box slider Sets the text size for the comment Range 0 10 to 10 00 Default 1 00 Info Reference entry box dropdown button Selects a reference image to include at the top right of your model Second drop...

Page 231: ...list Selects which channels to export turntables for Settings Size dropdown Selects the size of the generated images Settings Antialias dropdown How much anti aliasing to use in the gener ated images...

Page 232: ...cts a reference image to include at the top right of your model Second dropdown specifies whether the colorspace is sRGB or Linear Output Path entry box dropdown button Specifies where Mari should cre...

Page 233: ...tion for the projected file Color Depth dropdown Sets the color depth for the projected file Clamp checkbox If enabled Mari clamps the RGB values for the projected file Path entry box button Specifies...

Reviews: