


3
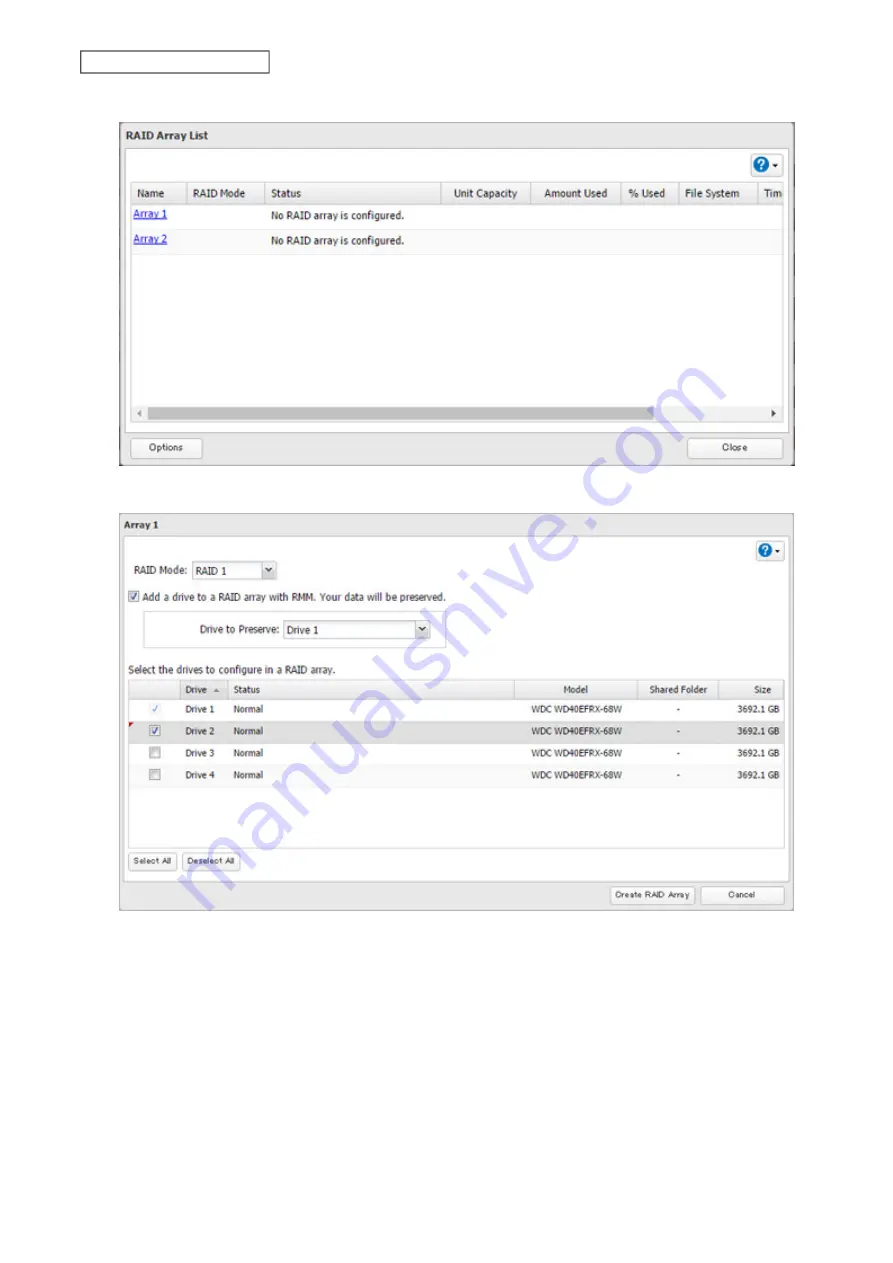
Choose a RAID array.
4
Set the RAID mode to “RAID 1”.
5
Select the “Add a drive to a RAID array with RMM. Your data will be preserved.” checkbox.
6
Select the drive whose data will be saved from the drop-down list.
7
Select the drive to add to the RAID array.
8
Click
Create RAID Array
.
9
The “Confirm Operation” screen will open. Enter the confirmation number, then click
OK
.
10
Click
OK
when completed.
52
Chapter 4 Storage Management
Summary of Contents for TeraStation 6000 Series
Page 32: ...3 Click Add Group 31 Chapter 3 File Sharing...
Page 120: ...2 Click Time Machine 119 Chapter 5 Backup...
Page 121: ...3 Click Select Backup Disk 4 Select the TeraStation then click Use Disk 120 Chapter 5 Backup...
Page 123: ...7 Time Machine will count down from 120 seconds then backup will begin 122 Chapter 5 Backup...
Page 132: ...5 Click Edit 131 Chapter 6 Remote Access...
Page 144: ...4 Click the Options tab 5 Click Edit 143 Chapter 6 Remote Access...
Page 153: ...4 Click the Options tab 152 Chapter 6 Remote Access...
Page 154: ...5 Click Edit 153 Chapter 6 Remote Access...
Page 169: ...11Click the NFS Rules tab 12Click Add 168 Chapter 7 Advanced Features...


