


9
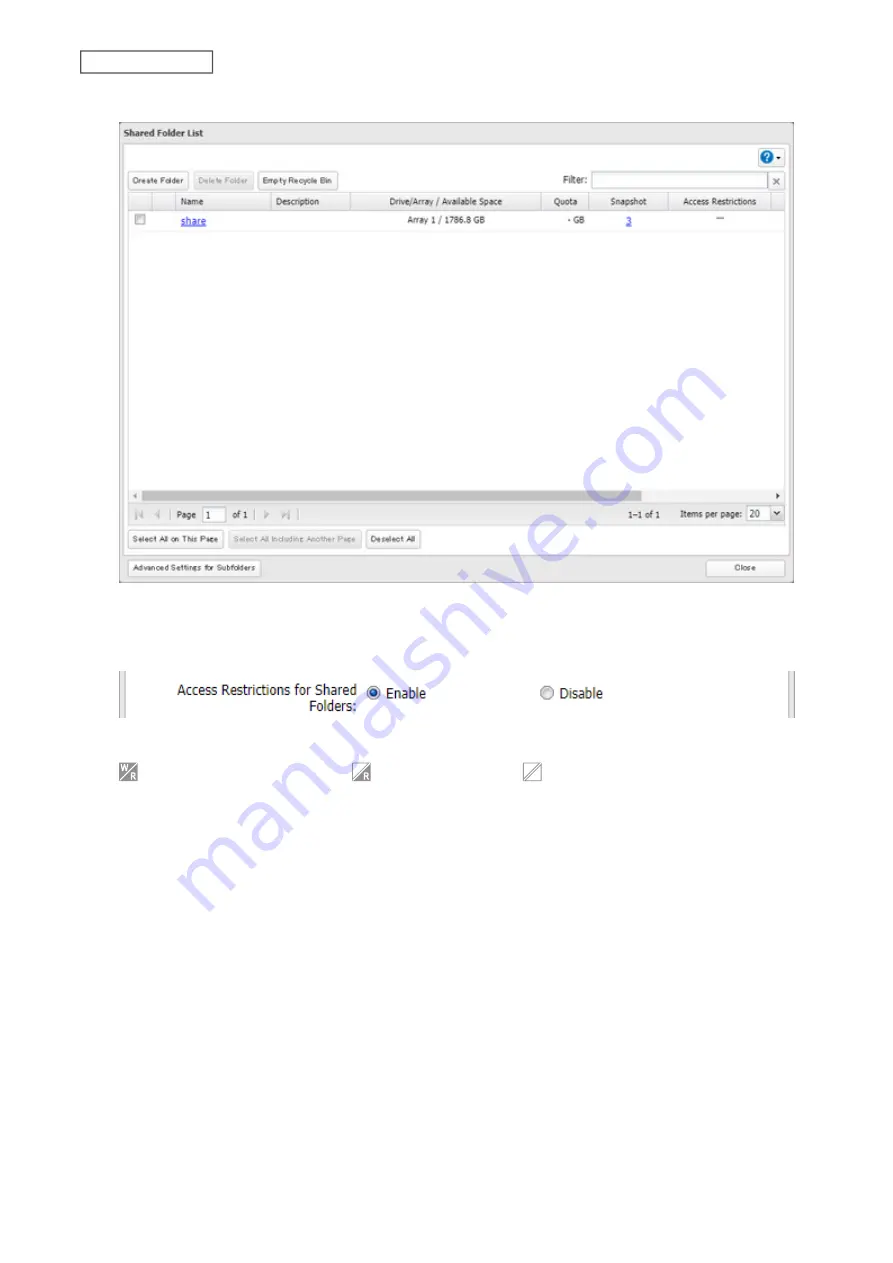
Click the shared folder that you want to set access restrictions for.
10
Click the
Access Restrictions
tab.
11
Enable “Access Restrictions for Shared Folders”.
12
Select the level of access for the user or group.
: Read and write access allowed
: Read access allowed
: Access prohibited
13
Click
OK
.
Notes:
• To have the TeraStation join an Active Directory domain, configure it to use a DNS server that can resolve names
for the Active Directory domain.
• After building an Active Directory domain, the administrator password for joining the domain must be changed
at least once, or joining the Active Directory domain will fail.
• The DNS name and NetBIOS name of Active Directory domains should be identical.
• To use the TeraStation as a member server in an Active Directory domain, the TeraStation should be logged in to
the domain and accessed from a computer that is not a member of the domain with a valid domain account.
• If the TeraStation is a member server of an Active Directory domain, you cannot connect as a guest user via AFP.
• If your TeraStation is a member server in an Active Directory domain and you change the authentication method
to “Workgroup”, the account on the domain controller will not be deleted automatically.
• If FTP is enabled, local and domain group access restrictions from the AD network do not work. Use user access
restrictions instead.
• If you allow read and write or read-only access for most users, group access restrictions are recommended.
36
Chapter 3 File Sharing
Summary of Contents for TeraStation 6000 Series
Page 32: ...3 Click Add Group 31 Chapter 3 File Sharing...
Page 120: ...2 Click Time Machine 119 Chapter 5 Backup...
Page 121: ...3 Click Select Backup Disk 4 Select the TeraStation then click Use Disk 120 Chapter 5 Backup...
Page 123: ...7 Time Machine will count down from 120 seconds then backup will begin 122 Chapter 5 Backup...
Page 132: ...5 Click Edit 131 Chapter 6 Remote Access...
Page 144: ...4 Click the Options tab 5 Click Edit 143 Chapter 6 Remote Access...
Page 153: ...4 Click the Options tab 152 Chapter 6 Remote Access...
Page 154: ...5 Click Edit 153 Chapter 6 Remote Access...
Page 169: ...11Click the NFS Rules tab 12Click Add 168 Chapter 7 Advanced Features...


