


4
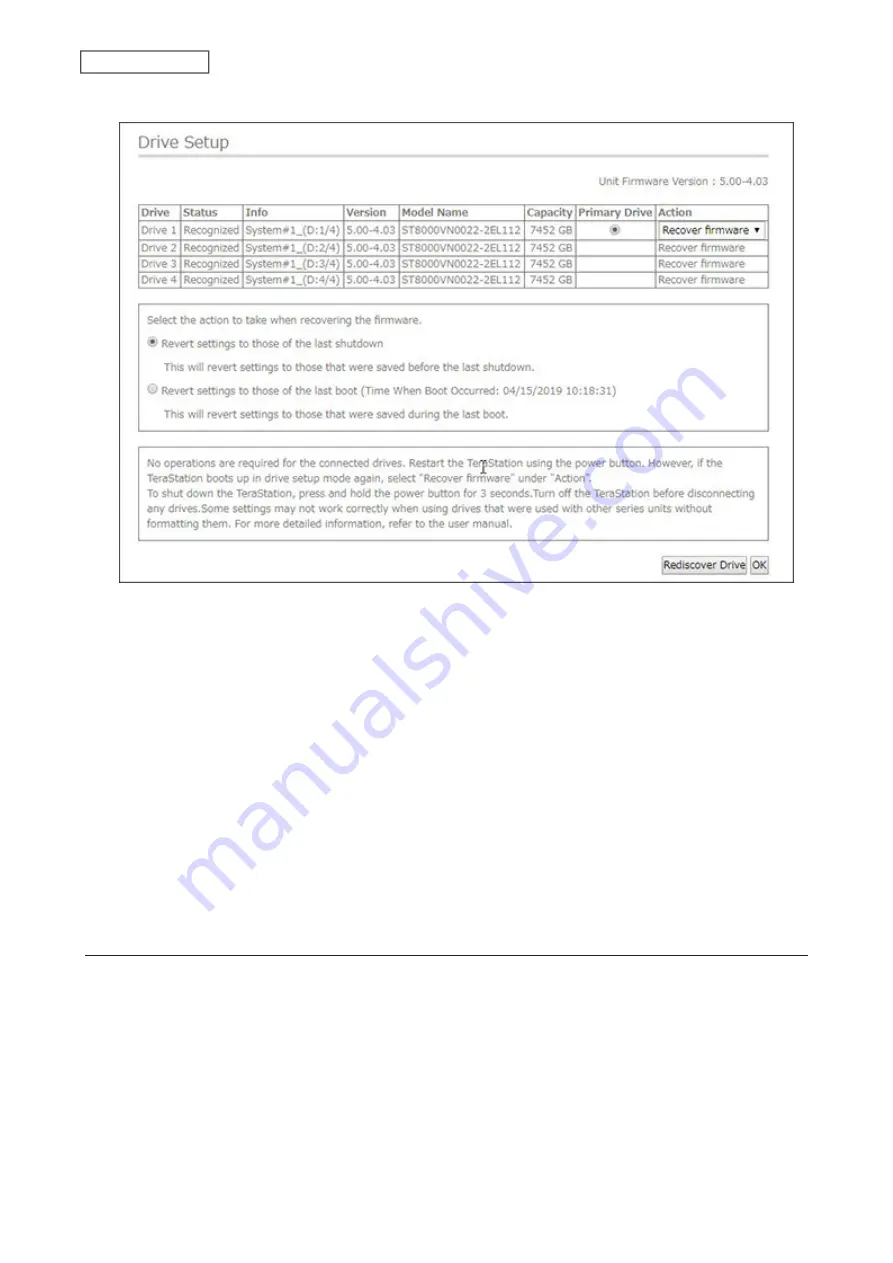
Make sure that “Recover firmware” is selected from the drop-down list under “Action”, then click
OK
.
Note:
There are two more options for “Action” other than “Recover firmware”. The details for all options are
below:
•
Use the drive’s firmware
: The TeraStation will boot using the firmware on the drive.
•
Recover firmware
: The TeraStation will be recovered using the firmware on the NAND flash.
•
Format drive
: The drive will be formatted.
5
The “Confirm Operation” screen will open. Enter the confirmation number, then click
OK
.
6
The recovery process will start. When the process is completed, the TeraStation will shut down automatically.
Press the power button to turn it on.
The TeraStation will be recovered from the malfunction that is keeping the power LED blinking. Make sure the
TeraStation finishes booting properly.
Note:
If the TeraStation does not recover from the error after trying the procedure above, try again from the first
step.
Booting the TeraStation in Emergency Mode
If the TeraStation boots up in emergency mode, depending on your TeraStation model, an “i” symbol is displayed
with the TeraStation icon and “EM” is added to your TeraStation’s hostname, or the LCD panel lights up in red with
the “Invalid Firmware” message.
216
Chapter 10 Appendix
Summary of Contents for TeraStation 6000 Series
Page 32: ...3 Click Add Group 31 Chapter 3 File Sharing...
Page 120: ...2 Click Time Machine 119 Chapter 5 Backup...
Page 121: ...3 Click Select Backup Disk 4 Select the TeraStation then click Use Disk 120 Chapter 5 Backup...
Page 123: ...7 Time Machine will count down from 120 seconds then backup will begin 122 Chapter 5 Backup...
Page 132: ...5 Click Edit 131 Chapter 6 Remote Access...
Page 144: ...4 Click the Options tab 5 Click Edit 143 Chapter 6 Remote Access...
Page 153: ...4 Click the Options tab 152 Chapter 6 Remote Access...
Page 154: ...5 Click Edit 153 Chapter 6 Remote Access...
Page 169: ...11Click the NFS Rules tab 12Click Add 168 Chapter 7 Advanced Features...


