


13
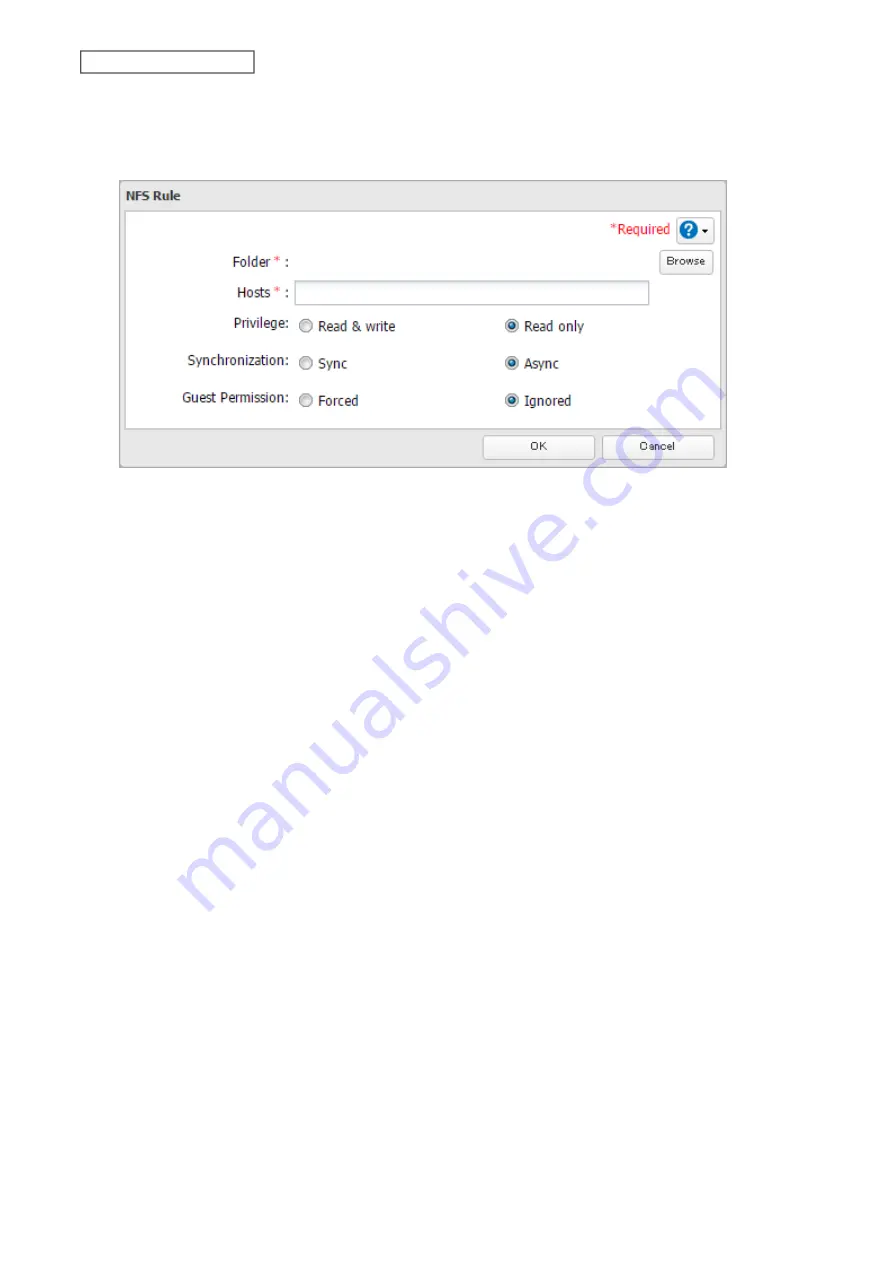
Choose the folder to restrict access to, and enter the clients that will have restricted access into the “Hosts”
field. Clients may be entered by hostname, IP address, or IP address range. Wildcards are supported. Separate
multiple entries with commas. You may assign read-only or read and write access to the listed clients. Rules
override any settings made from the
Services
tab.
14
Click
OK
.
Notes:
• To restrict NFS access to a specific network or client, navigate to
File Sharing
>
NFS
>
Services
and click
Edit
. Enter
the address of the network. For example, if your local network subnet has a router at 192.168.1.1 and clients
with IP addresses in the range from 192.168.1.2 through 192.168.1.48 with subnet mask 255.255.255.0, then the
“Public Network Address” would be 192.168.1.0 and the “Public Subnet Mask” would be 255.255.255.0. This would
mean that only clients on this local network would be able to access the NFS share. If the default settings are used
(0.0.0.0 for both the public network address and the public subnet mask), then access to the NFS share will not be
restricted.
• If you configure “Guest Permission” to “Forced” on the screen navigating to
NFS Rules
>
Add
, user ID and group ID
should be 65534 when the data is written from NFS clients; this is recommended for SMB or other protocols as
well. Use “Ignored” if the TeraStation only enables NFS connection.
• Be aware that some NFS clients may be able to access via NFS although the clients do not exist in the allowed NFS
client list.
NFS Mount Commands
Enter the mount command to access the shared folder from the NFS client. The mount command depends on your
operating system. The examples below assume that IP address of your TeraStation is 192.168.11.10, “/mnt/array1/
share” is the desired NFS path, and “/mnt/nas” or drive letter “z” is the mount point.
For Linux:
mount -t nfs 192.168.11.10:/mnt/array1/share /mnt/nas
For Windows Service for Unix 3.5:
mount 192.168.11.10:/mnt/array1/share z:
Note:
A shared folder whose folder name contains multibyte characters cannot be accessed.
For Solaris 10:
mount -F nfs 192.168.11.10:/mnt/array1/share /mnt/nas
For macOS:
mount -t nfs -o resvport 192.168.11.10:/mnt/array1/share /mnt/nas
169
Chapter 7 Advanced Features
Summary of Contents for TeraStation 6000 Series
Page 32: ...3 Click Add Group 31 Chapter 3 File Sharing...
Page 120: ...2 Click Time Machine 119 Chapter 5 Backup...
Page 121: ...3 Click Select Backup Disk 4 Select the TeraStation then click Use Disk 120 Chapter 5 Backup...
Page 123: ...7 Time Machine will count down from 120 seconds then backup will begin 122 Chapter 5 Backup...
Page 132: ...5 Click Edit 131 Chapter 6 Remote Access...
Page 144: ...4 Click the Options tab 5 Click Edit 143 Chapter 6 Remote Access...
Page 153: ...4 Click the Options tab 152 Chapter 6 Remote Access...
Page 154: ...5 Click Edit 153 Chapter 6 Remote Access...
Page 169: ...11Click the NFS Rules tab 12Click Add 168 Chapter 7 Advanced Features...


