


Notes:
• You can specify the LAN port to use for replication such as “(LAN3)”. However, if you connect two or more
LAN ports to the same network, the faster LAN port will take priority even if you specify the LAN port used.
For example, if both ports LAN1 and LAN3 are connected to the same network and LAN3 is faster, then that
port will be used even if you had configured LAN1 to be the port used.
To use a slower LAN port for replication in this environment, configure the LAN port settings to a different
network segment.
• If you want to back up to a Buffalo NAS device on another network, follow the procedure below to add the
Buffalo NAS device on another network before selecting the backup folders.
a. Click
List of Servers
.
b. Click
Add
; select the “Add Buffalo NAS device” option, enter the IP address or hostname of the
destination Buffalo NAS device, then click
OK
.
c. Click
Close
when completed.
d. Click
Refresh
and make sure the desired Buffalo NAS device has been added to the list.
8
Click
OK
, then
Yes
.
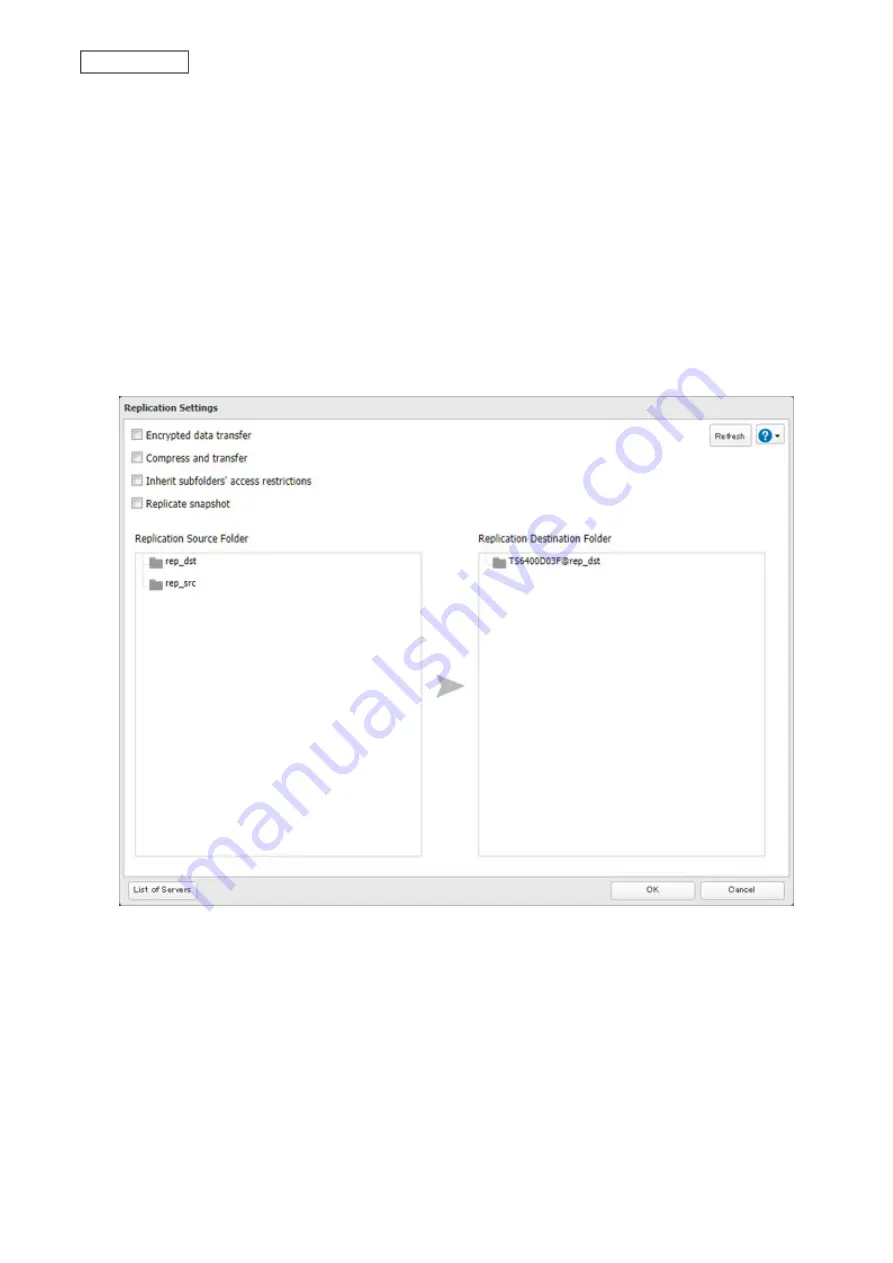
Notes:
• During setup, you may choose to encrypt and/or compress replication data. Encrypted data will be transferred
securely on the network. Compressed data will ease network loading and is recommended for slow or heavily
loaded network connections. Enabling either will increase the CPU load on the source TeraStation so that the
transfer speed will become slower, and replication time will be slower than if they are disabled. Encrypted or
compressed data will be decrypted or decompressed on the destination TeraStation.
• A maximum of 64 shared folders can be configured for replication.
• Don’t use the same TeraStation for both failover and replication, or replication and Time Machine.
• Don’t configure replication from one source folder to multiple destination folders.
107
Chapter 5 Backup
Summary of Contents for TeraStation 6000 Series
Page 32: ...3 Click Add Group 31 Chapter 3 File Sharing...
Page 120: ...2 Click Time Machine 119 Chapter 5 Backup...
Page 121: ...3 Click Select Backup Disk 4 Select the TeraStation then click Use Disk 120 Chapter 5 Backup...
Page 123: ...7 Time Machine will count down from 120 seconds then backup will begin 122 Chapter 5 Backup...
Page 132: ...5 Click Edit 131 Chapter 6 Remote Access...
Page 144: ...4 Click the Options tab 5 Click Edit 143 Chapter 6 Remote Access...
Page 153: ...4 Click the Options tab 152 Chapter 6 Remote Access...
Page 154: ...5 Click Edit 153 Chapter 6 Remote Access...
Page 169: ...11Click the NFS Rules tab 12Click Add 168 Chapter 7 Advanced Features...


