


3
Click
Edit
.
4
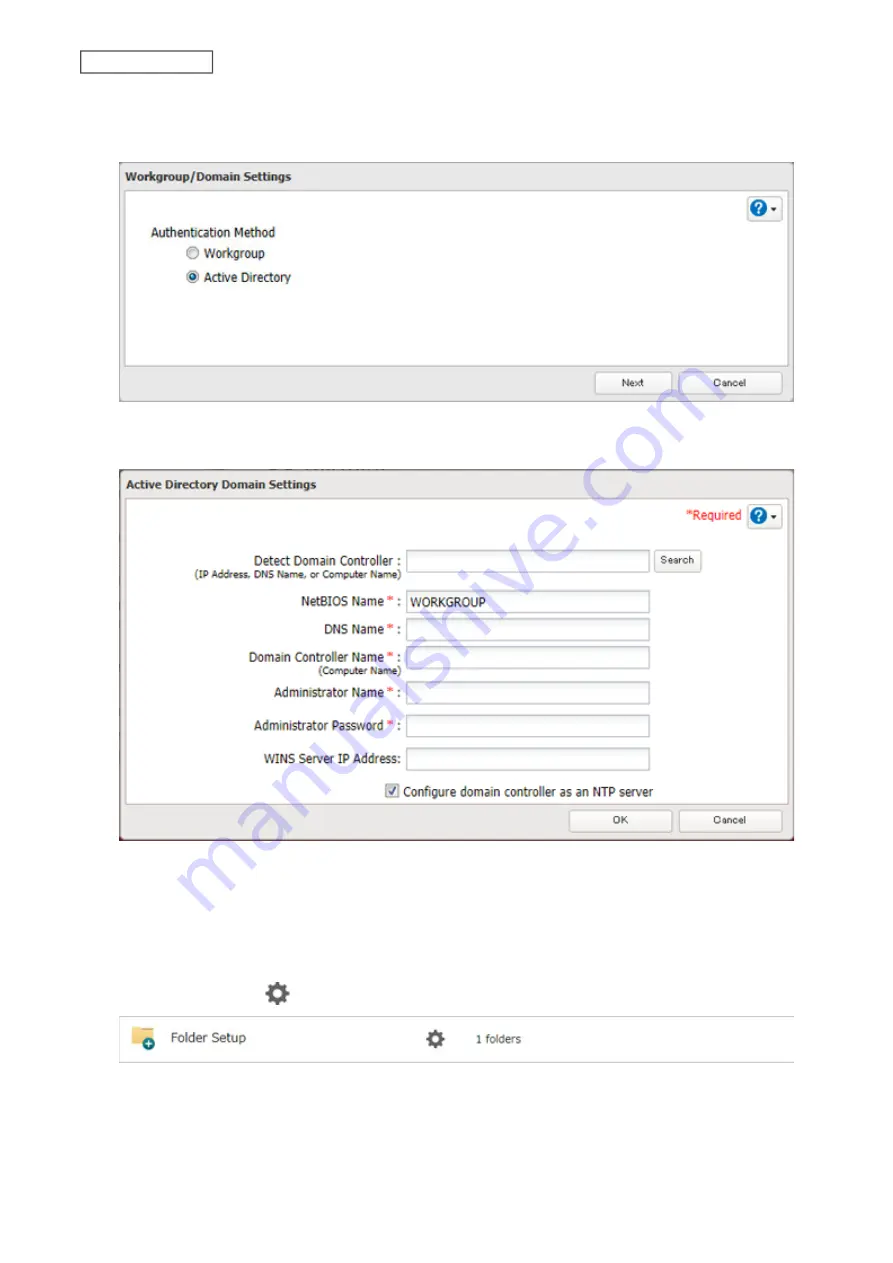
Select “Active Directory”, then click
Next
.
5
Enter the domain controller information and click
Search
. The domain controller on the same network will be
detected and required settings will be entered into each field automatically. Or, enter the settings manually.
6
If there is a difference of more than five minutes between the TeraStation’s clock and the domain controller’s
clock, joining the domain or authenticating domain users and groups may fail. For best results, select
“Configure domain controller as an NTP server” if the domain controller can function as the NTP server.
7
Click
OK
.
8
Click the settings icon (
) to the right of “Folder Setup”.
35
Chapter 3 File Sharing
Summary of Contents for TeraStation 6000 Series
Page 32: ...3 Click Add Group 31 Chapter 3 File Sharing...
Page 120: ...2 Click Time Machine 119 Chapter 5 Backup...
Page 121: ...3 Click Select Backup Disk 4 Select the TeraStation then click Use Disk 120 Chapter 5 Backup...
Page 123: ...7 Time Machine will count down from 120 seconds then backup will begin 122 Chapter 5 Backup...
Page 132: ...5 Click Edit 131 Chapter 6 Remote Access...
Page 144: ...4 Click the Options tab 5 Click Edit 143 Chapter 6 Remote Access...
Page 153: ...4 Click the Options tab 152 Chapter 6 Remote Access...
Page 154: ...5 Click Edit 153 Chapter 6 Remote Access...
Page 169: ...11Click the NFS Rules tab 12Click Add 168 Chapter 7 Advanced Features...


