


7
SNMP has been configured for the TeraStation. For further use, configure your SNMP-compatible network
management software using the Buffalo-specific MIB (management information base) file. The MIB file is
available from the
Depending on which SNMP client software you use, the procedure for configuring the software will differ. For
more detailed information on configuring the client software, refer to its help or included manual.
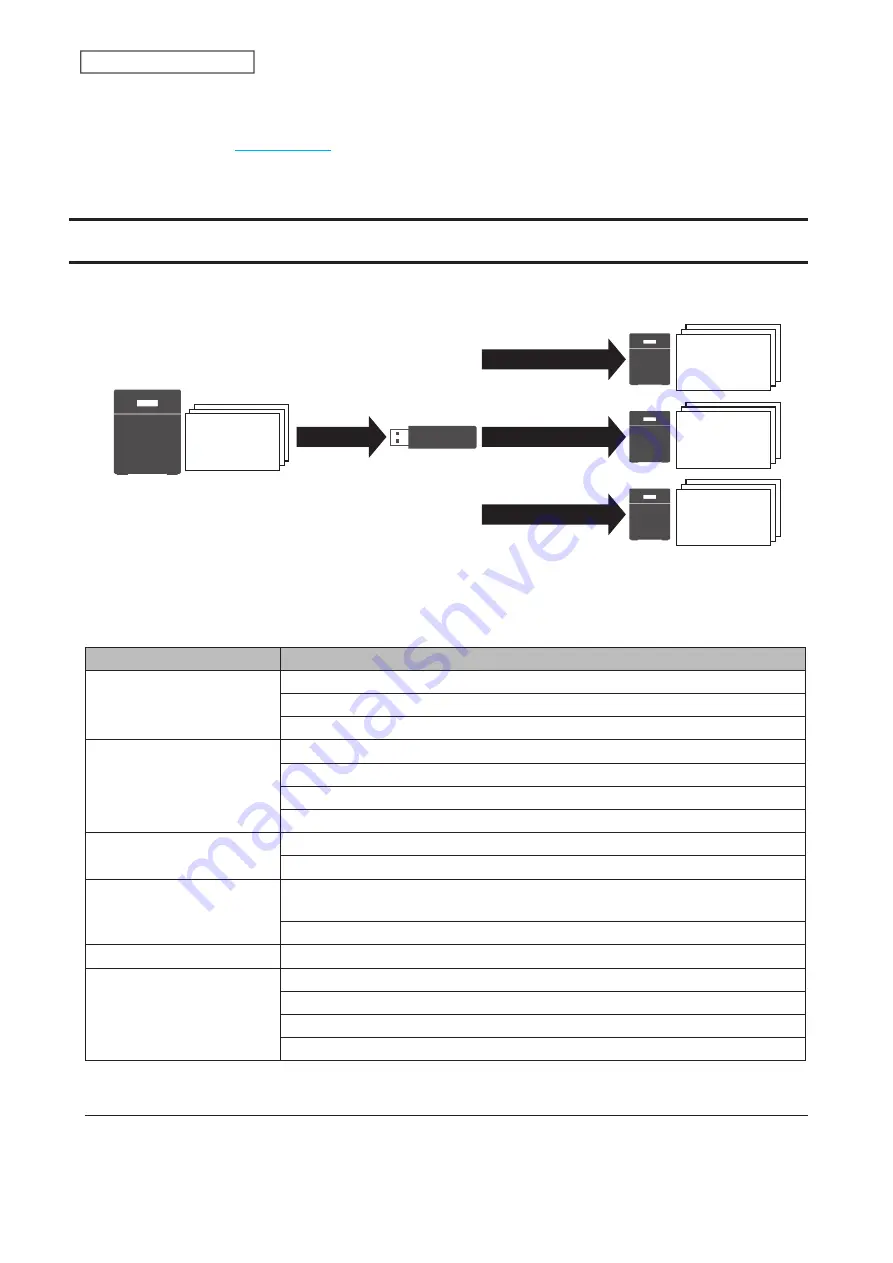
Saving and Applying Settings
The TeraStation’s settings can be saved to a USB drive and restored to another TeraStation of the same series. Use
this feature to back up and copy settings to a new TeraStation.
Save
Settings &
Firmware
Settings &
Firmware
Settings &
Firmware
Settings &
Firmware
Restore
Restore
Restore
Write down the drive configuration (number of drives, RAID, LVM, etc.) of the TeraStation whose settings were saved.
Make sure that any TeraStations that you apply these settings to have exactly the same drive configuration before
you apply the settings. If the drive configuration is different, you may get unexpected results.
The following settings are not saved or restored:
Category
Settings
File Sharing
Subfolders’ access restriction settings in the shared folders
All settings for USB drives
All settings in “Snapshots”
Storage
All settings in “Drives”
All settings in “LVM”
All settings in “iSCSI”
USB drive information
Cloud Storage
Job settings of Dropbox Sync
Job settings of Microsoft OneDrive Sync
Network
All settings except for service port restrictions, Wake-on-LAN, and MTU size
settings in “IP Address”
All settings in “Port Trunking”
Backup
All settings in “Failover”
Management
The TeraStation’s hostname
All settings in “Power Management”
All settings in “SSL”
Display language in Settings
Saving Settings
1
Insert a 1 GB or larger USB drive (not included) into a USB port on the TeraStation.
172
Chapter 7 Advanced Features
Summary of Contents for TeraStation 6000 Series
Page 32: ...3 Click Add Group 31 Chapter 3 File Sharing...
Page 120: ...2 Click Time Machine 119 Chapter 5 Backup...
Page 121: ...3 Click Select Backup Disk 4 Select the TeraStation then click Use Disk 120 Chapter 5 Backup...
Page 123: ...7 Time Machine will count down from 120 seconds then backup will begin 122 Chapter 5 Backup...
Page 132: ...5 Click Edit 131 Chapter 6 Remote Access...
Page 144: ...4 Click the Options tab 5 Click Edit 143 Chapter 6 Remote Access...
Page 153: ...4 Click the Options tab 152 Chapter 6 Remote Access...
Page 154: ...5 Click Edit 153 Chapter 6 Remote Access...
Page 169: ...11Click the NFS Rules tab 12Click Add 168 Chapter 7 Advanced Features...


