background image

3. Packaging

3. PACKAGING

About this chapter

This chapter provides an overview of what is in the box and how to unpack.

Overview

Content

Unpacking

3.1

Content

No DisplayPort cable is delivered with the kit. A good shielded DisplayPort cable is necessary for good EMI
performance. Bad DisplayPort cables cause loss of the image and the image only recovers by reconnecting
the DisplayPort cable.

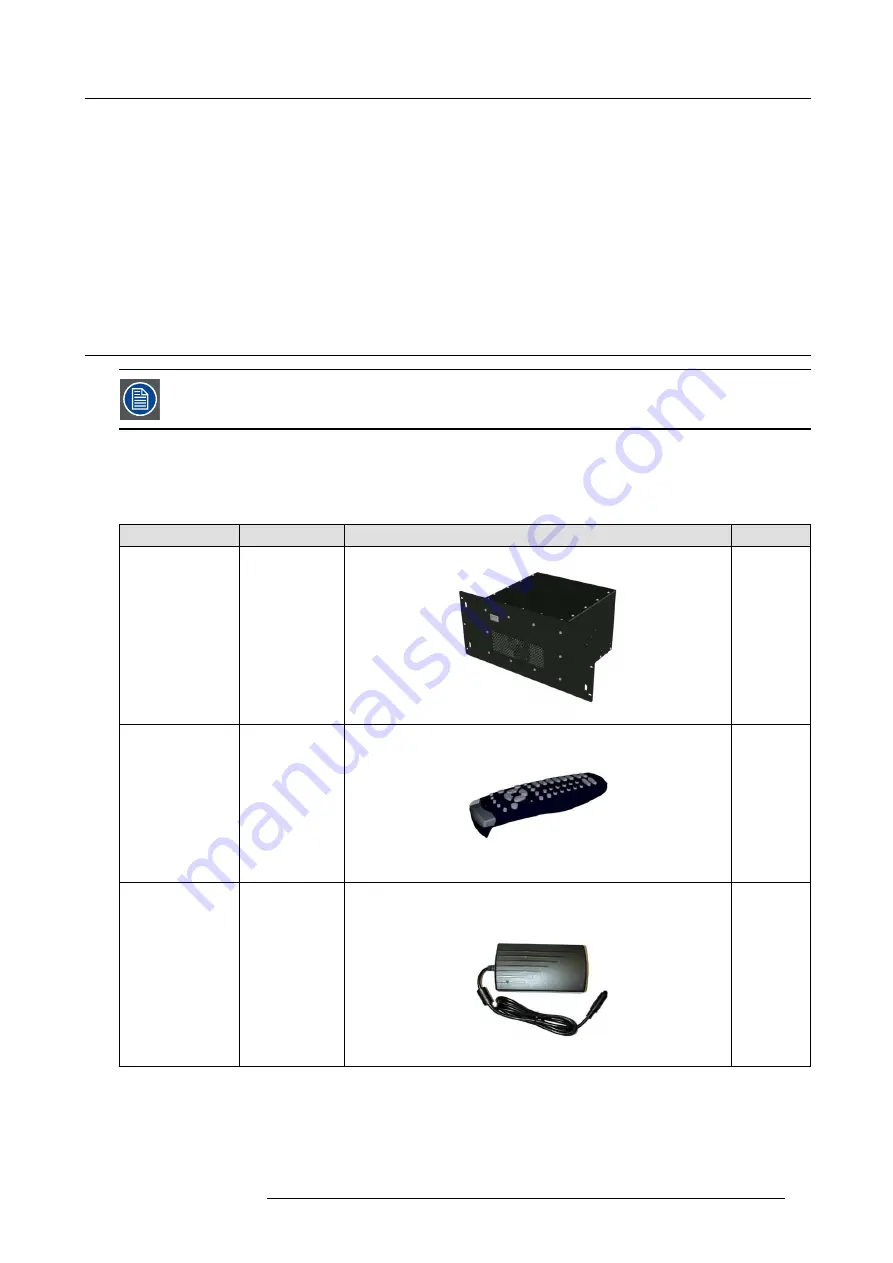
What’s in the box

The items listed in the table below are delivered along with the device. Ensure that everything is present and intact. Contact your
local dealer or

Barco

if anything is missing or damaged. Never use a damaged unit (e.g. MCM-50, power cord, power adaptor,

RCU).

Description

Article number

Image

Quantity

MCM-50

R9898503

1

Remote Control Unit
(RCU) + 2 batteries

R764277K

1

12 VDC power
adaptor

B557282

1

R5909057 MCM-50 17/05/2016

13

Summary of Contents for MCM-50

Page 1: ...MCM 50 User Guide Optimized for F50 R5909057 02 17 05 2016...

Page 2: ...Barco NV President Kennedypark 35 8500 Kortrijk Belgium Phone 32 56 36 82 11 Fax 32 56 36 883 86 Support www barco com en support Visit us at the web www barco com Printed in Belgium...

Page 3: ...r compliance could void the user s authority to operate the equipment Guarantee and Compensation Barco provides a guarantee relating to perfect manufacturing as part of the legally stipulated terms of...

Page 4: ...eneral Public License for more details You should have received a copy of the GNU General Public License along with eCos if not write to the Free Software Foundation Inc 59 Temple Place Suite 330 Bost...

Page 5: ...50 27 6 4 Setting the MCM 50 address 28 6 5 Network configuration 29 6 5 1 Configuring the MCM 50 for a Private Subnet 30 6 5 2 Configuring the MCM 50 for a DHCP network 31 6 6 Linking MCM 50 devices...

Page 6: ...2 Renaming a Geometry file 81 11 1 2 3 Copying a Geometry file 81 11 1 2 4 Deleting a Geometry file 82 11 1 3 Shifting the image on the projector panel 83 11 1 4 Transport delay 85 11 2 Soft Edge and...

Page 7: ...presentation 131 14 Specifications 133 14 1 General specifications 133 14 2 Dimensions 134 14 3 Technical Regulations 134 15 RCU Control 135 15 1 Range of RCU and IR receivers 135 15 2 OSD navigation...

Page 8: ...Table of contents 4 R5909057 MCM 50 17 05 2016...

Page 9: ...against risk of electric shock and energy hazard and having access to live parts Safety standards also impose limits to the internal and external temperature rises radiation levels mechanical stabilit...

Page 10: ...into this product through cabinet slots as they may touch dangerous voltage points or short out parts that could result in a risk of fire or electrical shock Never spill liquid of any kind on the prod...

Page 11: ...ms must be well ventilated or cooled in order to avoid build up of heat 1 7 Installation Safety On Installation Do not place this equipment on an unstable cart stand or table The product may fall caus...

Page 12: ...es to the ceiling check that temperature near the installation site is not excessive Environment condition check The device must always be mounted in a manner which ensures the free flow of clean air...

Page 13: ...oth Stubborn stains may be removed with a cloth lightly dampened with mild detergent solution Never use strong solvents such as thinner or benzine or abrasive cleaners since these will damage the cabi...

Page 14: ...1 Safety instructions 10 R5909057 MCM 50 17 05 2016...

Page 15: ...ting the device 2 Introduction general information about the manual and about the device 3 Packaging overview of the deliverables and unpacking instructions 4 Facility and system requirements lists re...

Page 16: ...c Procedure related notes tips warnings and cautions are printed in bold between 2 lines preceded by an icon 2 3 Key features and benefits Key features and benefits The MCM 50 external warp box is int...

Page 17: ...the image and the image only recovers by reconnecting the DisplayPort cable What s in the box The items listed in the table below are delivered along with the device Ensure that everything is present...

Page 18: ...V326111 1 Power cord connectors C13 and CEE7 R326103 1 Rack mount R874169 1 Screws to tighten the rack mount B364484 10 User Guide R5909057 1 Safety Guide R5905189WW 1 3 2 Unpacking Packaging Cardboar...

Page 19: ...hipping the unit always pack it as it was packed during first delivery Unpacking the MCM 50 1 Carefully cut the tape on the top lid of the box Warning Follow the relevant safety precautions while usin...

Page 20: ...3 Packaging 16 R5909057 MCM 50 17 05 2016...

Page 21: ...a site near heat sources such as radiators or air ducts or in a place subject to direct sunlight excessive dust or humidity Be aware that room heat rises to the ceiling check that temperature near th...

Page 22: ...4 Facility and system requirements Image 4 1 18 R5909057 MCM 50 17 05 2016...

Page 23: ...r battery life time At delivery the batteries can be found in a separated bag attached to the remote control unit Before using your remote control install the batteries first Installing the batteries...

Page 24: ...d batteries must be done according to the manufacturer s instruction 5 2 Installing the rack mount plate Introduction The rack mount plate which is delivered with the MCM 50 can be mounted to enable i...

Page 25: ...see the concerning appendix The MCM 50 should always be connected to the F50 projector Connecting the F50 projector 1 Connect one end of the DisplayPort cables to the DP output connector on the rear...

Page 26: ...the original power supply and power cables CAUTION Do not use power supplies or power cables that are damaged Replace it by a new original one Connecting power 1 Connect the 8 pin DIN of the supplied...

Page 27: ...etwork or a small dedicated network Following operations are made possible file transfer for firmware upgrade storage of multiple device configurations and set ups wide range of control possibilities...

Page 28: ...5 Physical installation and connections 24 R5909057 MCM 50 17 05 2016...

Page 29: ...5 4 3 2 1 Image 6 1 1 DisplayPort connection with input channel 1 2 DisplayPort connection with input channel 2 3 DisplayPort connection for channel A between MCM 50 and DP 1 on F50 series projector 4...

Page 30: ...TR TINT PHASE COLOR BRIGHTN P IP ADJUS T PAUSE Image 6 2 RCU Address button 2 Within 5 seconds after pressing the Address button press one of the digit buttons to enter its value as RCU serial address...

Page 31: ...will establish communication to any brand new MCM 50 as it comes out of the box 6 2 Powering the MCM 50 Introduction As soon as the AC mains power adapter is connected to both the MCM 50 unit and the...

Page 32: ...M 50s at once or to address the device at its very first use By default the common address is set to 0 but it can be set to 1 as well to avoid interaction with other non Barco devices programmed to th...

Page 33: ...s of the local router on the same local network as this will be used to forward traffic to destinations beyond the local network If there is no router on the MCM 50 local network then set this field t...

Page 34: ...DHCP network Editable if Use DHCP is set Overview Configuring the MCM 50 for a Private Subnet Configuring the MCM 50 for a DHCP network 6 5 1 Configuring the MCM 50 for a Private Subnet Description T...

Page 35: ...ns the network detection only takes a few seconds This means that the total time needed to go from power ON to active mode is only a few seconds This value can vary depending on the speed of the netwo...

Page 36: ...6 6 Linking MCM 50 devices in a multi channel system Description It is possible to perform some alignment steps in multiple channel display systems in a semi automatic way by linking multiple MCM 50 d...

Page 37: ...now choose to match the colors of all projectors or monitors by simply clicking one of the Dynacolor buttons This assumes however that colors have been accurately measured and defined in the MCM 50 f...

Page 38: ...0 navigate to Installation Linked devices and press ENTER to select Image 6 14 2 In the dialog box that appears select the Host x checkbox and press ENTER Note x represents the number of the Host The...

Page 39: ...box if the color settings of the Slave MCM 50 should be controlled by the master during color alignment Setting an MCM 50 to be Slave 1 In the OSD of the MCM 50s to be Slave navigate to Installation L...

Page 40: ...6 Setup and configuration Image 6 17 36 R5909057 MCM 50 17 05 2016...

Page 41: ...ource signal on at least one of the input connectors How to select a source from OSD 1 In the OSD navigate to Source selection and open the drop down menu 2 Select the source to be displayed Image 7 1...

Page 42: ...eo Dual 1 x 2 Top down Two inputs are required The sources are displayed next to each other The images are scanned from top left to bottom right Mono Active stereo Dual 2 x 1 Top down Two inputs are r...

Page 43: ...7 3 1 Details on Stitched Layouts Lock source To maintain synchronous operation amongst the image halves or quadrants the frame start i e vertical sync of each source that make up the Stitch Layout ma...

Page 44: ...rces section click the source or input to be displayed on the top half of the image Image 7 6 Image 7 7 The selected source appears in the first button indicating the top half of the Selection section...

Page 45: ...ection section and is disabled from the Sources section 5 Click Next 6 In the section Lock on source select the input from which the sync should be used to display the image Image 7 9 7 Click Finish t...

Page 46: ...the center position of the slider bar If all sources are locked externally as they should be their sliders will also be positioned in the center of the respective slider bars Only if a source is not i...

Page 47: ...ource Description The sync of which source to lock on can be changed at any time How to lock to another source 1 In the OSD navigate to Window files Edit Lock source and press ENTER to select Image 7...

Page 48: ...age 7 15 3 Click Apply if you want to swap the position of two other sources and go back to step 2 4 Press OK to confirm 7 3 4 3 Input Stereo Sync settings Description Select if the Input Stereo Sync...

Page 49: ...the desired name for the copied file Image 7 18 4 Confirm by pressing ENTER 5 Exit the menu 7 3 6 Loading a Window file Description When a source is being displayed you can manually load a different W...

Page 50: ...ny custom Window file can be renamed How to rename a Window file 1 In the OSD navigate to Window files Rename and press ENTER to select Image 7 21 2 In the dialog that appears select the Window file t...

Page 51: ...s to be copied and press ENTER to confirm Image 7 24 The selected file name appears in the edit box at the bottom of the dialog box 3 In the edit box enter the name of the copy by changing the origina...

Page 52: ...in case of multiple channel systems other ways of alignment are used in similar display systems Gamma should always be set to the value corresponding to the gamma setting of the image generator Overvi...

Page 53: ...in the range 0 to 255 Default value is 128 Changing the contrast is change the ratio of full white compared to full black In multiple channel systems the contrast must be set to the default value on a...

Page 54: ...teps of 0 2 Default value is 2 2 This value should meet the gamma setting of the source e g graphical card of a computer that is used as a source In case of doubt leave the gamma to its default settin...

Page 55: ...e device features Image 8 2 The sections below explain in detail how to operate the OSD Overview Displaying the advanced menu items Navigating through the OSD Opening a drop down menu Opening a dialog...

Page 56: ...nu How to open a drop down menu form the main menu bar 1 Navigate to the desired menu item 2 On the RCU press to open the drop down menu How to open a drop down menu from a drop down menu item 1 Navig...

Page 57: ...ow to enter data in an edit box 1 Navigate to the desired edit box an edit box having a blue background color is selected Image 8 5 2 Press ENTER to activate it 3 Enter the value digits or characters...

Page 58: ...8 OSD Preferences 54 R5909057 MCM 50 17 05 2016...

Page 59: ...ited set of colors can be enabled to match colors amongst the devices of a multiple channel display system Overview General settings Source alignment timings Colors using Dynacolor 9 1 General setting...

Page 60: ...unction is dis abled How to enable disable the Automatic startup 1 In the OSD navigate to Installation Automatic Startup On or Off Image 9 4 2 Press ENTER to confirm your selection 3 Exit the menu 9 1...

Page 61: ...best matching Standard Image file from the device s default library is stored as a Custom Image file and used to display the source signal It is saved only after manual adjustments When a source sign...

Page 62: ...No Custom Image file can be loaded if no source has been selected How to manually load a Custom Image file 1 In the OSD navigate to Image files Load and press ENTER to select Image 9 7 2 In the dialog...

Page 63: ...value in case of iBlend to display the correct part of the total pixels of the source signal Horizontal Period N Vertical Total lines N Vertical Active lines Y By default same value as image generato...

Page 64: ...ureBox to 1 This enables some edit fields in the Edit custom file dialog box Image 9 13 6 Press Back to return the Edit custom file dialog box 7 In the Edit custom file dialog box change the parameter...

Page 65: ...r the new file Image 9 16 3 Confirm by pressing ENTER Image 9 17 4 A confirmation request window appears press ENTER to confirm press BACK to return 5 Exit the menu 9 2 4 Renaming a Custom Image file...

Page 66: ...le can be copied to a new Custom Image file at any time How to copy a Custom Image file 1 In the OSD navigate to Image files Copy and press ENTER to select Image 9 20 2 In the list of the dialog box n...

Page 67: ...or is an advanced feature for perfect color matching across all systems in a multiple channel display system to slightly change the color impression or to force a customized color temperature to the p...

Page 68: ...9 Basic operation Enabling disabling Dynacolor 1 In the OSD navigate to Display setup Dynacolor Enable On or Off Image 9 25 2 Press ENTER to confirm the selection 64 R5909057 MCM 50 17 05 2016...

Page 69: ...xplains the geometry adjustment principle and lists the procedures to perform geometry adjustment this enables us to correct vertical and horizontal keystone to create bows to meet the shape of cylind...

Page 70: ...l 14 Level 15 Level 17 Level 18 Level 19 Level 20 Level 21 Level 1 2 x 2 3 x 3 5 x 5 9 x 9 17 x 17 33 x 33 Image 10 2 Level hierarchy The hierarchy of these levels is very important each level interac...

Page 71: ...21 21 21 21 19 20 18 20 19 20 20 21 17 21 21 18 21 20 21 19 21 21 20 21 21 21 21 21 21 19 20 18 20 19 20 20 21 17 21 21 18 21 20 21 19 21 21 20 21 21 21 21 21 21 19 20 18 20 19 20 20 21 17 21 21 18 21...

Page 72: ...tion See Moving an anchor point in small steps page 72 and Moving an anchor point in large steps page 73 Note Anchor points should only be moved inside the visible image area since moving an anchor po...

Page 73: ...er bar and edit box are used to define the new position of the anchor point along the Y axis relative to its original position In table front mode and if Axislink is set to off a positive value moves...

Page 74: ...e OSD navigate to Geometry Edit 2x2 or 3x3 or 5x5 or 9x9 or 15x15 or 33x33 and press ENTER to select Image 10 9 In the Geometry edit dialog the selected Level 2x2 appears Image 10 10 Always start adju...

Page 75: ...mode Selecting an anchor point 1 After selecting the level from the Geometry Distortion edit dialog by default Select Mode is enabled and the top left row 0 column 0 corner is selected Image 10 12 Sel...

Page 76: ...1 19 20 18 20 19 20 20 21 17 21 21 18 21 20 21 19 21 21 20 21 21 21 21 21 21 19 20 18 20 19 20 20 21 17 21 21 18 21 20 21 19 21 21 20 21 21 21 21 21 21 19 20 18 20 19 20 20 21 17 21 21 18 21 20 21 19...

Page 77: ...sX or PixelsY edit box whereas in Change Mode you can edit the value of the selected PixelsX i e relative movement along the X axis can be negative or PixelsY i e relative movement along the Y axis ca...

Page 78: ...de All geometry adjustments of the lower modes are reset all geometry correction values are set to 0 The correction values of the selected mode and all the higher modes are retained E g if you select...

Page 79: ...10 Advanced operation Image 10 20 The following diagram illustrates the geometry adjustment restored to mode 9x9 Image 10 21 Restore to 9x9 2 Exit the menu R5909057 MCM 50 17 05 2016 75...

Page 80: ...f the optional Infitec filter in the projector is not inserted Set 2 standard Dynacolor set can be selected if the optional Infitec filter in the projector is not inserted Infitec set Dynacolor set wi...

Page 81: ...ne tune the image colors to match multiple channels to each other Finally we discuss how we can align a set of gray levels amongst multiple channels in your display system Overview Geometry Soft Edge...

Page 82: ...hich is still vertical Y 300 300 300 X Y Image 11 2 Example Axis link set to Off Example 2 x 2 mode Axis link set to On Following procedure illustrates a basic 2 x 2 adjustment with Axislink set On an...

Page 83: ...etry related data is stored in Geometry files The device s memory contains a list of Standard Geometry files created for demo purposes e g to demonstrate the warping capabilities of the device The mom...

Page 84: ...The Geometry operations that you can perform are as follows Overview Loading a Geometry file Renaming a Geometry file Copying a Geometry file Deleting a Geometry file 11 1 2 1 Loading a Geometry file...

Page 85: ...y file to be renamed and press ENTER to select The selected file name appears in the edit box at the bottom of the dialog box 3 In the edit box change the name to your wishes and press ENTER to confir...

Page 86: ...firm by pressing ENTER 5 Exit the menu 11 1 2 4 Deleting a Geometry file Description Custom Geometry files can be deleted at any time Deleting a Geometry file 1 In the OSD navigate to Geometry Delete...

Page 87: ...usting the shift After shifting the image on the projector panel parts of the image might not be visible anymore Shifting the image on the projector panel 1 In the OSD navigate to Geometry Edit Shift...

Page 88: ...rizontal shift or PixelsY vertical shift edit box 4 Press ENTER to navigate to Change mode Image 11 18 5 Use the arrow keys on the RCU to enter a new value in the selected edit box The image is shifte...

Page 89: ...s sequence 1 Make sure that the Transport delay of all projectors is set to Automatic 2 Adjust the geometry until it is well aligned in all devices 3 Check the Transport delay value in all devices and...

Page 90: ...mage on one single large screen we can make the adjacent images from two or more devices overlap in part In the overlap areas where the image of two channels is joined we find twice the brightness so...

Page 91: ...By performing Black Level adjustment another bitmap is created again having the native resolution of the device The value of each pixel on the bitmap is added to the value of the corresponding pixel o...

Page 92: ...oft Edge area and or a blanked area on each of the four edges of the image Each edge where the blending is to be applied has a grid of anchor points Depending on the selected level the amount of ancho...

Page 93: ...represents a group of anchor points and interacts with other levels moving an anchor point on a certain level affects points in the levels underneath Therefor it is required to start shaping the Soft...

Page 94: ...r points of a higher level are marked by a bigger square than anchor points of a lower level Anchor points are color coded Red square the selected anchor point i e the anchor point that can be moved G...

Page 95: ...up Soft edge and alpha beta planes Edit and press ENTER to open the Soft Edge Selection dialog Image 11 31 2 In the Soft Edge Selection dialog enter the following selections Plane set checkbox Interna...

Page 96: ...time See The Soft Edge selection dialog page 96 9 Repeat step 4 to step 8 to create the correct Soft Edge shape for each of the other edges Creating a blanked area 1 In the OSD browse to Display setup...

Page 97: ...two if required See Selecting an anchor point page 100 Moving an anchor point in small steps page 100 and Moving an anchor point in large steps page 101 9 If you need to further shape the blanking are...

Page 98: ...follows alpha tiff The free storage capacity on the D drive is about 8 MB it is needed to store the image files geometry files factory backup Alpha plane and Beta plane In practice about 6 MB is avail...

Page 99: ...mage files geometry files factory backup Alpha planes and Beta planes In practice about 6 MB is available for the Alpha Beta plane Uploading and activating an external Beta Plane 1 Make sure that the...

Page 100: ...he menu 11 2 6 The Soft Edge selection dialog Description The Soft Edge selection dialog acts as a platform enabling you to give various inputs to the device to perform soft edge adjustment It consist...

Page 101: ...es are hard edges Adjusting a hard edge results in creating a blanked area without Soft Edge blending on that edge Adjustment guide The adjustment guide consists of a four brightness graduated bars ap...

Page 102: ...anchor point is indicates by a red square Selection Position X and Y Indicate the X and Y coordinate of the active anchor point In table front mode the left top corner of the image is the coordinate...

Page 103: ...11 Expert operation Image 11 45 Image 11 46 Image 11 47 Image 11 48 R5909057 MCM 50 17 05 2016 99...

Page 104: ...t Edge selection dialog pressing activates the first anchor point on the previous edge of the image 5 If the correct anchor point is selected indicated by a red square around it press ENTER to go to A...

Page 105: ...ues of Position X or Position Y 1 From the Soft Edge edit dialog press ENTER or BACK to navigate to Edit mode Image 11 51 2 Use the arrows or to select the Position X or Position Y edit box 3 Press EN...

Page 106: ...CIE chromaticity diagram where each vertex is defined by the x and y coordinate of the primary colors The white point W can be moved within the color triangle by changing its x and y coordinates resul...

Page 107: ...lue of the white point in the active Dynacolor set to match the colors Always keep the CIE chromaticity diagram in mind while changing the white point position Increasing the desired X value of the wh...

Page 108: ...iangle as desired values in the active Dynacolor set of each device we closely come to a color matched system Only fine tuning might still be required x y 0 0 2 0 4 0 6 0 0 2 0 4 0 6 0 8 A C B C Image...

Page 109: ...in the same color gamut Dynacolor sets If you use your device s in different sceneries where different Dynacolor sets are used like Set 1 or Set 2 or Infitec Set you need to perform the Dynacolor adju...

Page 110: ...the desired primary and secondary colors of the device Only Barco engineers may change these values to force a common color triangle Barco trained and qualified engineers may also change the X and Y...

Page 111: ...11 Expert operation Image 11 59 11 3 3 Enabling Dynacolor Starting up Dynacolor 1 In the OSD navigate to Display setup Dynacolor Enable On or Off R5909057 MCM 50 17 05 2016 107...

Page 112: ...tup it might be needed to match the colors amongst all devices To do so the color coordinates for a common color triangle are calculated from the native i e measured color coordinates for R G B and W...

Page 113: ...ue for X and or Y of White Image 11 62 Note Make sure that the new X Y position is within the desired color triangle For example if you increase the x value of the white point in the Desired field fro...

Page 114: ...sing the color fine tuning procedure to fully match them If not successful it might be required to measure the native colors of the display per channel and enter them as measured values in the accordi...

Page 115: ...Y i e brightness value Image 11 65 Note The Y value is transformed to a relative L value which implies that the physical unit is irrelevant 6 Click Proceed A Green test pattern is displayed 7 Proceed...

Page 116: ...ibrating the Dynacolor for Infitec The projector uses different color filters when operating in active stereo mode Calibrating the Dynacolor for Infitec set A 1 In the OSD navigate to Display setup Dy...

Page 117: ...4 Repeat from step 1 but now for the Infitec set B Matching Infitec set A and Infitec set B 1 In the OSD navigate to Display setup Dynacolor Adjust Set Match Infitec A B Image 11 68 2 Press ENTER Comm...

Page 118: ...11 Expert operation 114 R5909057 MCM 50 17 05 2016...

Page 119: ...ails on how these tasks must be performed can be found in the following sections Condition based maintenance The table below lists the maintenance tasks that must be performed on certain conditions Co...

Page 120: ...agnostics reasons Save text will save the text inside the Barco Networked Projector Upgrade Tool in a file Screen shot will save a screen shot of the displayed screen at that particular time 8 When th...

Page 121: ...d as well Displaying the I2C Diagnostics window 1 In the OSD navigate to Service Diagnostics I2C and press ENTER to select Image 12 3 A dialog box pops up showing some information 2 Exit the menu 12 4...

Page 122: ...ps up showing some information Image 12 5 2 Exit the menu 12 5 Diagnostic LEDs Description At the front side of the MCM 50 four LEDs indicate its status IR ERROR ON STANDBY MCM 50 IR ERROR ON STANDBY...

Page 123: ...the device serial number of the device and device runtime This data should always be known when contacting Barco s Helpdesk Viewing the MCM 50 identification 1 In the OSD navigate to General Identific...

Page 124: ...and the scaled pattern shows the same artefacts the cause should be looked for in the image processing board The scaled patterns are distorted according to the geometry distortion defined in the activ...

Page 125: ...plugged Plug in the power cord LED on power supply OFF Check power cord LED on power supply ON 1 Check the connection between the power supply and the MCM 50 2 Check the fuse in the device The MCM 50...

Page 126: ...by state Switch to active state Artefacts are visible on the display Situation Solution Noise 1 Check the IG 2 Check the cabling and connections The image on the display is poor Situation Solution Bad...

Page 127: ...width Digital Protection HDCP High bandwidth Digital Content Protection is a form of digital copy protection developed by Intel Corporation to prevent copying of digital audio and video content as it...

Page 128: ...s made in the Edid Configuration dialog Making your own custom EDID file s is done through the Create EDID dialog Custom EDID files can be deleted at any time The Standard EDID includes two timings 12...

Page 129: ...Repeat step 2 to step 4 until you have selected the correct EDID for all inputs 6 Press Apply to confirm and store the new settings 7 Exit the menu 13 2 2 Creating Custom EDID files Description You ca...

Page 130: ...ed Blanking o CVT MB Coordinated Video Timings Minimum Blanking not a standard o GTF Generalized Timing Formula Section Options o set or clear the check box Stereo You can leave it unchecked o select...

Page 131: ...R to delete 4 Exit the menu 13 3 Patterns Internal versus scaled patterns The device can generate built in patterns called internal and scaled patterns that can be used for adjustment measurement and...

Page 132: ...1 In the OSD navigate to Display setup Menu bar position and press ENTER to select Image 13 11 2 Use and to position the menu bar 3 Exit the menu 13 6 Status bar position Description The Status bar ca...

Page 133: ...ition the slider box You can toggle between standard or small steps to move the slider box position by pressing ENTER when slider box is displayed 13 8 Sync Variance Limit Description The Sync Varianc...

Page 134: ...g image distortion The best value for the Sync Variance Limit is about 50 microseconds higher than the critical range This guarantees the display of the actual frame without distortion and with minimu...

Page 135: ...When the vertical refresh is not within this range the input will be displayed asynchronously at 60 Hz This applies only if Full sceen synchronous representation is set to On Enabling or disabling ful...

Page 136: ...13 MCM 50 Tools 132 R5909057 MCM 50 17 05 2016...

Page 137: ...d CE EN55022 Class A Inputs 4 times DisplayPort 1 1a that allows native WQXGA up to 120Hz in two columns 2 x 1280 x 1600 four columns 4 x 640 x 1600 mono content only four quadrants 4 x 1280 x 800 mon...

Page 138: ...R ERROR ON STANDBY 298 276 10 437 6 279 465 9 482 6 140 177 8 222 215 Image 14 1 Dimensions given in millimeters 14 3 Technical Regulations Certificates Image 14 2 EAC mark 10 Image 14 3 Rohs RoHS Ima...

Page 139: ...MCM 50 control 15 1 Range of RCU and IR receivers Effective range of the RCU When using the wireless RCU make sure the MCM 50 to be controlled is within the effective operating distance 30 m 100 ft in...

Page 140: ...to return one step ENTER to confirm or select Navigation buttons up down left right Used to navigate through the OSD Example How to navigate to the IP address edit box in the Network settings dialog...

Page 141: ...6 7 8 9 PAUSE AUTO IMAGE SDI DVI VIDEO RGB S VIDEO PC LOGO PIP 0 CONTR TINT PHASE COLOR BRIGHTN P IP ADJUS T Address button Digits Image 15 4 RCU data input buttons Set address button a sunk down but...

Page 142: ...e digit from 0 down to 8 Note Alternatively the arrow can be pressed 7 times to go up from 0 to 8 Image 15 6 8 Press ENTER to confirm 9 Press BACK to go one step back in the menu or press MENU to exit...

Page 143: ...splay a source full screen or in a window in native resolution Pressing a multiple times cycles through the sources connected to the same type of connector Example two DVI sources are connected to the...

Page 144: ...15 RCU Control 140 R5909057 MCM 50 17 05 2016...

Page 145: ...Barco weee Disposal of batteries in the product This product contains batteries covered by the Directive 2006 66 EC which must be collected and disposed of separately from municipal waste If the batte...

Page 146: ...6572 X Indicates that this toxic or hazardous substance contained in at least one of the homogeneous materials used for this part is above the limit requirement in GB T 26572 EIP EFUP Barco EFUP All E...

Page 147: ...de in information The made in country is indicated on the product ID label on the product itself Production date The month and year of production is indicated on the product ID label on the product it...

Reviews: