7. Getting started
7. GETTING STARTED
About this chapter
Once the device is installed, set up and con
fi
gured, it is ready for daily use and/or for advanced con
fi
guration and alignment. This
chapter describes basic procedures.
Overview
•
•
•
Displaying multiple sources: Stitched Layouts
•
7.1
Starting the MCM-50
Power up the MCM-50
See "Powering the MCM-50", page 27.
Activate the MCM-50
See "Activating the MCM-50", page 27.
7.2
Displaying a single source
Description
Before a source can be projected, the source signal must be connected to the source input(s) of the device and a valid synchroniza-
tion signal must be available along with the source signal on at least one of the input connectors.
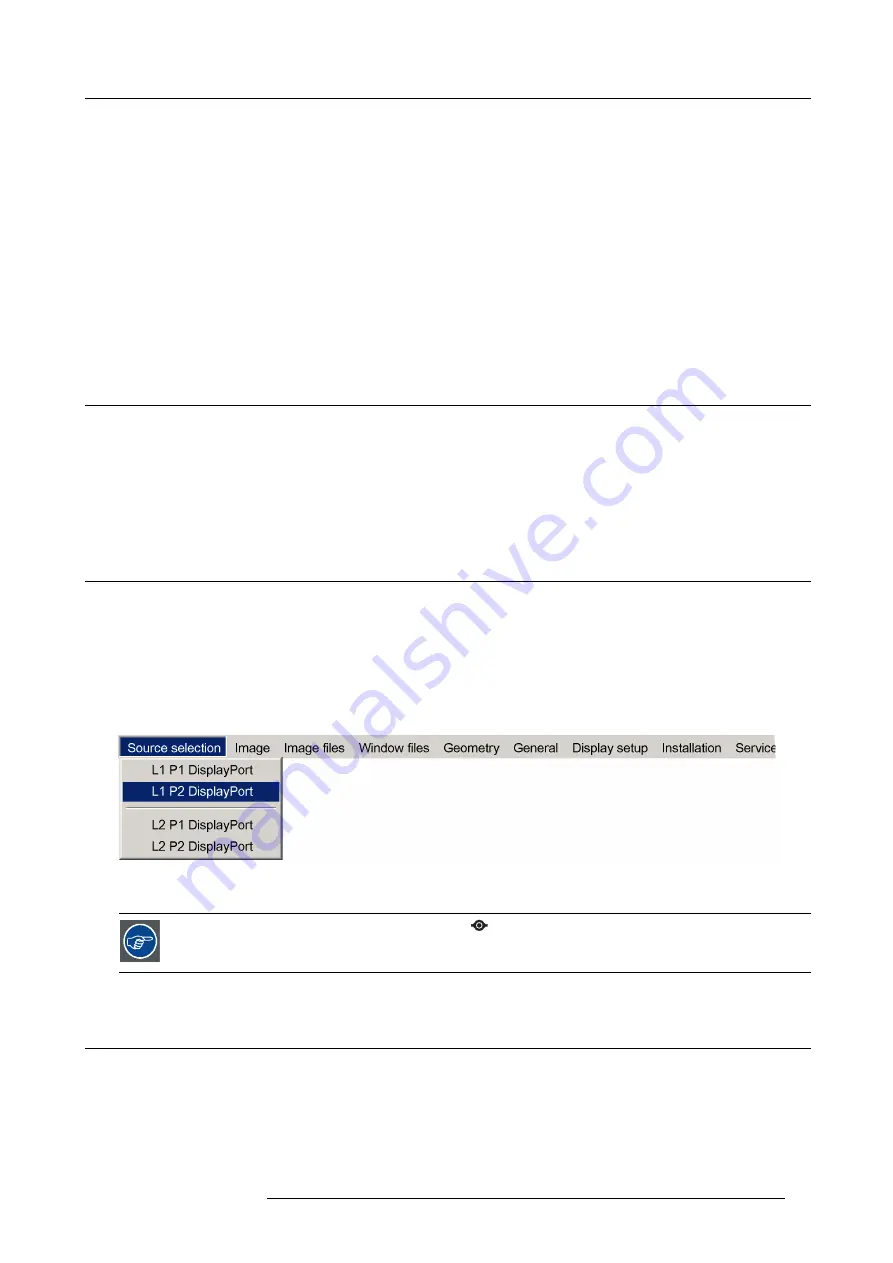
How to select a source from OSD?
1. In the OSD, navigate to
Source selection
and open the drop down menu.
2. Select the source to be displayed.
Image 7-1
3. Press
ENTER
to display the selected source.
An available source is indicated by a Barco logo
in the pre
fi
x. A displayed source is indicated by a bullet
in the pre
fi
x.
7.3
Displaying multiple sources: Stitched Layouts
Introduction
The
fi
rst time you use your new MCM-50, the selected source is displayed in the device’s native resolution (2x 1280 x 1600@60 Hz
(Mono)). If the resolution of the source is different to the projector’s resolution, the image is stretched or shrunk.
It is however possible to con
fi
gure and display two or four source signals to make up one single image in full native resolution. This
is called a
Stitch Layout
: the sources are stitched together.
R5909057 MCM-50 17/05/2016
37
Summary of Contents for MCM-50
Page 1: ...MCM 50 User Guide Optimized for F50 R5909057 02 17 05 2016...
Page 8: ...Table of contents 4 R5909057 MCM 50 17 05 2016...
Page 14: ...1 Safety instructions 10 R5909057 MCM 50 17 05 2016...
Page 20: ...3 Packaging 16 R5909057 MCM 50 17 05 2016...
Page 22: ...4 Facility and system requirements Image 4 1 18 R5909057 MCM 50 17 05 2016...
Page 28: ...5 Physical installation and connections 24 R5909057 MCM 50 17 05 2016...
Page 40: ...6 Setup and configuration Image 6 17 36 R5909057 MCM 50 17 05 2016...
Page 58: ...8 OSD Preferences 54 R5909057 MCM 50 17 05 2016...
Page 118: ...11 Expert operation 114 R5909057 MCM 50 17 05 2016...
Page 136: ...13 MCM 50 Tools 132 R5909057 MCM 50 17 05 2016...
Page 144: ...15 RCU Control 140 R5909057 MCM 50 17 05 2016...


